A customer's Fendt 724. The module in a weatherproof box bolted under the cab; six channels run to a 15-pin socket at the rear for the tipper. Full wiring on the use-case page.
ISOBUS Block 8-Channel Relay Module
Universal implement ECU. Retrofit ISOBUS onto any implement. 8 relay channels, 8 sensor inputs, controlled from the tractor screen or AUX-N buttons.
Free shipping on all orders, via DHL Express.
Import duty is payable to US Customs on delivery.
Returned complete and undamaged. Buyer pays return shipping. Custom kits excluded; faults covered by the 5-year warranty.
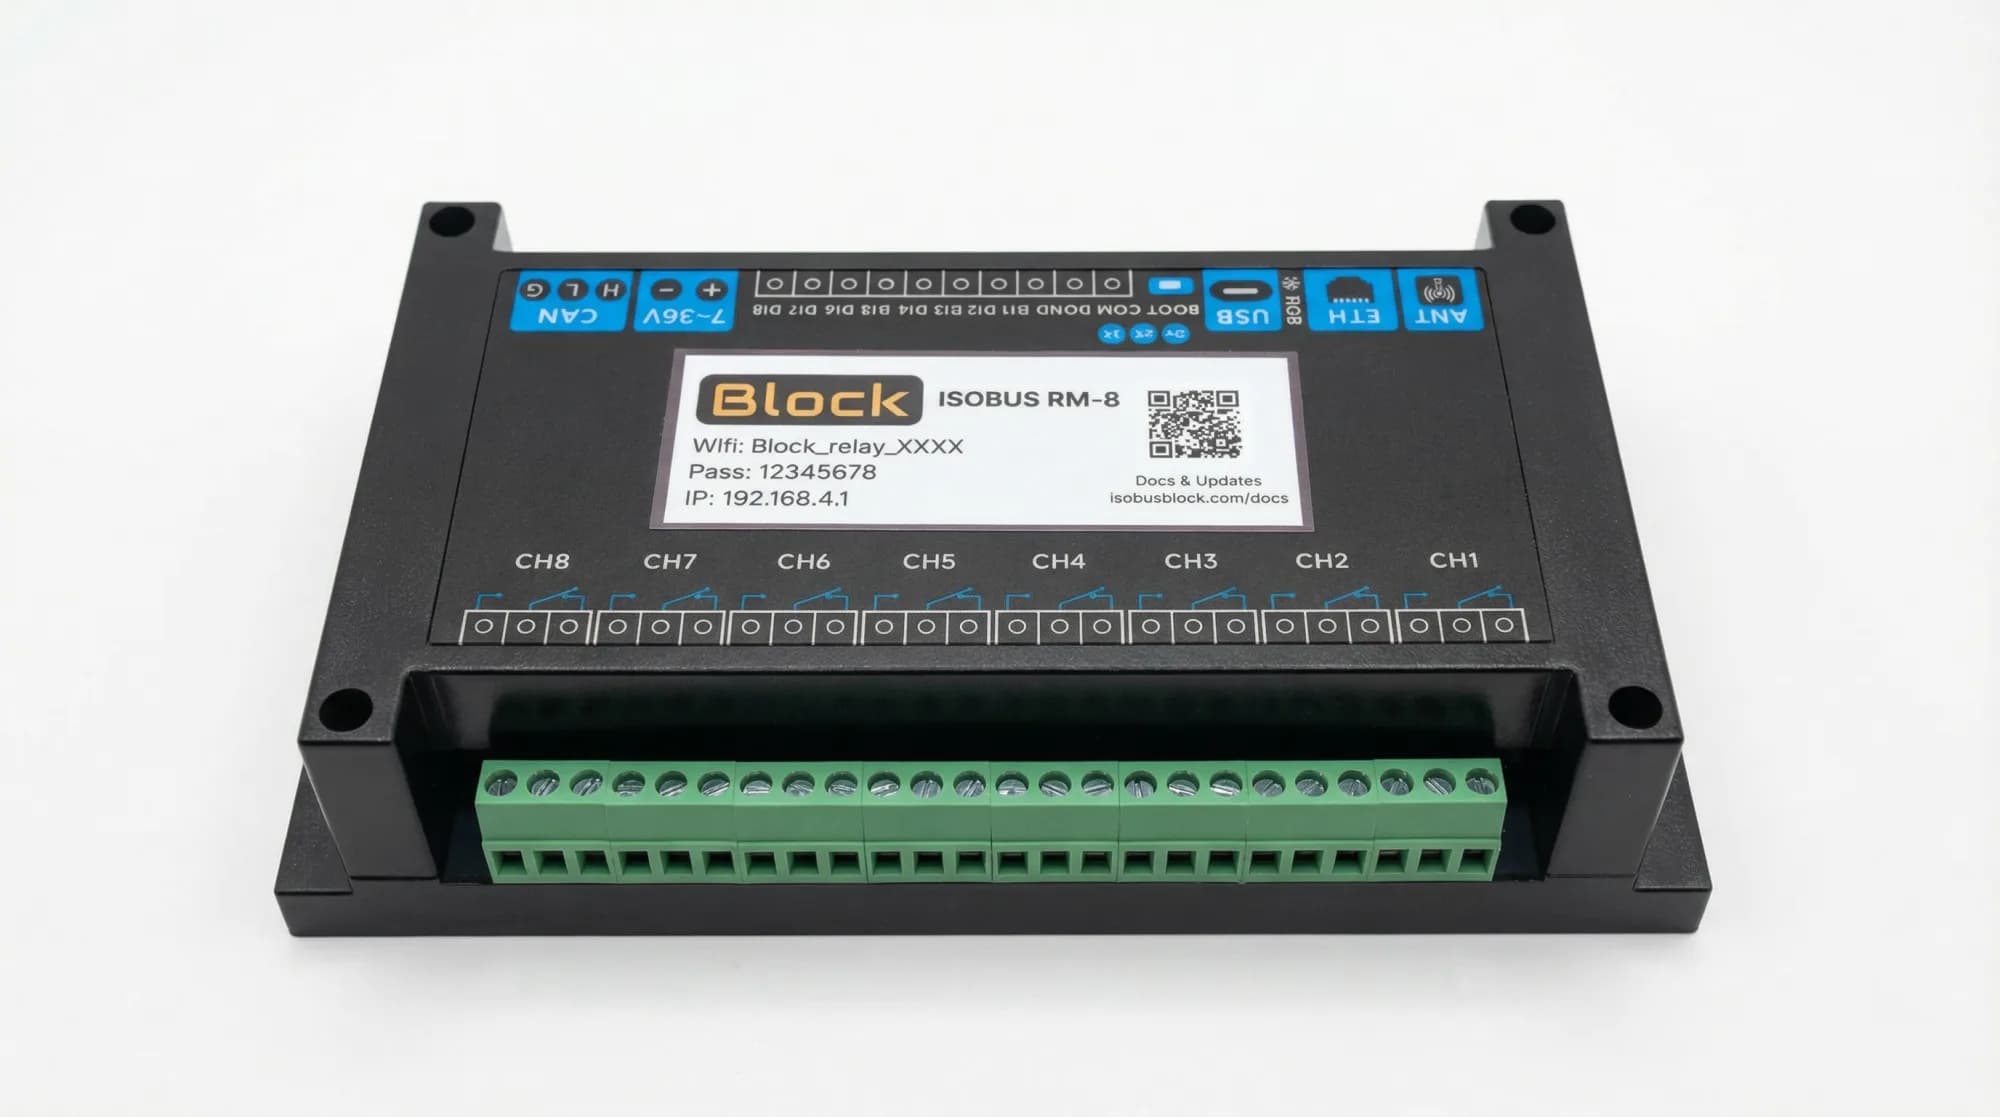
8 × 10 A
Relay channels, NO, COM and NC terminals on each
8 Inputs in Your Tractor
Pick a button, pick an output, done. Assignments stay in the tractor.
Custom Names & Icons
Name each channel, pick an icon. Both show on the screen and in the joystick menu.
Toggle or Momentary
Toggle stays on until you press again. Momentary runs while you hold. Set per channel.
Group Channels Together
One press, several relays. Open a valve and switch on a work light together.
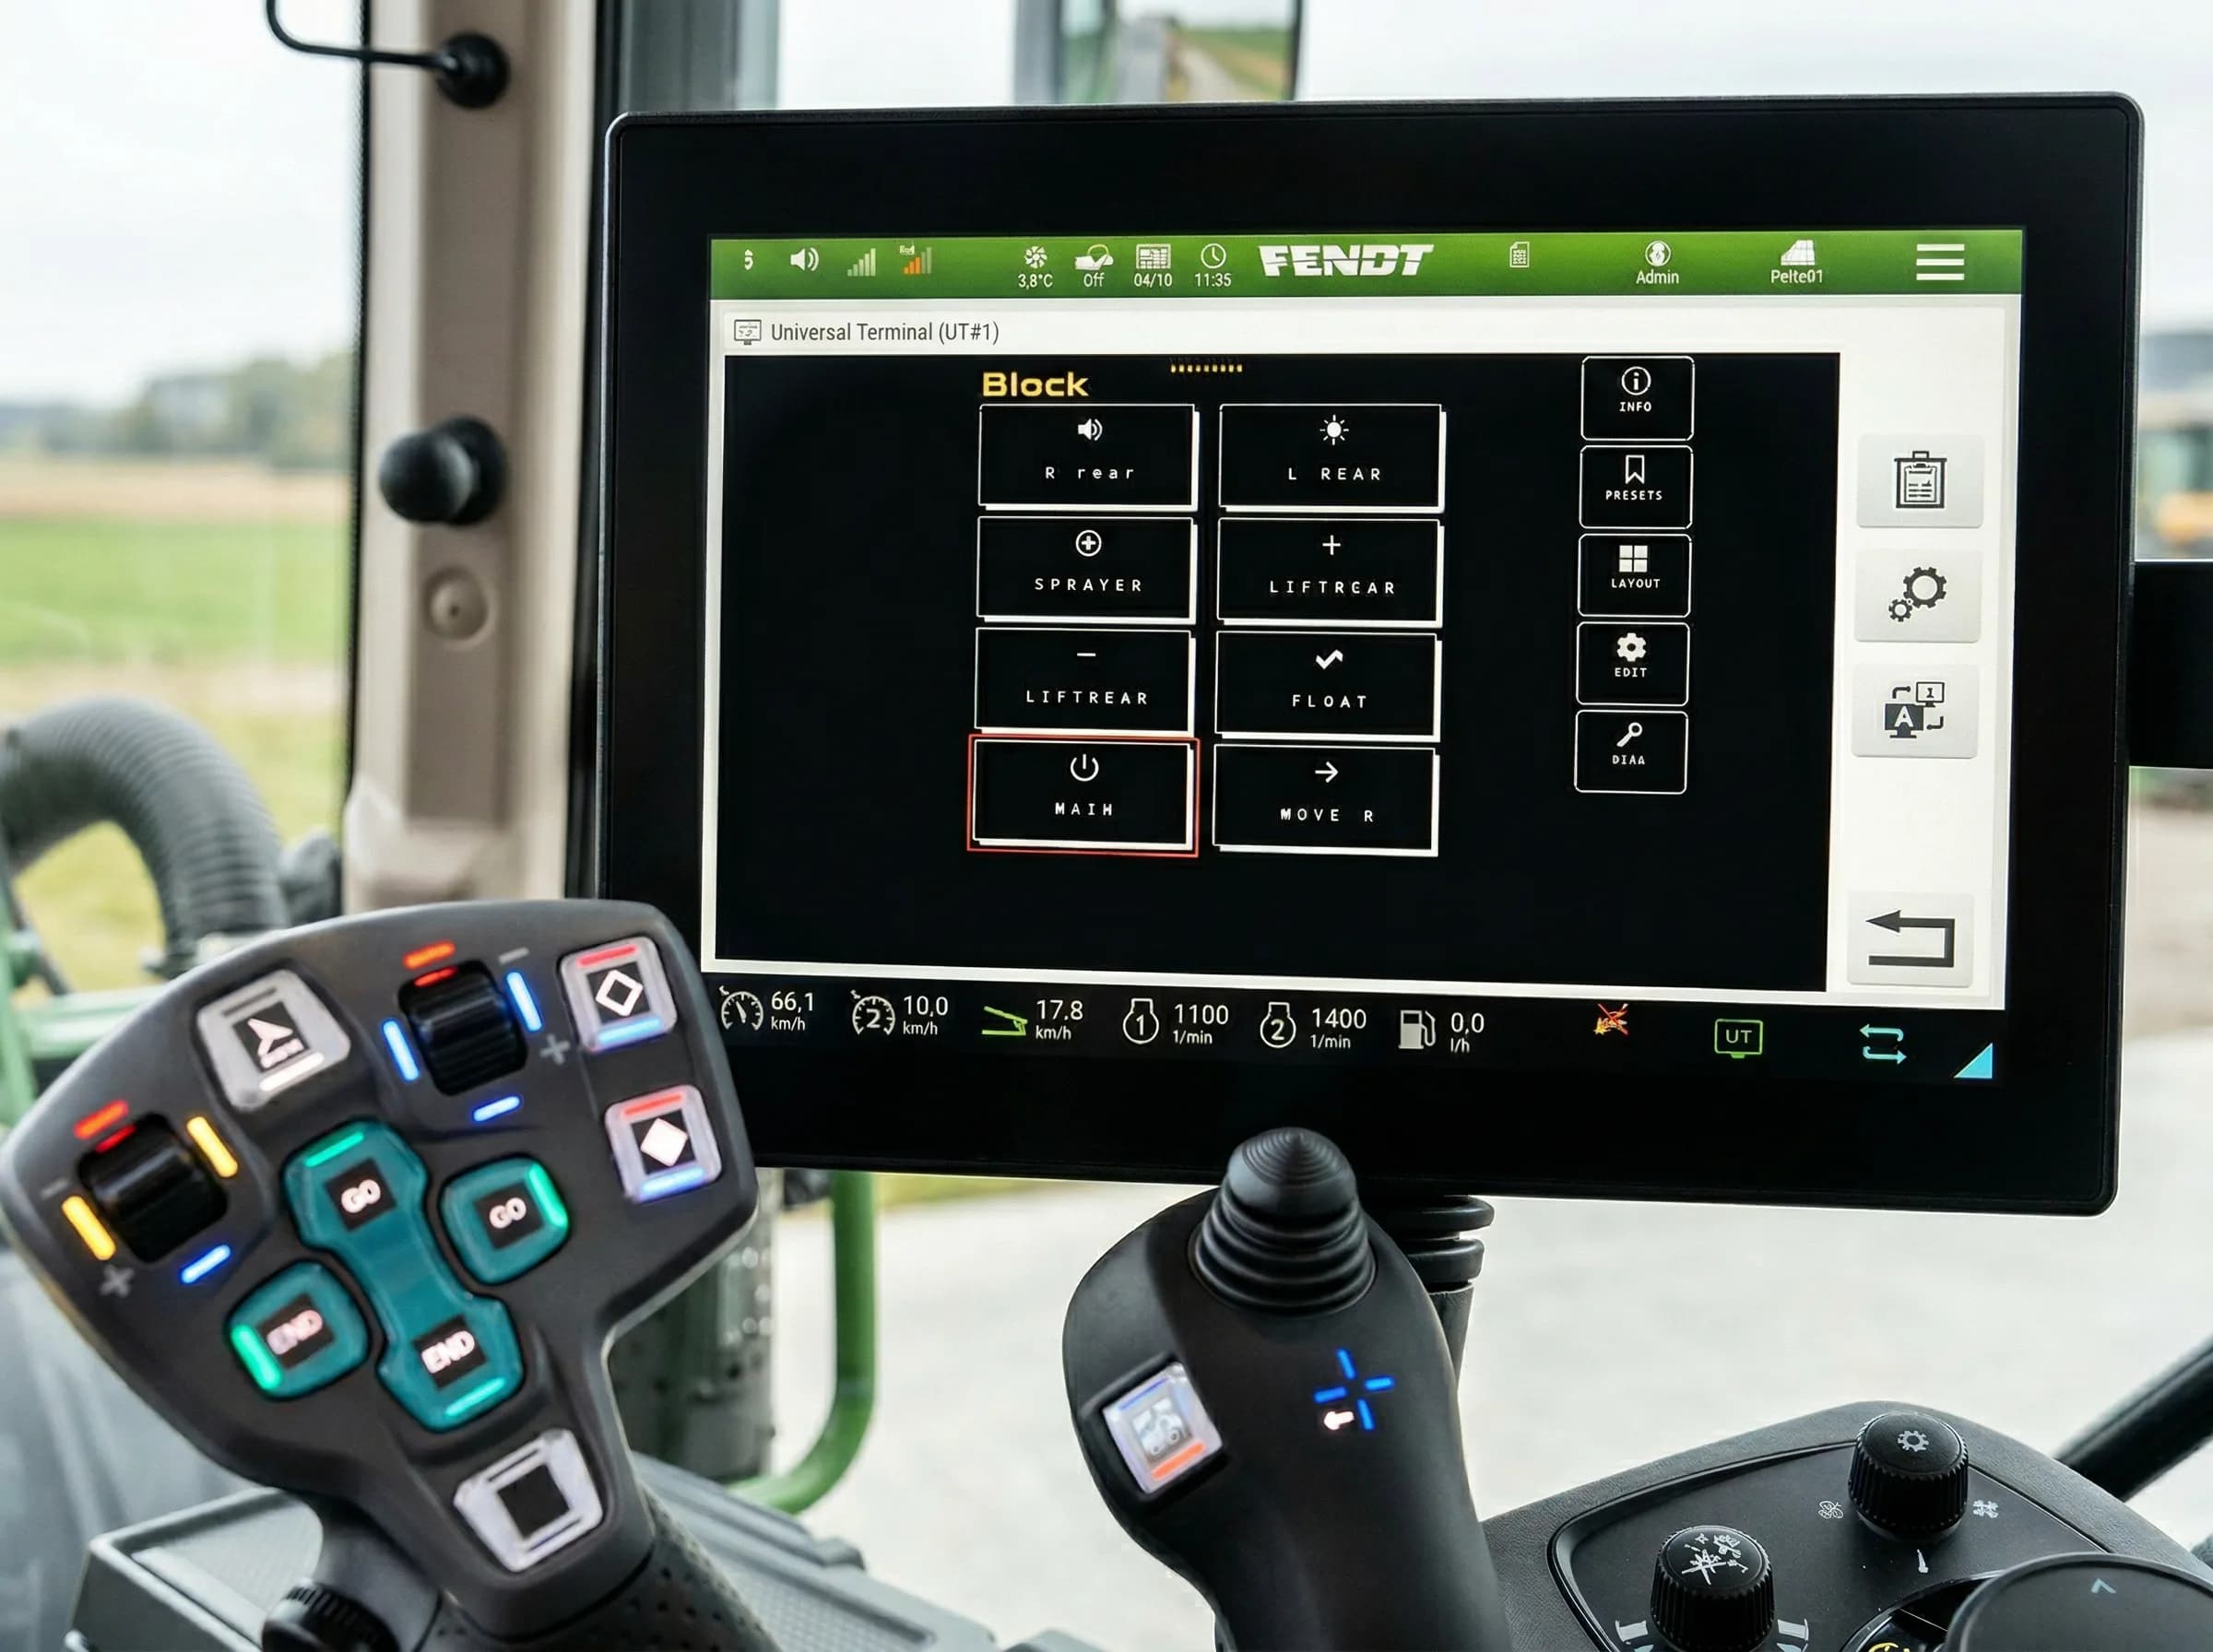
Your screen
Buttons named, icons picked, on the terminal you already have
On customers' machines
A customer's machine: an Amazone Pantera being converted from a sprayer into a harvesting machine. A 32-channel build switches its new functions.
The same machine from the seat. The build's functions carry the customer's own names, assigned to the joystick in the AmaTron 4's AUX-N menu.
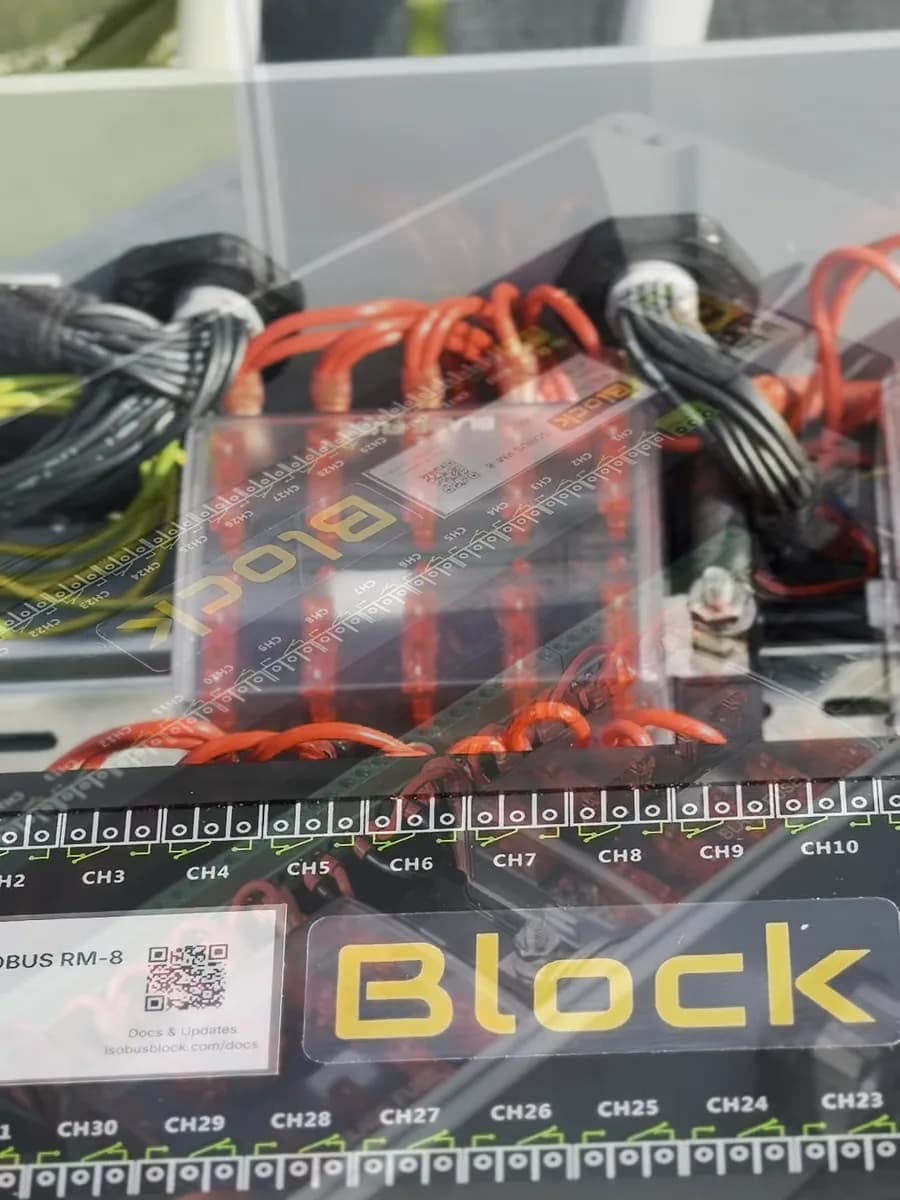
The same customer's build before shipping. The 32-channel module is the black unit; the enclosure, fuse boxes, wiring and channel map were built to order.
A hook-lift trailer in the UK, fitted by our dealer Tramline Tec. The 32-channel module in an enclosure on the chassis. We ship the module only; the box, terminals and wiring are the installer's.
What customers tell us
It was a pleasure to work with you, very knowledgeable and nothing too much of a problem. Great piece of ingenuity.
A customer in Austria fitted the module to a new Fendt 724 and wired six channels to the 15-pin socket for a three-way tipper, with two spare in the cab. He wrote that the install was plug and play and that controlling the tipper from the terminal is comfortable.
Austria. Fendt 724 Gen6, three-way tipper with lift axle.
Excellent customer service. The rake worked really well all season, much easier steering with the ISOBUS Block installed.
Description
Optional add-ons
Connector kits and cable
Where you mount the Block decides the connector. In the cab, it plugs into the tractor's in-cab ISOBUS socket. On the implement, it plugs into the external socket at the rear or front, and the ISOBUS cable runs from there to the Block.
None of these are required. The module takes any ISOBUS cable you source yourself. The kits and the cable just save you sourcing the parts.
Add them next to Add to cart at the top of this page.
Name it. Assign it. Press it.
Mount it, wire your loads, plug in one ISOBUS cable, and set up your buttons on the tractor screen. A screwdriver does the module end.
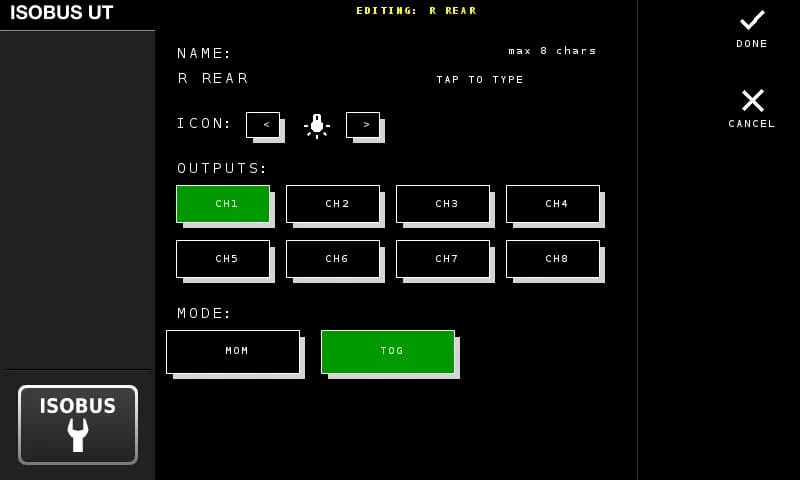
Name your button
Type a name (up to 8 characters), pick an icon, select which outputs it controls, and choose toggle or momentary mode.
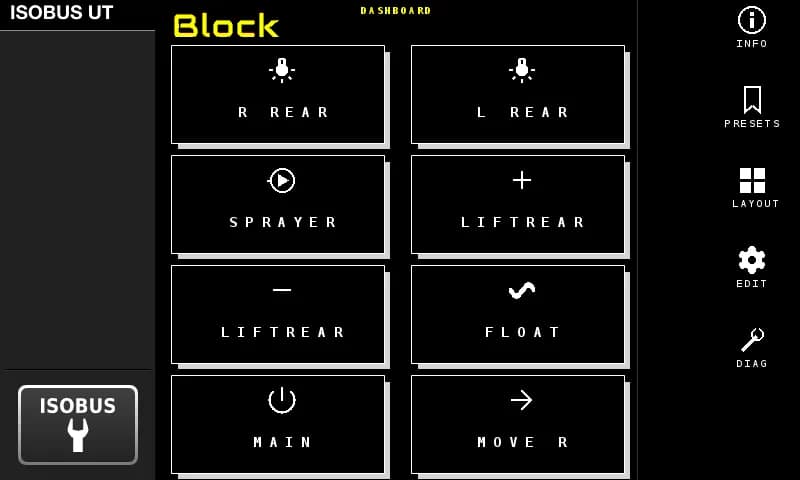
See it on the screen
Your buttons show up on the tractor display with the names and icons you chose. Pick a layout that fits your setup.
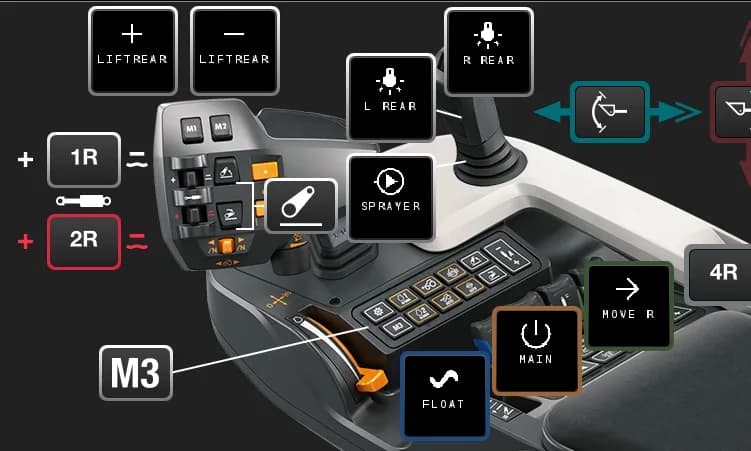
Assign to your joystick
Open the tractor's AUX-N menu. Your named buttons appear there. Assign them to any joystick or armrest button you want.
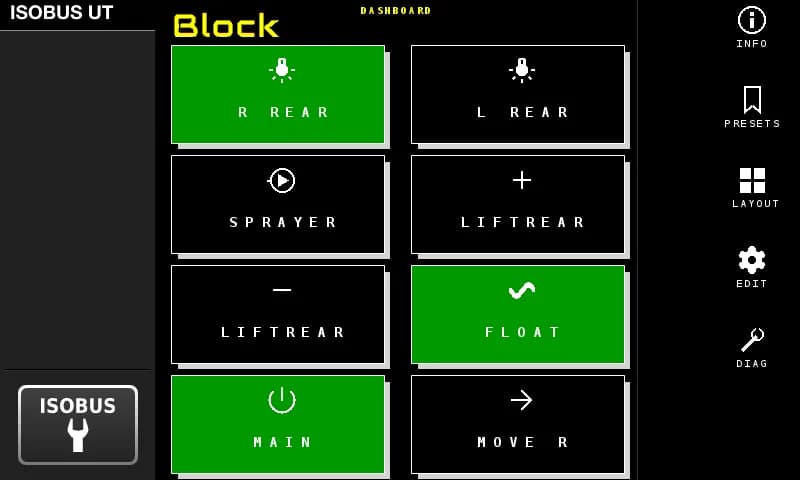
Press it
Your joystick button switches the relay. Active outputs light up green on the screen. That's the whole system.
What actually changes
Same tractor. Same cab. Completely different setup.
AUX-N Control
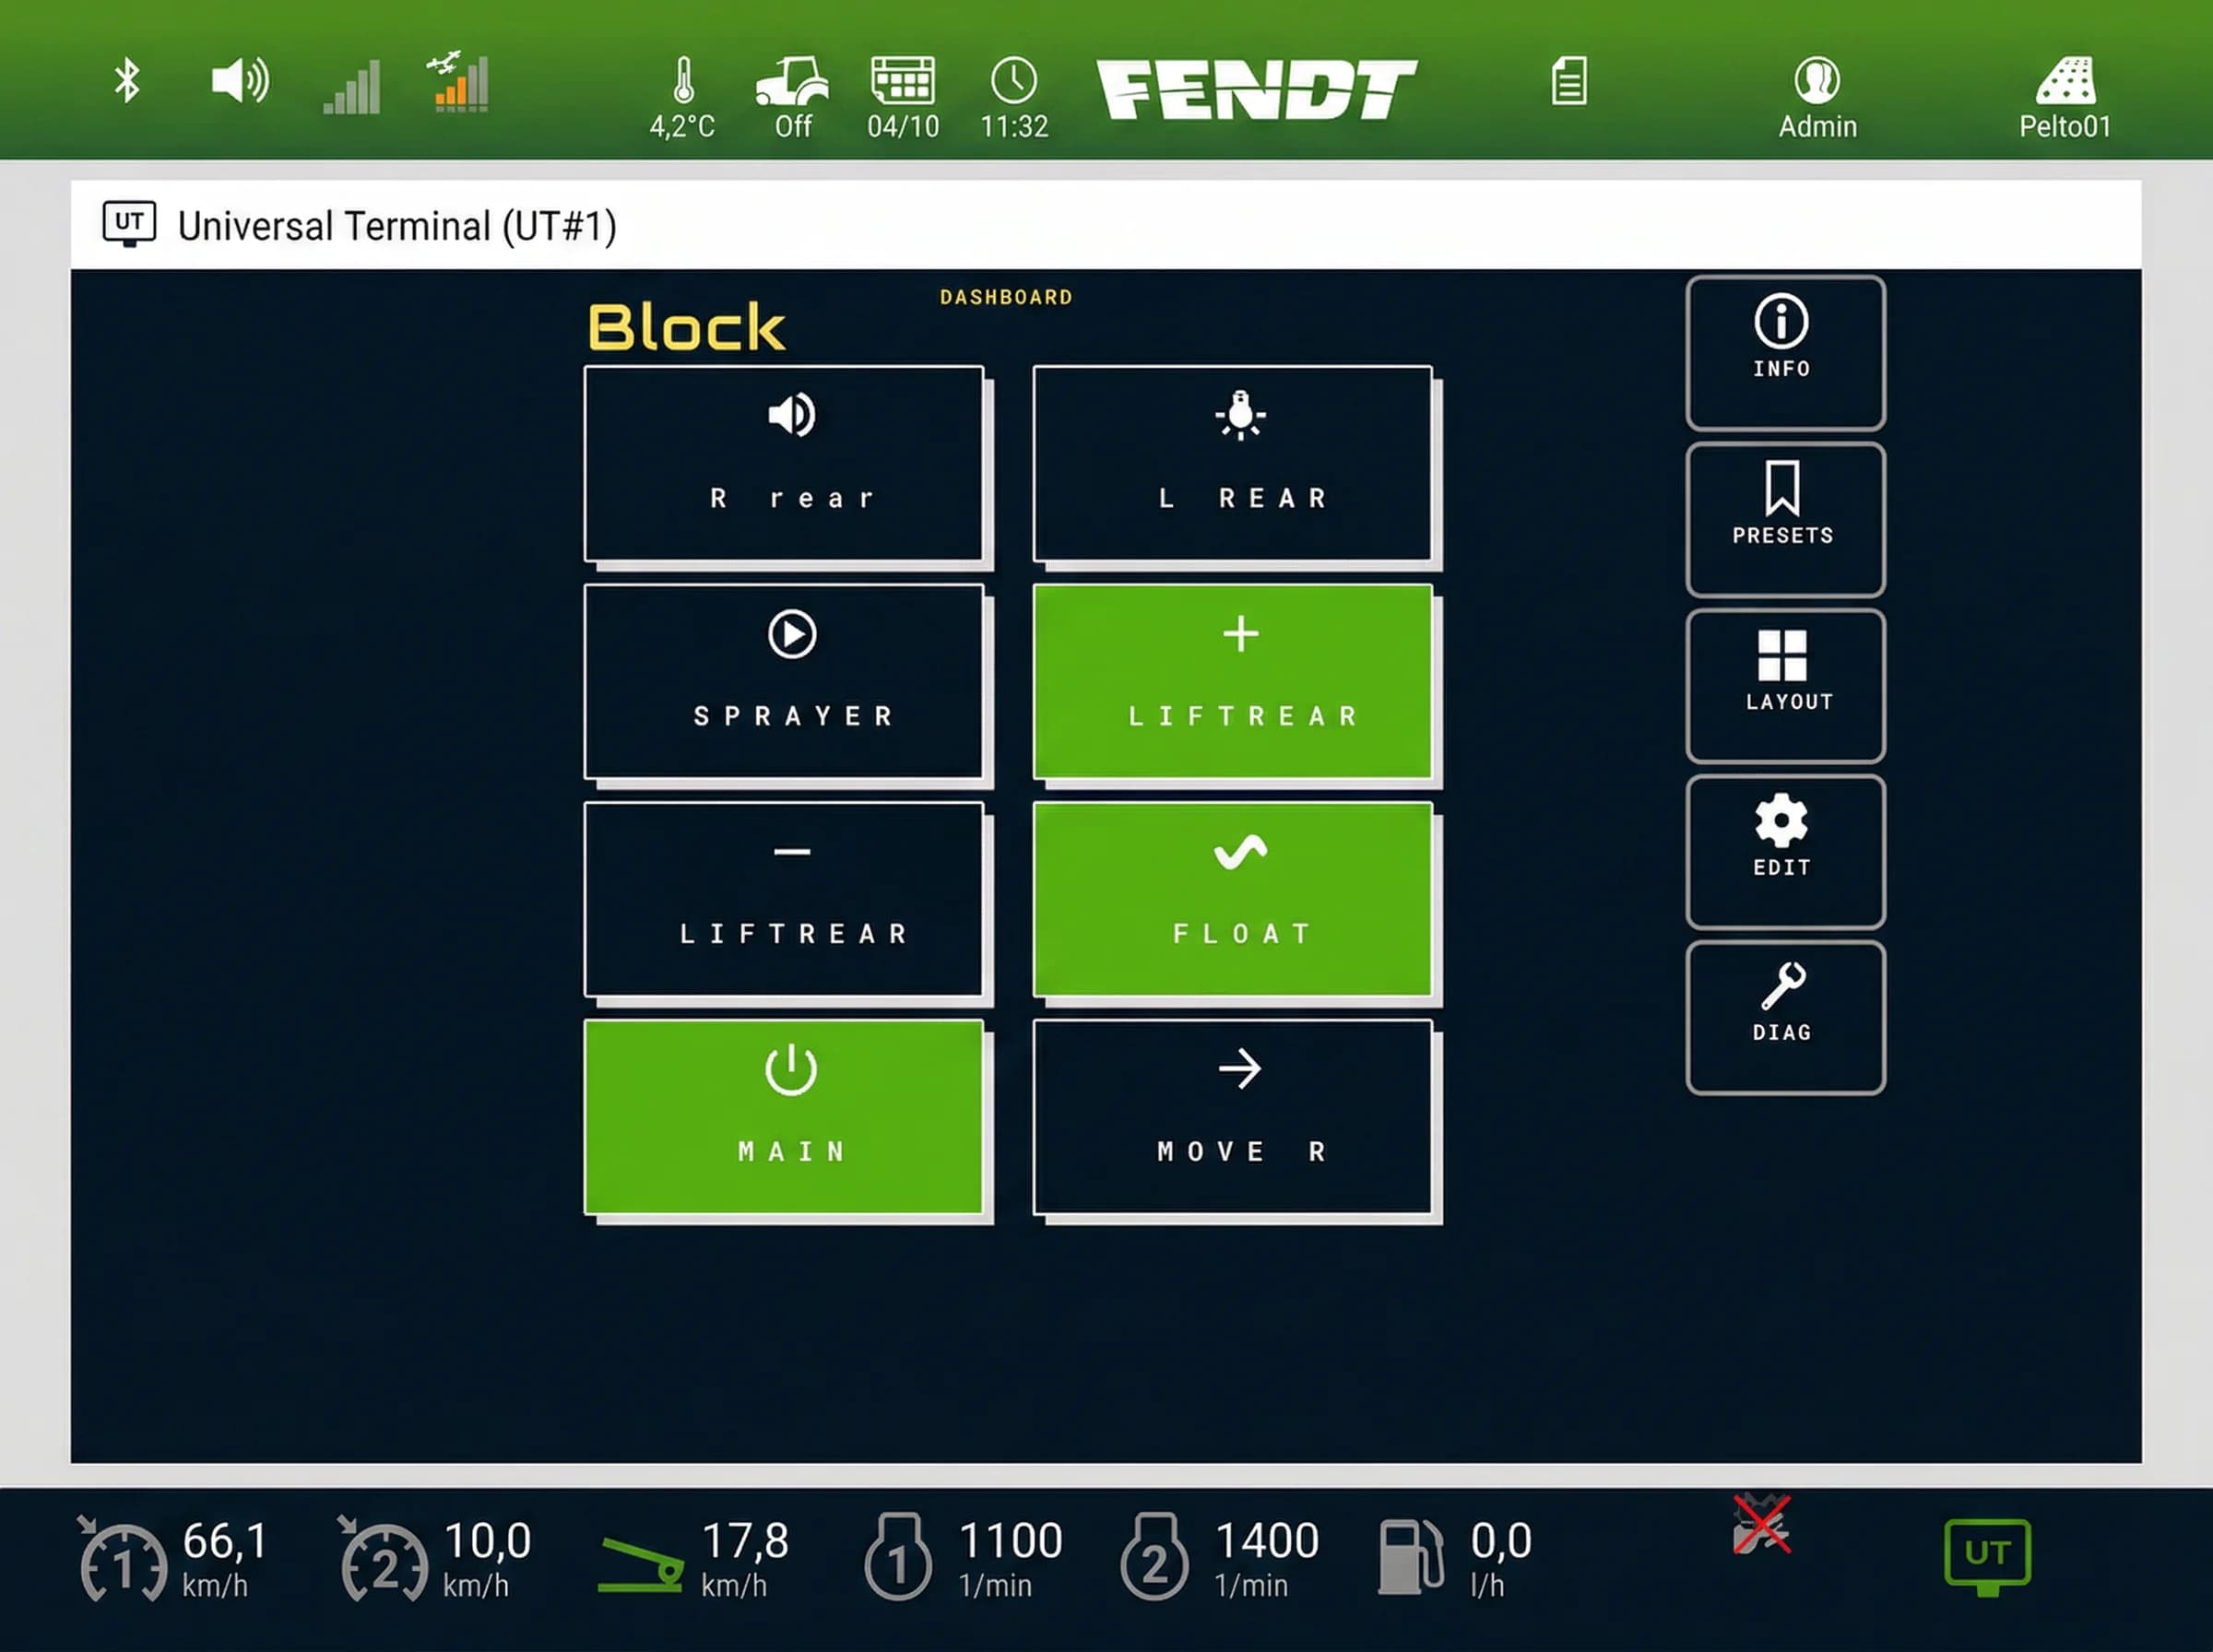
Custom names and icons on the Virtual Terminal. Active channels highlighted in green
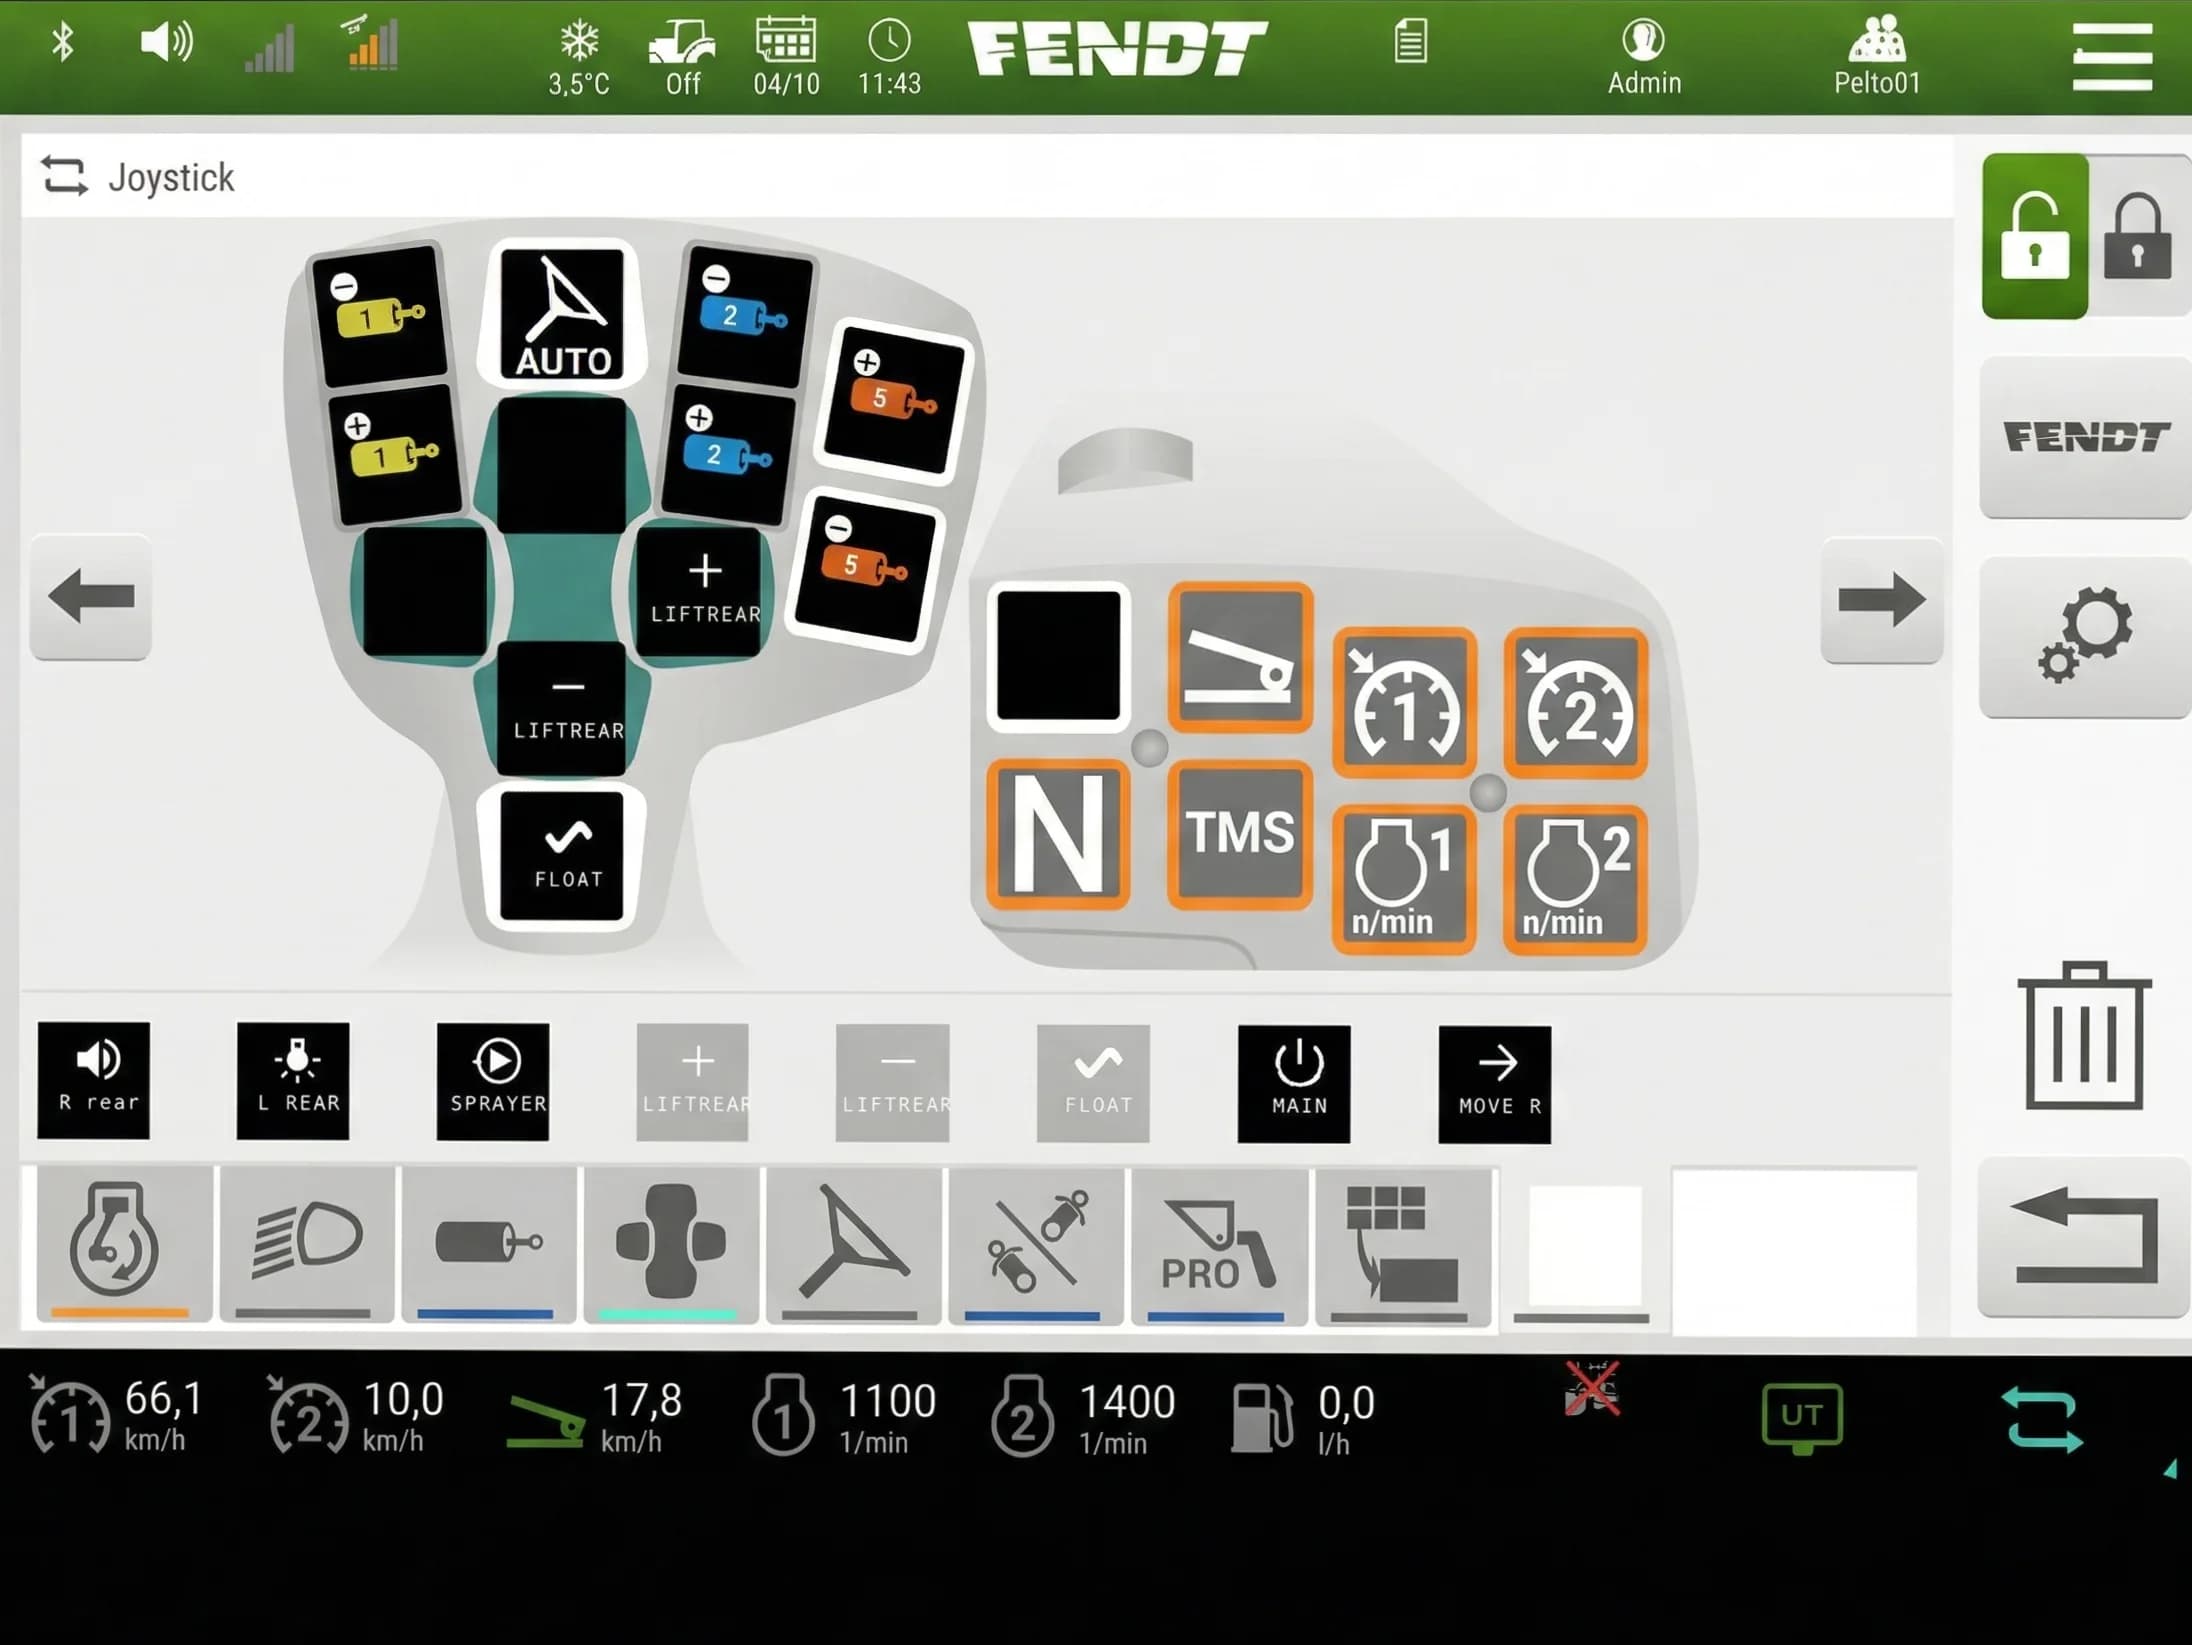
Same names and icons carry over to the joystick button assignments
See it in action
The actual screens you'll use: button editor, layout options, AUX-N assignment, and more.
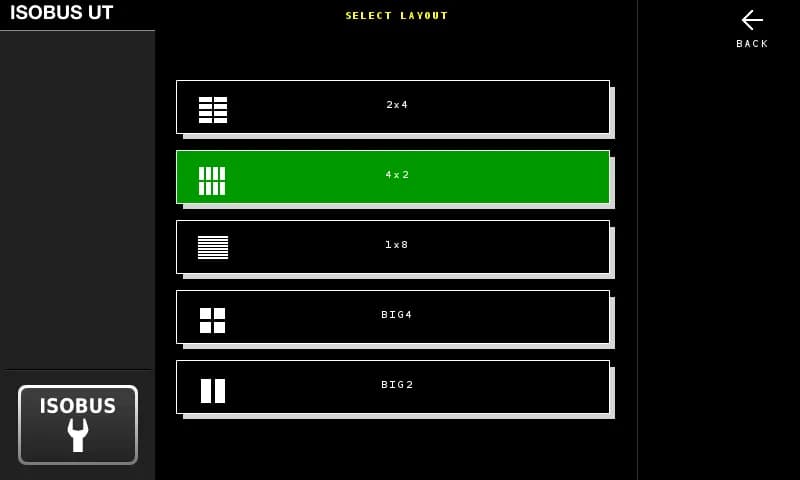
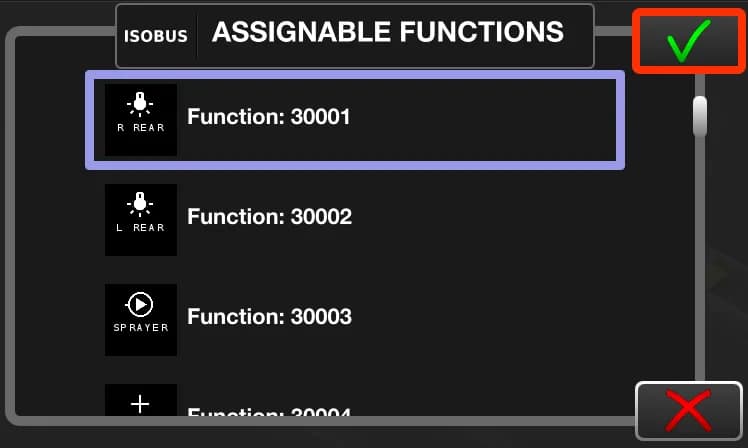
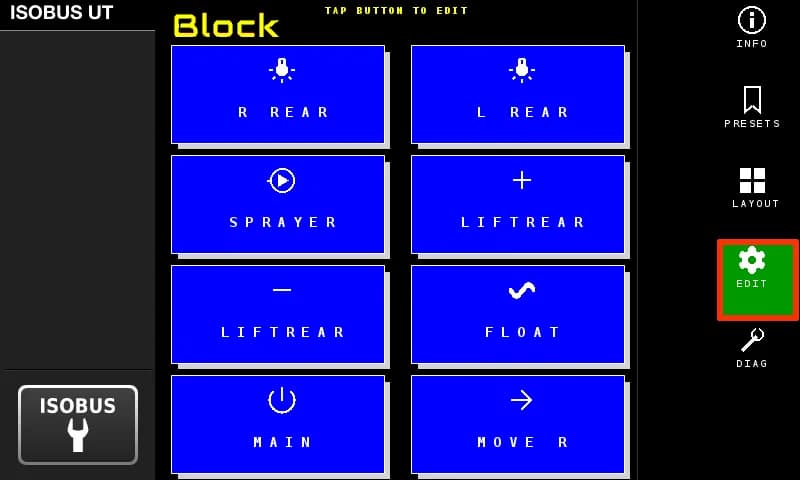
Name each button, pick an icon, choose outputs and mode
Let a sensor do the switching
The module has 8 digital inputs. Wire a proximity sensor, a limit switch, a pressure switch or a switch on the cab panel to one, and it can switch the relay outputs for you. 5 to 36 V, optocoupler isolated. Dry contact, NPN and PNP sensors all work.
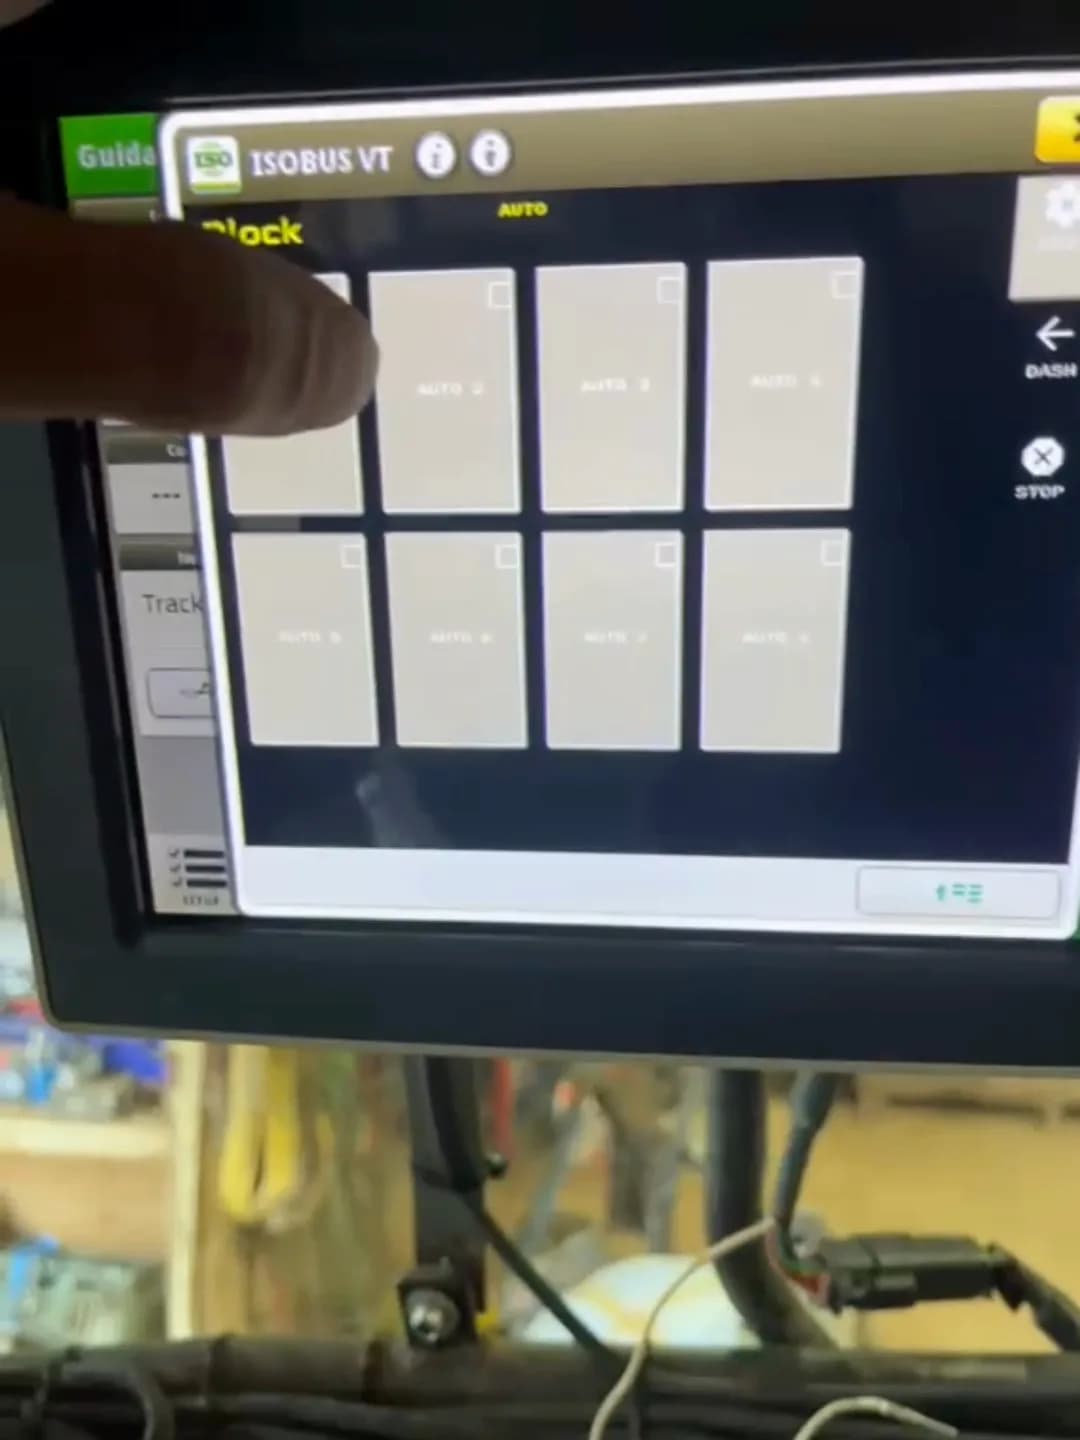
You decide when it runs. Arm it from the tractor screen, or from an armrest button you assigned to it. All of it is set up on the terminal. No laptop, no app, no programming.
Output on while the input is active.
A sensor on the wagon door. When the load pushes the door open, a buzzer sounds in the cab.
Each pulse flips the output on or off.
Forces the outputs off while the input is active.
For an end switch or a limit switch. It stops the automation, never your own button press.
Manual always wins
Grab the joystick and the automation drops out. Any control that overlaps a running function disarms it: a joystick press, an armrest button, a screen button, the web interface. The automation never blocks, limits or delays what you do by hand.
- Automation never resumes by itself. Re-arming is one deliberate press.
- Nothing arms itself. After a power cycle everything is manual again.
- A latched STOP holds every output off until you release it, whatever else is asking for them.
Tune each input to the machine
Five settings per input, stored per preset, set with steppers on the terminal. The same page shows a live IN and OUT indicator, the raw sensor state next to the filtered result.
| Setting | What it does | Range |
|---|---|---|
| Debounce | Filters contact bounce and electrical noise. | 10 ms to 1 s |
| On delay | The sensor has to mean it before anything moves. Ignores bumps and blips. | 0 to 10 s |
| Off delay | Stops hunting when a sensor sits right on its trigger point. | 0 to 10 s |
| Min on | Once the relay switches on it stays on this long, so a twitchy sensor cannot chatter it on and off. That is also what saves the relay. | 0 to 10 s |
| Max on | Ceiling on continuous on-time. Catches a sensor that fails stuck-on. | No limit, or 1 to 300 s |
Hard floors of 100 ms on and 100 ms rest are built in. No combination of settings can chatter a relay from the input side.
What it is not
This is not a safety system. A block input or an interlock stops the automation. It does not stop you, because manual control is never blocked. STOP holds every output off until you release it, but it is an operator control, not an emergency stop. If a movement has to be stopped whatever happens, fit a mechanical end stop.
An input is either on or off, nothing in between. It does not measure a level, count pulses or read a frequency. Two inputs can be interlocked so they never run at the same time, and that is the only logic between them.
Everything is set up on the tractor terminal. The web interface only tests outputs and updates firmware, and switching an output there turns the automation off.
Built for the field. 8 relay channels, 10A each, 7–36V input. Set up everything from the tractor screen.
| Supply voltage | 7–36V DC |
| Relay channels | 8 (NO, COM, NC per channel) |
| Max current | 10A per channel |
| Max switching voltage | 30V DC / 250V AC |
| Protection | Optocoupler isolation, power isolation |
| Enclosure | Rail-mount ABS housing (indoor use; requires weatherproof enclosure for outdoor installation) |
| Dimensions | 3.5 × 6.9 in (90 × 175 mm) |
| Weight | 1.1 lb (500 g) |
| Operating temperature | −22°F to +122°F |
| Warranty | 5 years |
Questions?
More from the ISOBUS Block platform
ISOBUS Block, built to order
Tell us the machine and what you want it to do. We work out the rest and build it here.
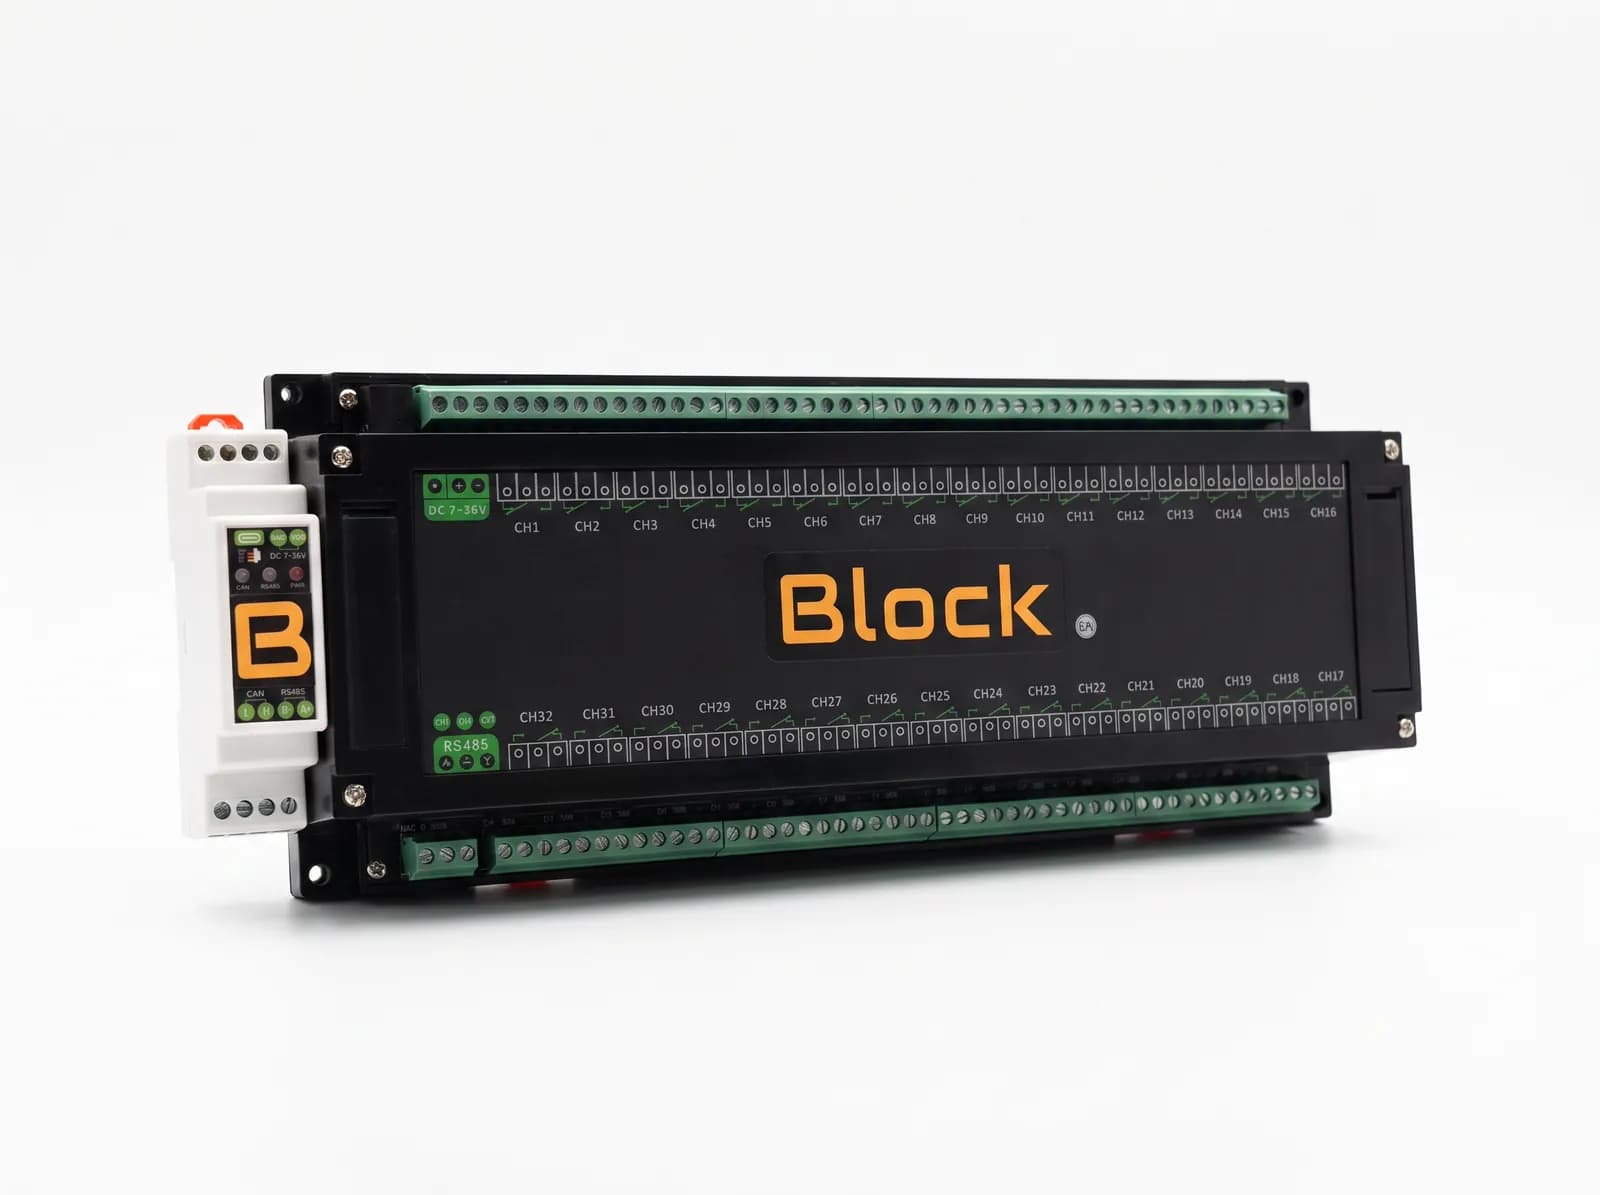
ISOBUS Block 32-Channel Relay Module
When eight outputs are not enough. 32 relay channels, 10 A each, controlled from the tractor screen and the AUX-N buttons you already have.