Getting Started
Get your ISOBUS Block module up and running in minutes
Quick Start Guide
Get your ISOBUS Block module up and running in minutes.
What You Need
- ISOBUS Block module
- ISOBUS cable with mating connector for the in-cab connector
- Wire and connectors for your load (e.g. work light, valve)
- Screwdriver for the screw terminals
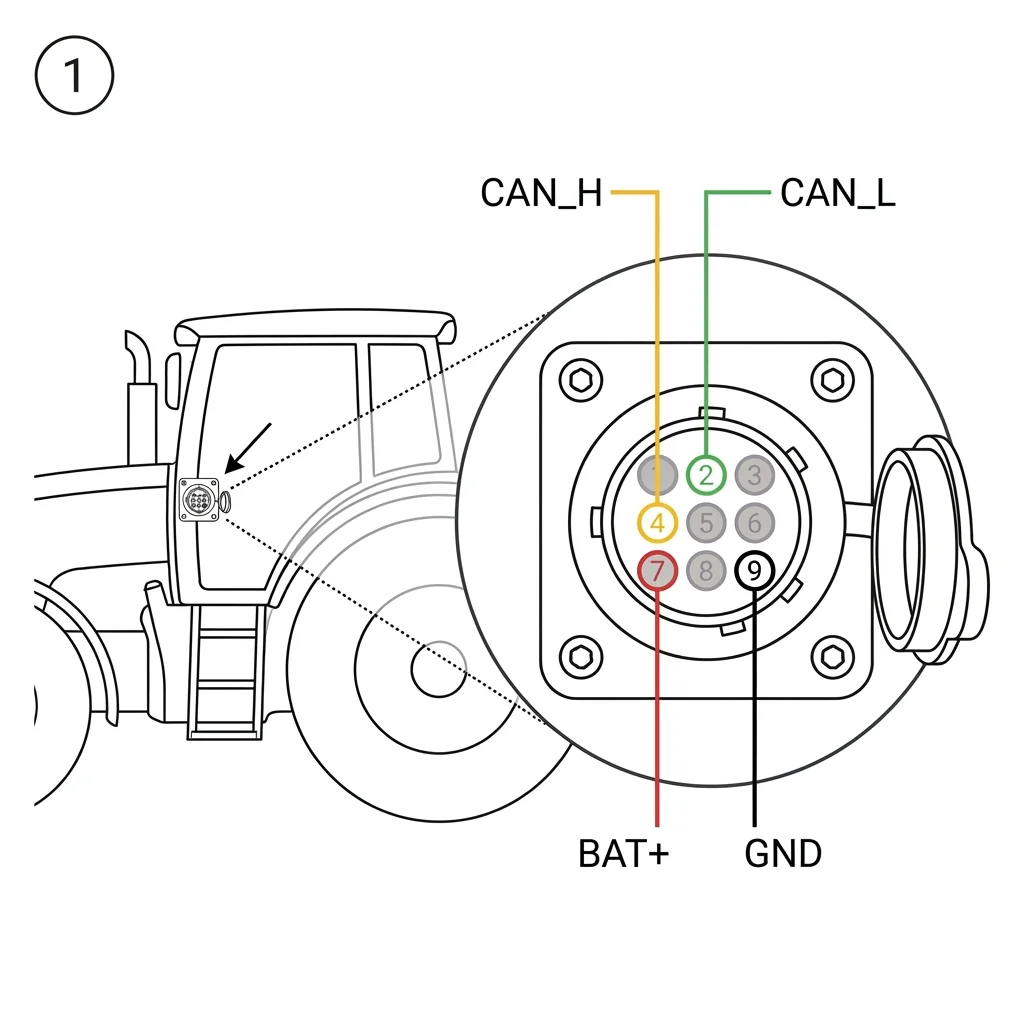
Step 1: Find the In-Cab Connector
Locate the 9-pin ISOBUS in-cab connector on your tractor's cab pillar. Identify the pins you need: CAN_L (pin 2), CAN_H (pin 4), BAT+ (pin 7), and GND (pin 9).
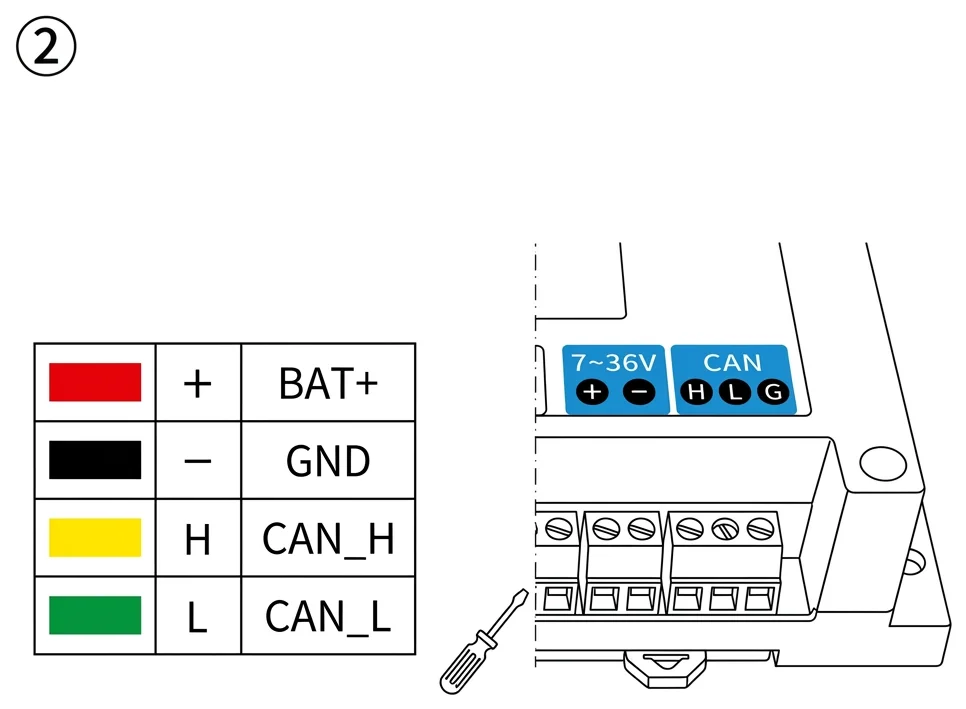
Step 2: Wire to the Module
Connect the 4 wires from the in-cab connector to the ISOBUS Block module terminals. Match the colors to the terminal labels.
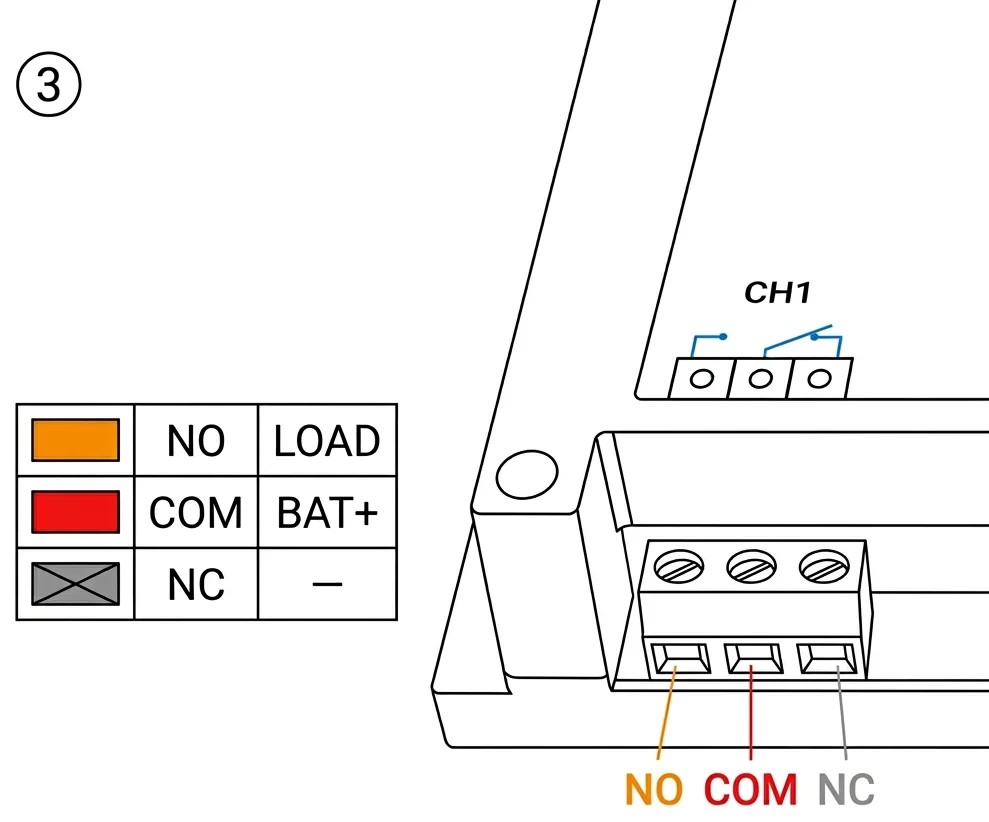
Step 3: Wire Your Load
Connect the device you want to control to a relay channel. Wire BAT+ to COM and your device to NO. The NC terminal is not used.
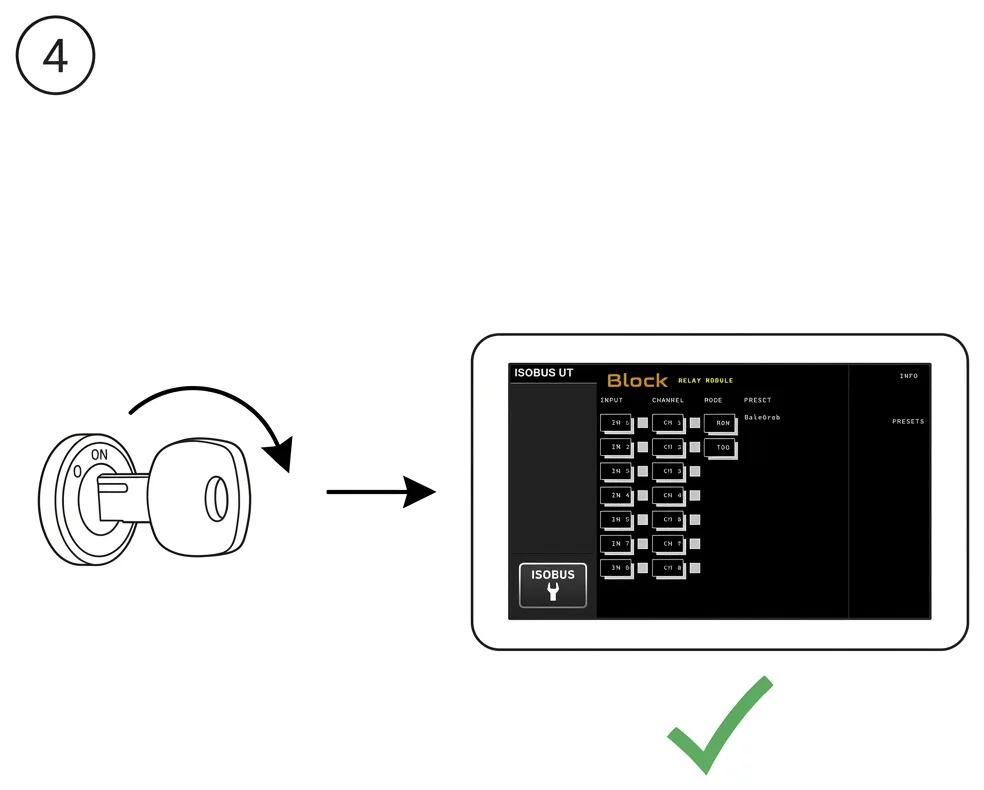
Step 4: Start the Tractor
Turn the ignition on. The ISOBUS Block interface will appear on your tractor's Virtual Terminal display.
Step 5: Set Up a Button
On the VT, press the EDIT soft key (cog icon) to enter edit mode, tap a button, and set its name, icon, the channel(s) it switches (CH1–CH8), and its mode (TOG/MOM). Exit edit mode to save, then press the button to switch your load.
Next Steps
- Set up the VT buttons — name, icon, channels, and mode
- Assign channels to buttons
- Set up AUX-N functions for armrest/joystick control
- Button modes (momentary vs toggle)
- Connect to WiFi for output testing, diagnostics, and firmware
- Web Interface Overview - Understanding the web UI