ISOBUS Block + In-Cabin Wiring Harness
Relay module with a pre-built 1.8 m harness for the in-cab ISOBUS connector. Plug it in and start assigning buttons.
Free shipping on all orders, via DHL Express.
Returned complete and undamaged. Buyer pays return shipping. Custom kits excluded; faults covered by the 5-year warranty.
Description
Name it. Assign it. Press it.
Plug in one ISOBUS cable, wire your loads, then set up your buttons from the tractor screen.
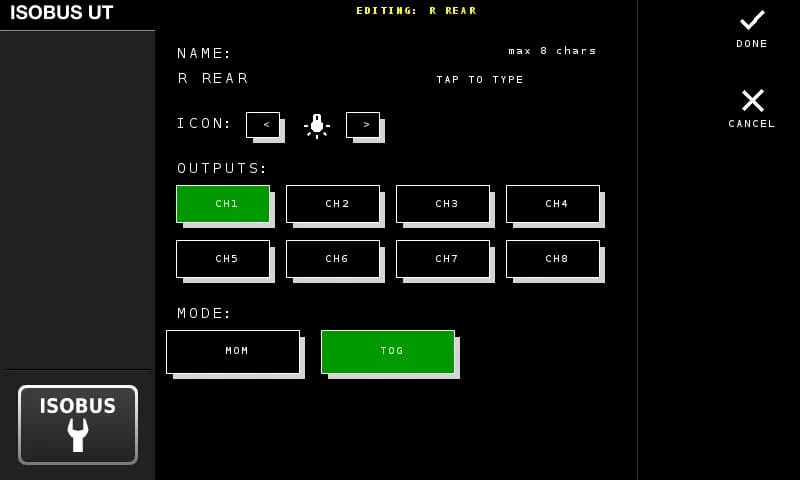
Name your button
Type a name (up to 8 characters), pick an icon, select which outputs it controls, and choose toggle or momentary mode.
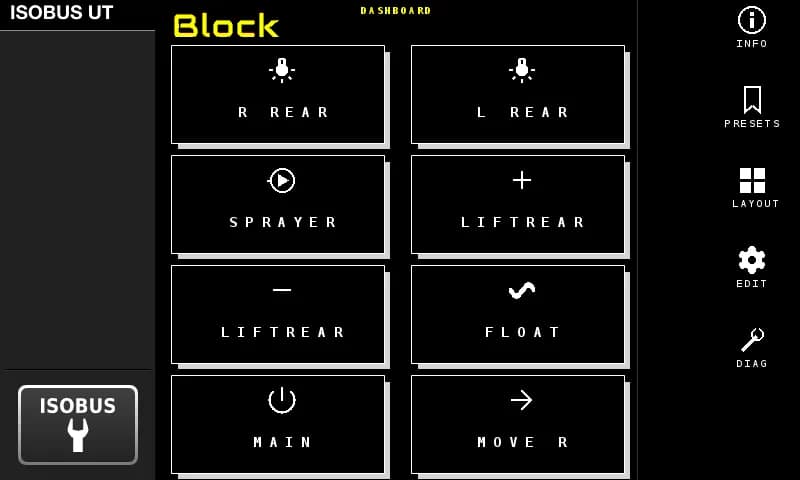
See it on the screen
Your buttons show up on the tractor display with the names and icons you chose. Pick a layout that fits your setup.
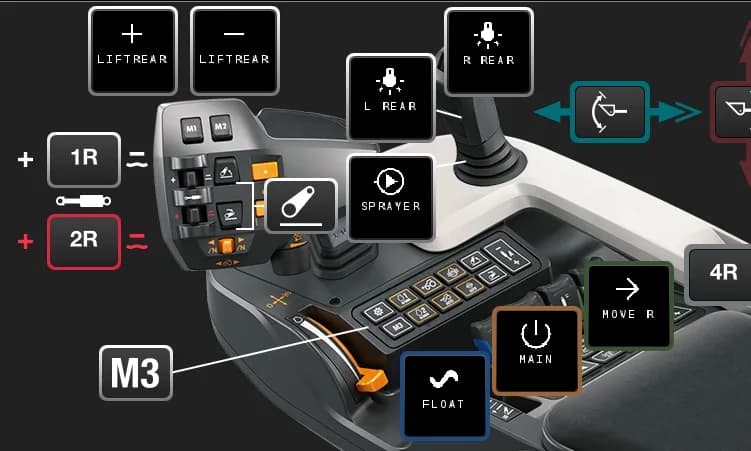
Assign to your joystick
Open the tractor's AUX-N menu. Your named buttons appear there — assign them to any joystick or armrest button you want.
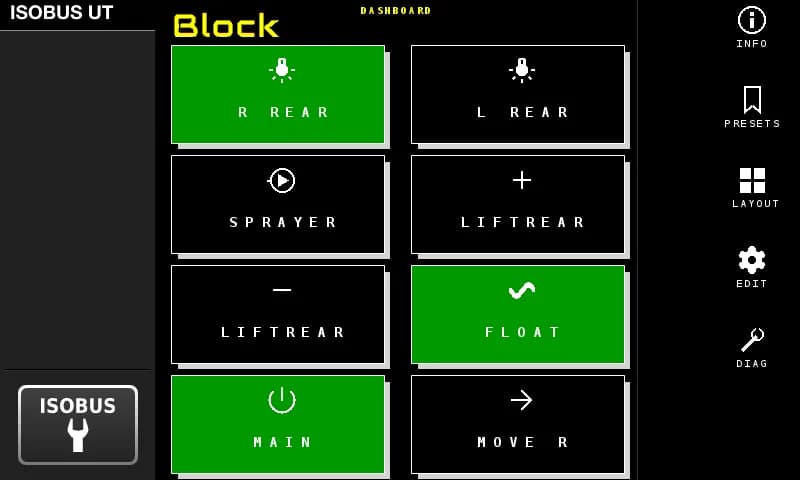
Press it
Your joystick button switches the relay. Active outputs light up green on the screen. That's the whole system.
Want less wiring work?
ISOBUS Block — 8-Channel Relay Module
Bare module for integrators. You wire the harness and the output side yourself.
See this optionISOBUS Block + Plug-and-Play Implement Kit
Full kit in an IP-rated box. Bolt it on the implement, run one cable to the tractor.
See this optionWhat's included
| Specifications | |
|---|---|
| Control | Tractor screen (CH1–CH8, TOG / MOM) and AUX-N joystick or armrest button |
| Includes | Relay module + 1.8 m harness (in-cab ISOBUS connector + pre-stripped wires for screw terminals) |
| Warranty | 5 years |
| Connector | In-cab ISOBUS connector (standardized across tractor brands) |
| Max current | 10A per channel |
| Installation | In-cab mount; relay outputs wired to your loads separately |
| Harness length | 1.8 m |
| Relay channels | 8 (NO, COM, NC per channel) |
| Supply voltage | Powered via ISOBUS |
| Max switching voltage | 250V AC / 30V DC |
What actually changes
Same tractor. Same cab. Completely different setup.
AUX-N Control
8 Inputs in Your Tractor
The module shows up in your tractor's AUX-N menu with 8 assignable inputs. Pick a button, pick an output, done. Your assignments are stored in the tractor — reconnect next season and they're still there.
Group Channels Together
One button press, multiple relays. Open a valve and turn on a work light at the same time.
Toggle or Momentary
Toggle stays on until you press again. Momentary activates while you hold. Set it per channel.
Custom Names & Icons
Name each channel (up to 8 characters) and pick an icon. Your names and icons show up on the screen and in the joystick assignment page.
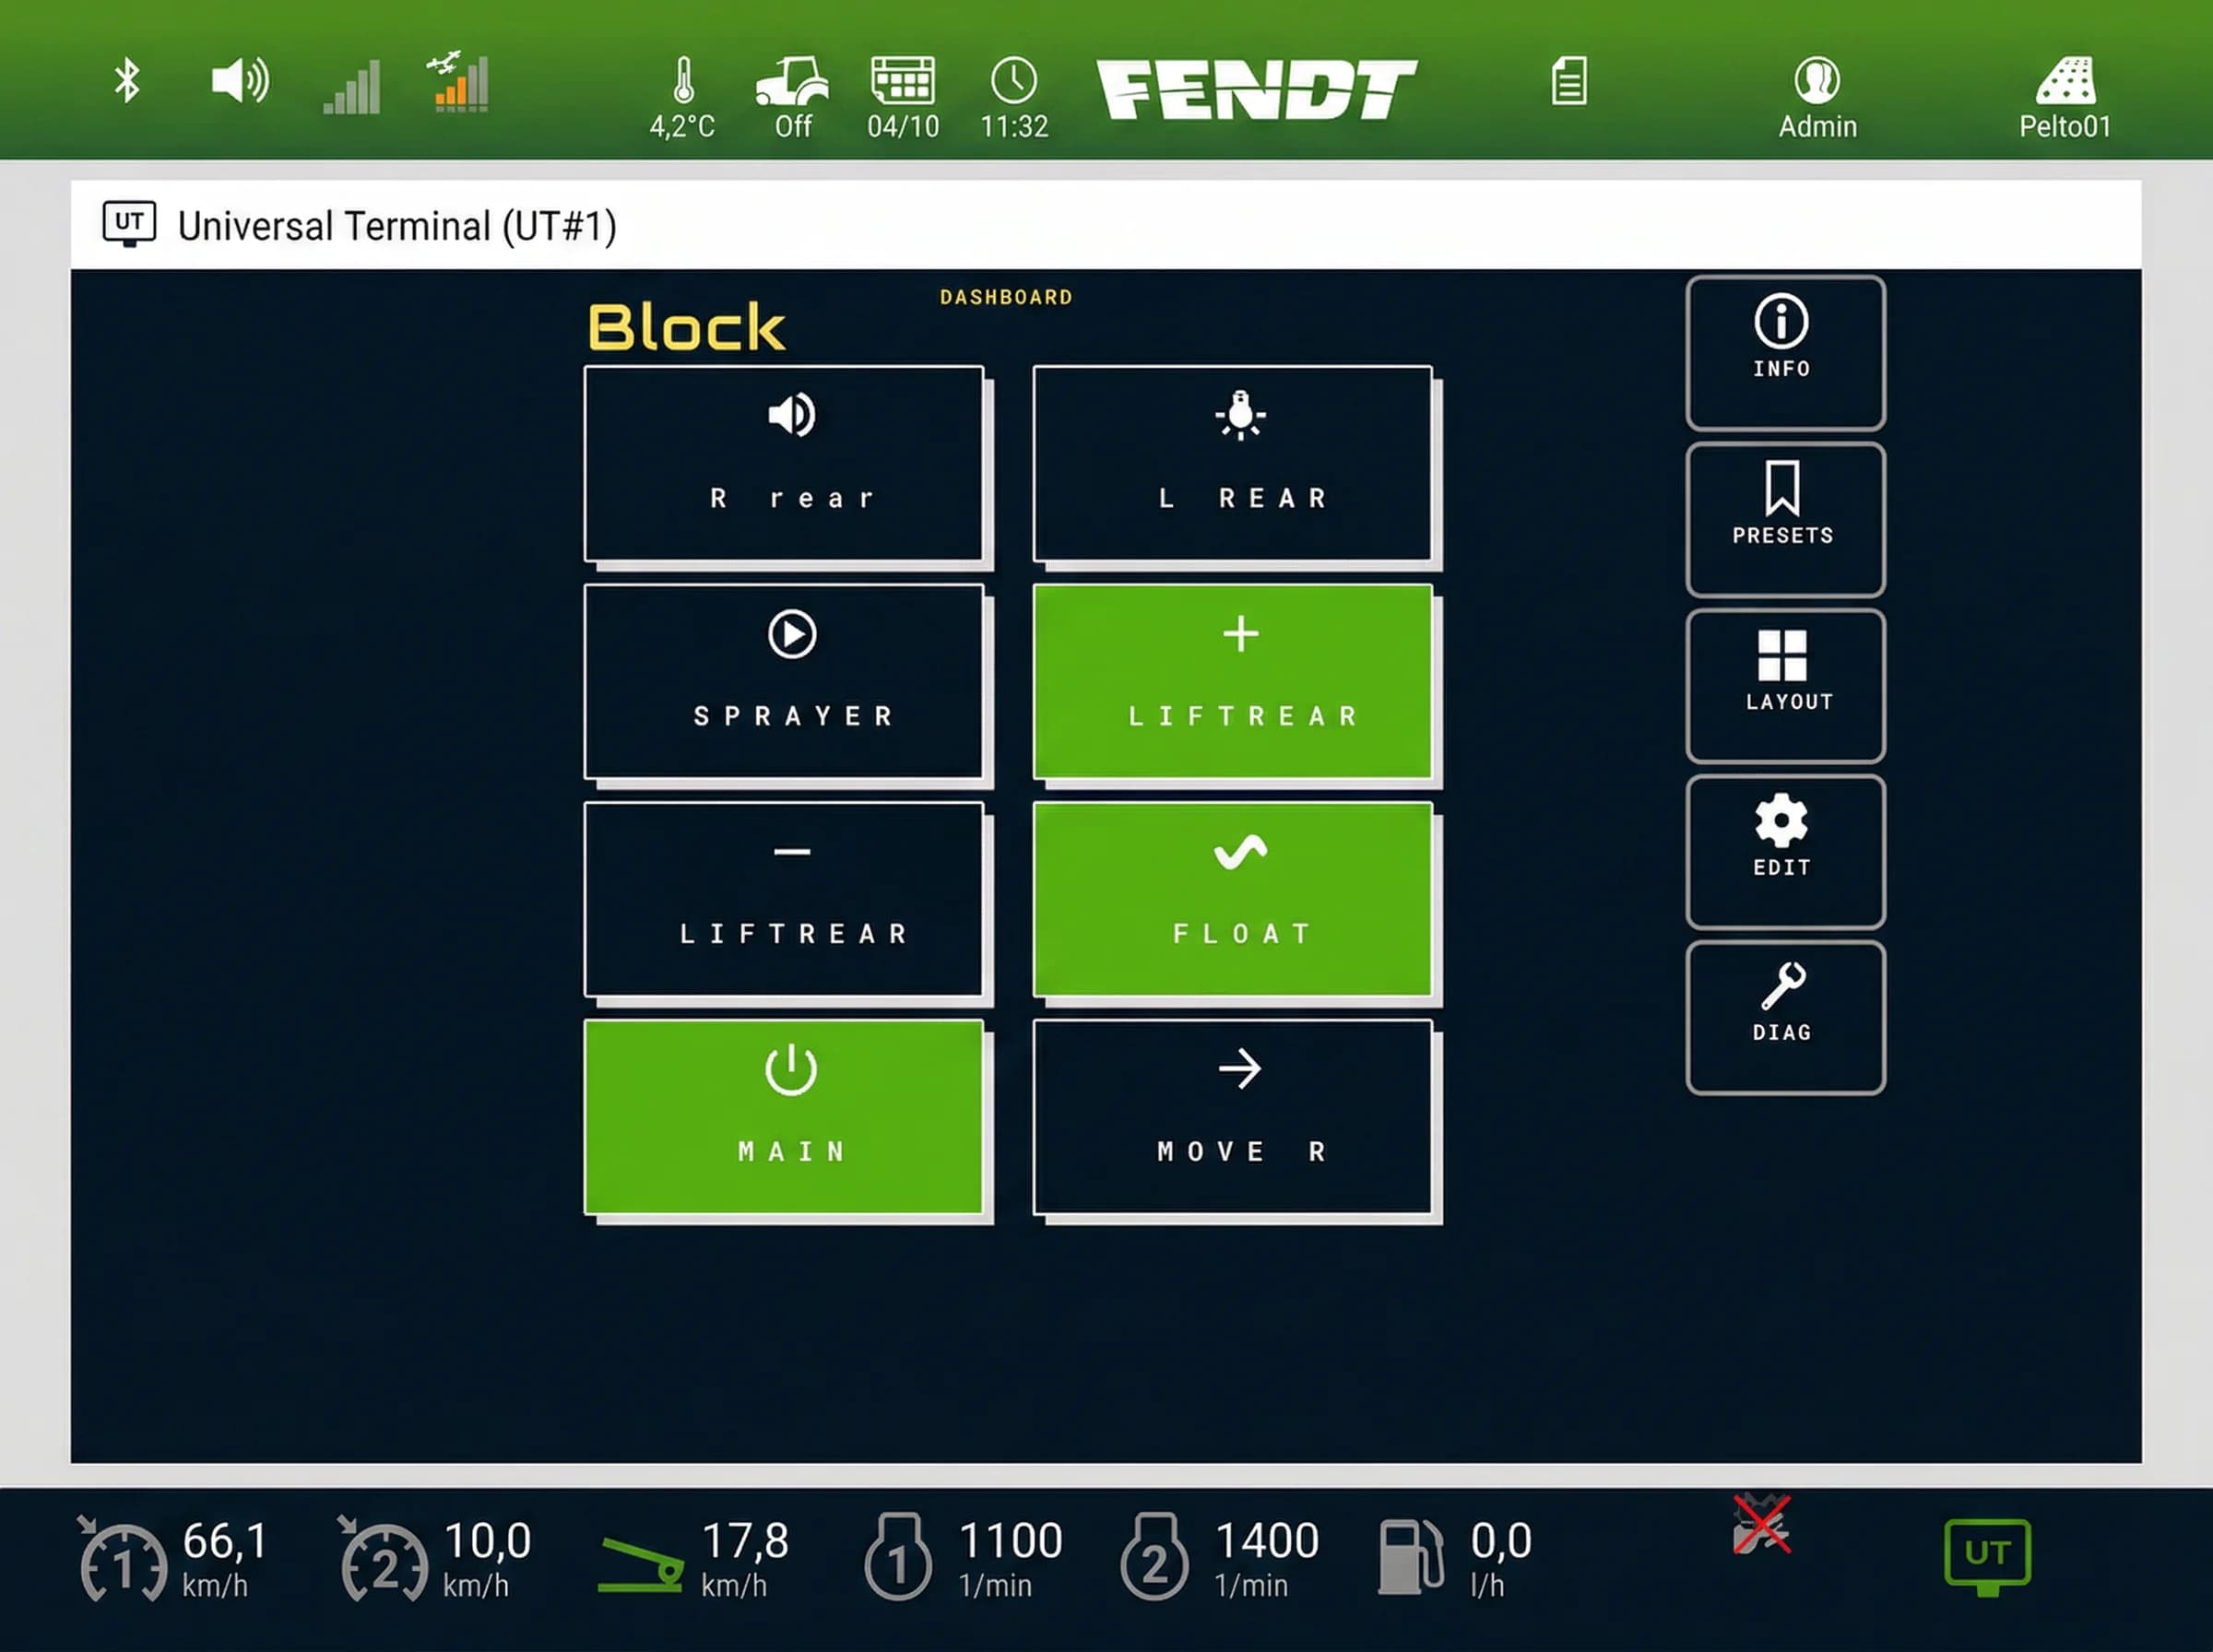
Custom names and icons on the Virtual Terminal — active channels highlighted in green
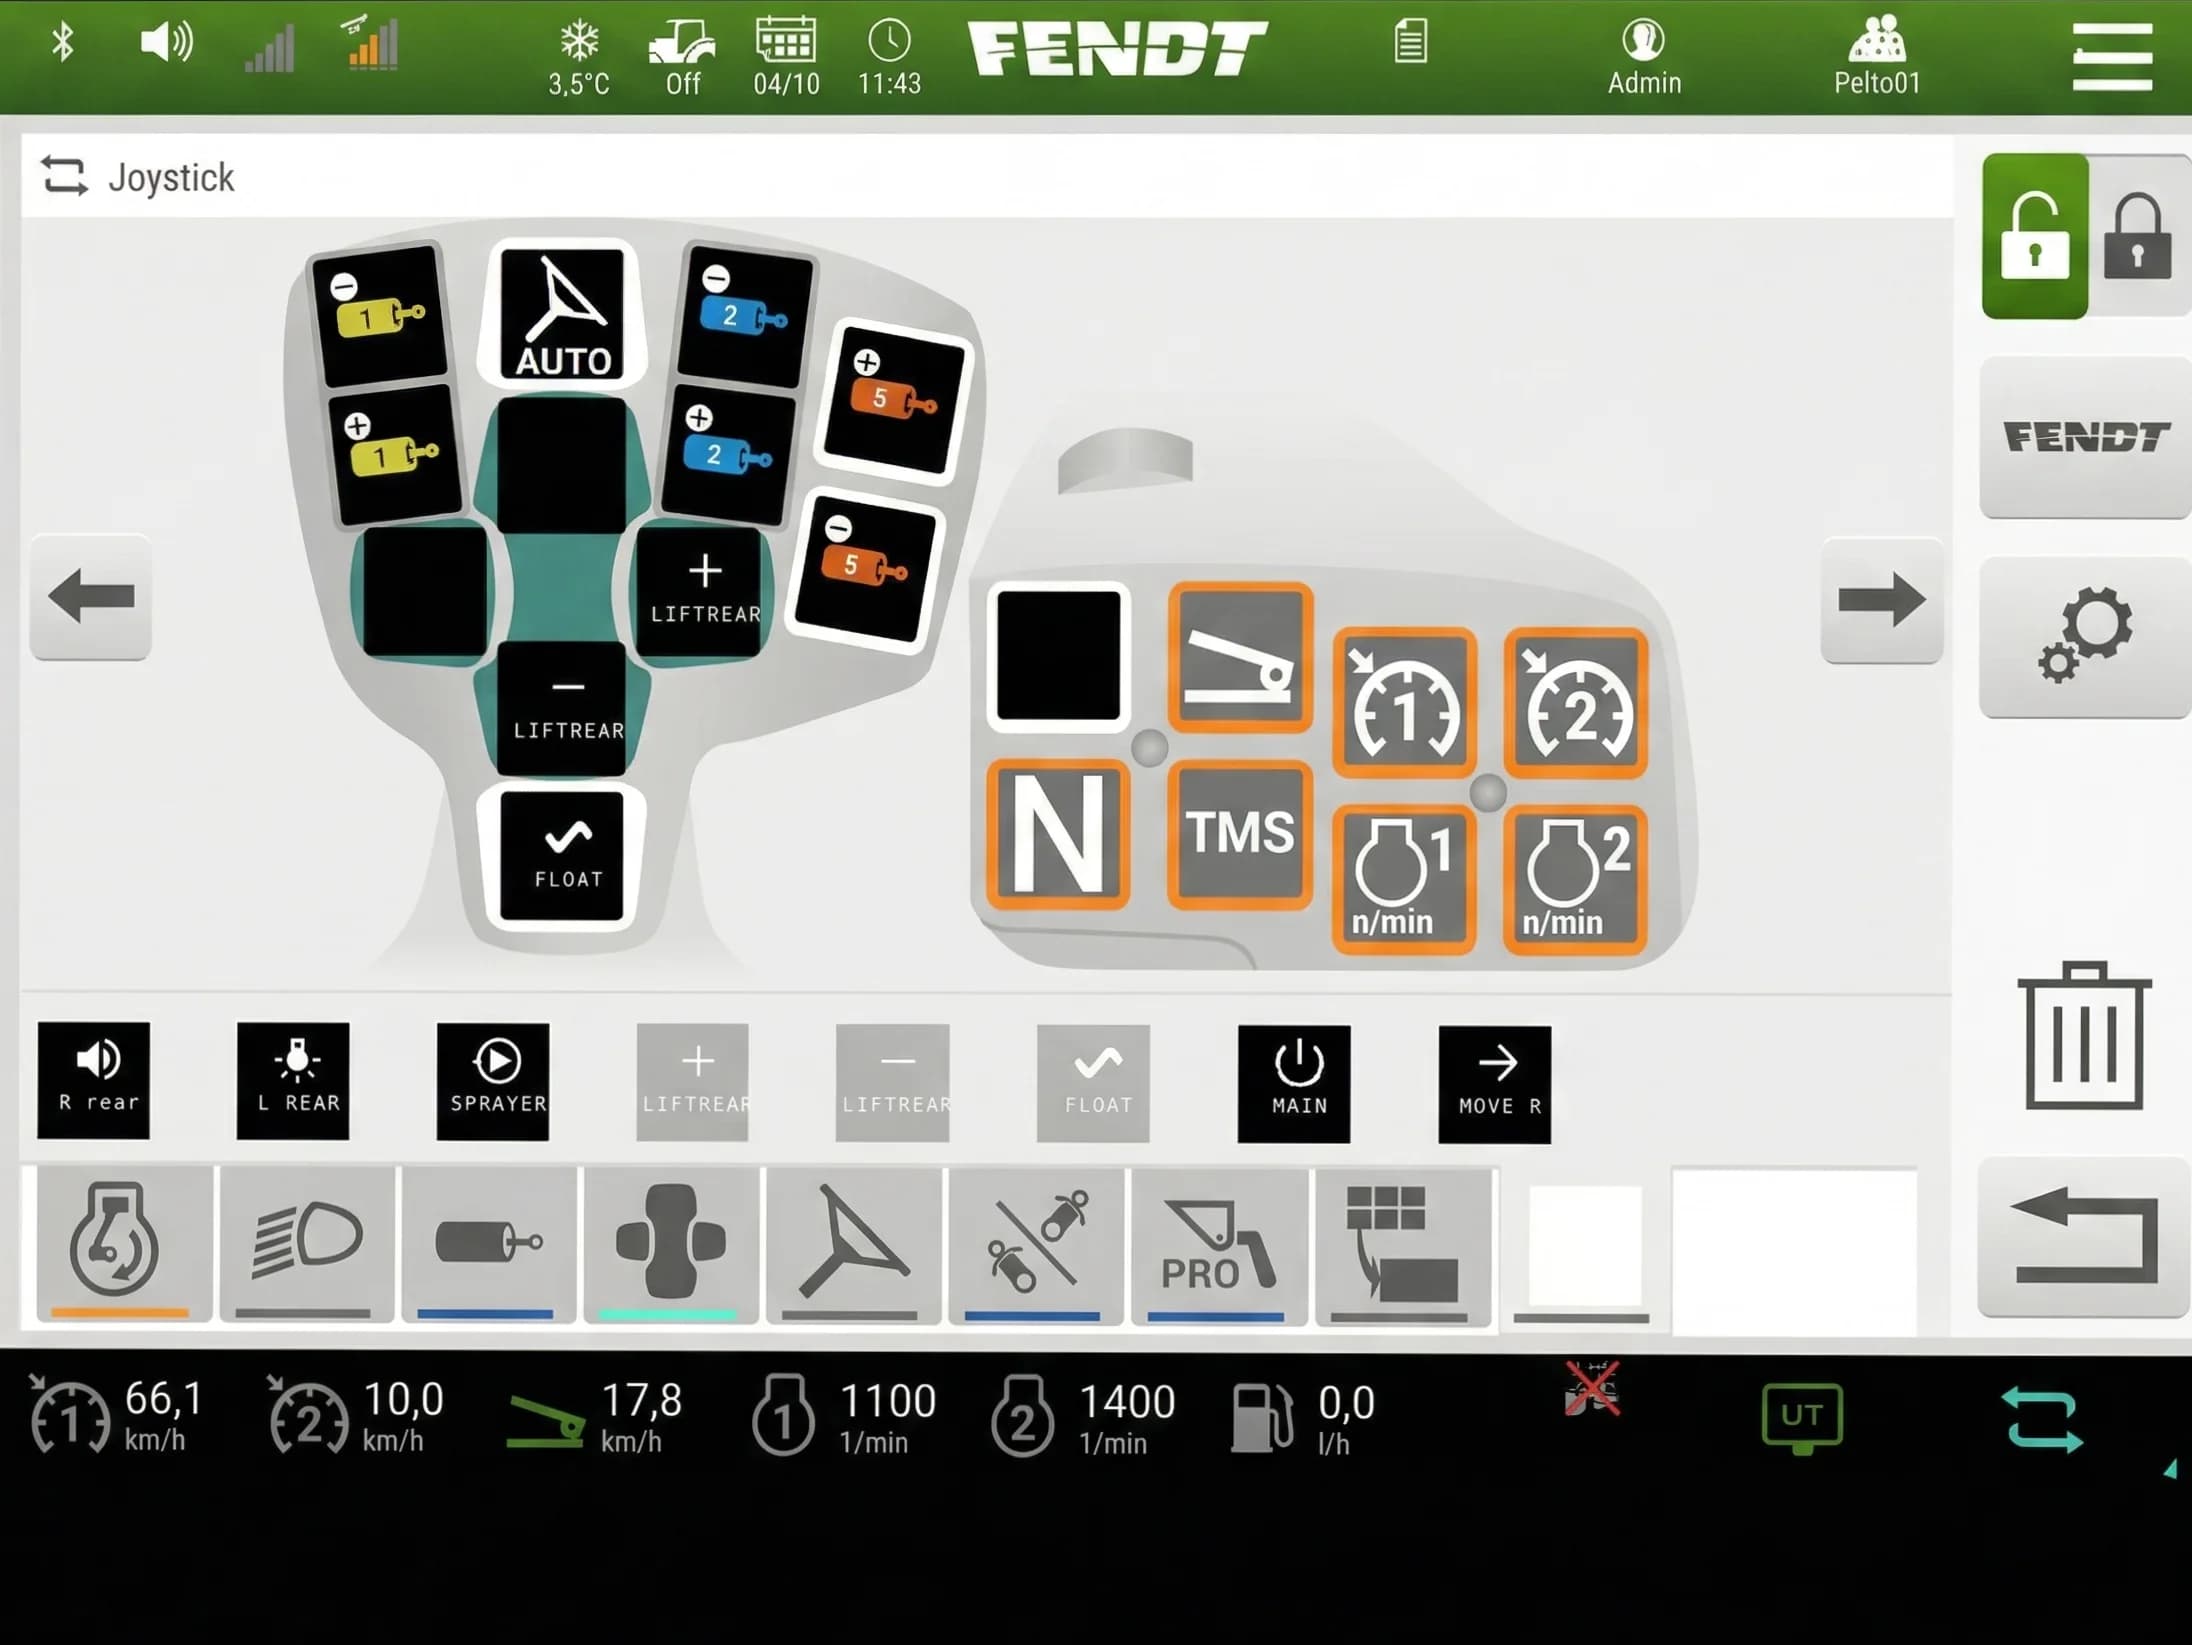
Same names and icons carry over to the joystick button assignments
See it in action
The actual screens you'll use — button editor, layout options, AUX-N assignment, and more.
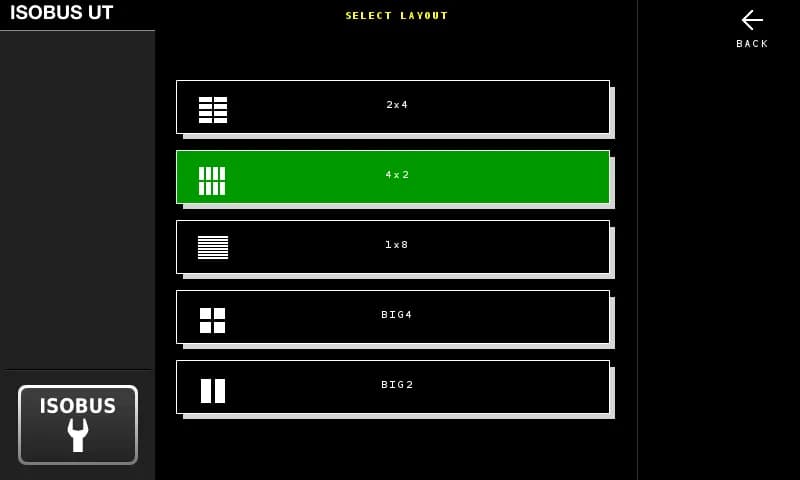
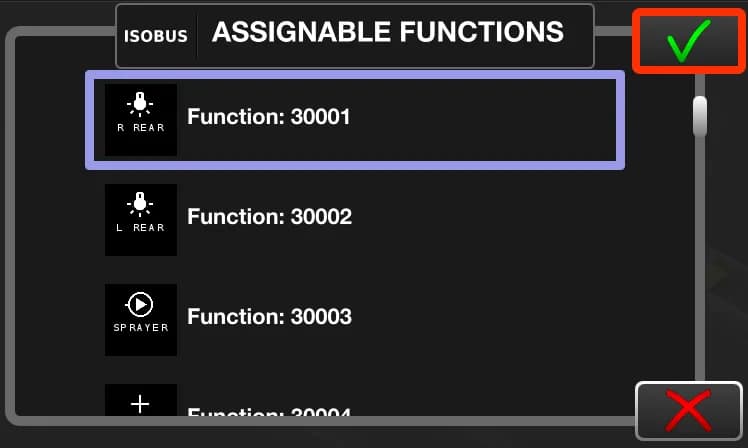
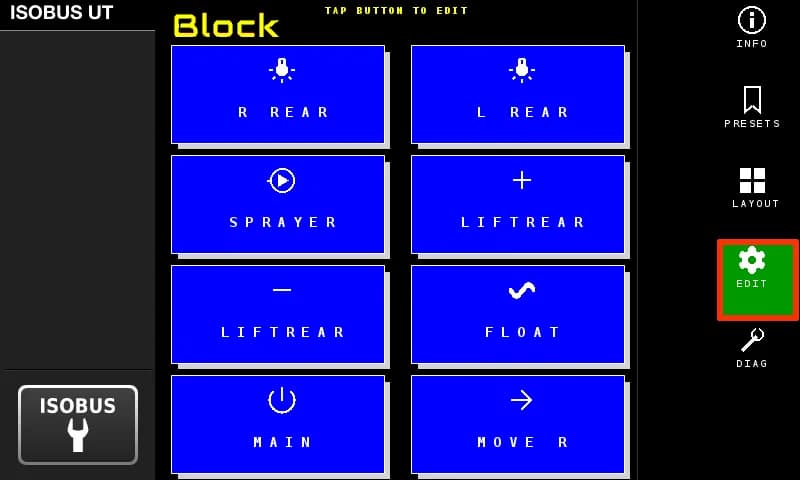
Name each button, pick an icon, choose outputs and mode
Built for the field. 8 relay channels, 10A each, 7–36V input. Set up everything from the tractor screen.
ISOBUS Native
Shows up on your Virtual Terminal. Works with any ISOBUS tractor — John Deere, Case IH, New Holland, Kubota, AGCO.
WiFi Built In
Test outputs, check status, update firmware. Connect with your phone — open a browser, no app needed.
12V and 24V
7–36V DC input. Any ISOBUS tractor, 12 V or 24 V system.
Professional Grade
Designed in Finland. Built for the field, not the bench.
| Supply voltage | 7–36V DC |
| Relay channels | 8 (NO, COM, NC per channel) |
| Max current | 10A per channel |
| Max switching voltage | 30V DC / 250V AC |
| Protection | Optocoupler isolation, power isolation |
| Enclosure | Rail-mount ABS housing (indoor use; requires weatherproof enclosure for outdoor installation) |
| Dimensions | 3.5 × 6.9 in (90 × 175 mm) |
| Weight | 1.1 lb (500 g) |
| Operating temperature | −22°F to +122°F |
| Warranty | 5 years |
Questions?
More from the ISOBUS Block platform
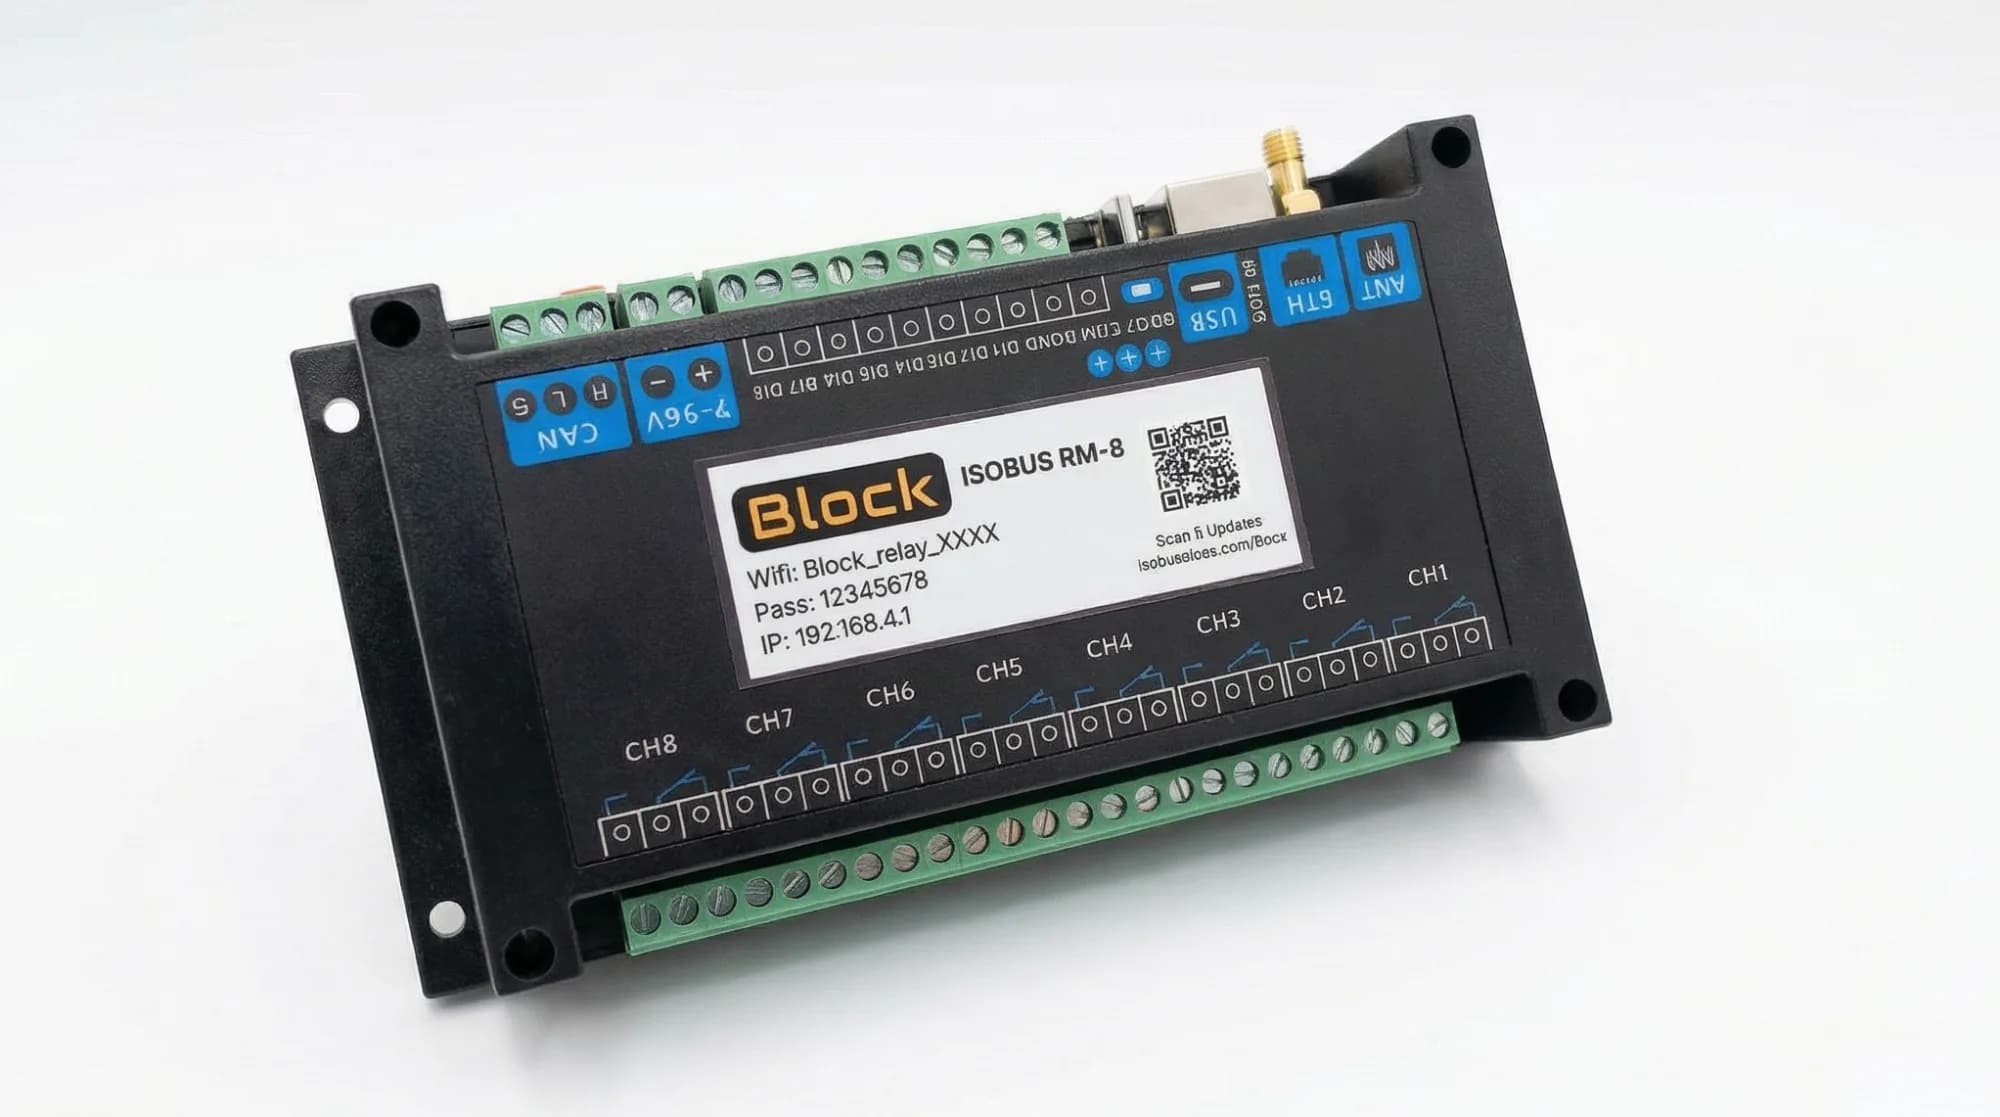
ISOBUS Block — 8-Channel Relay Module
8 × 10A relay outputs. Shows up on the tractor screen. Switch work lights, solenoids, and valves from AUX-N buttons.
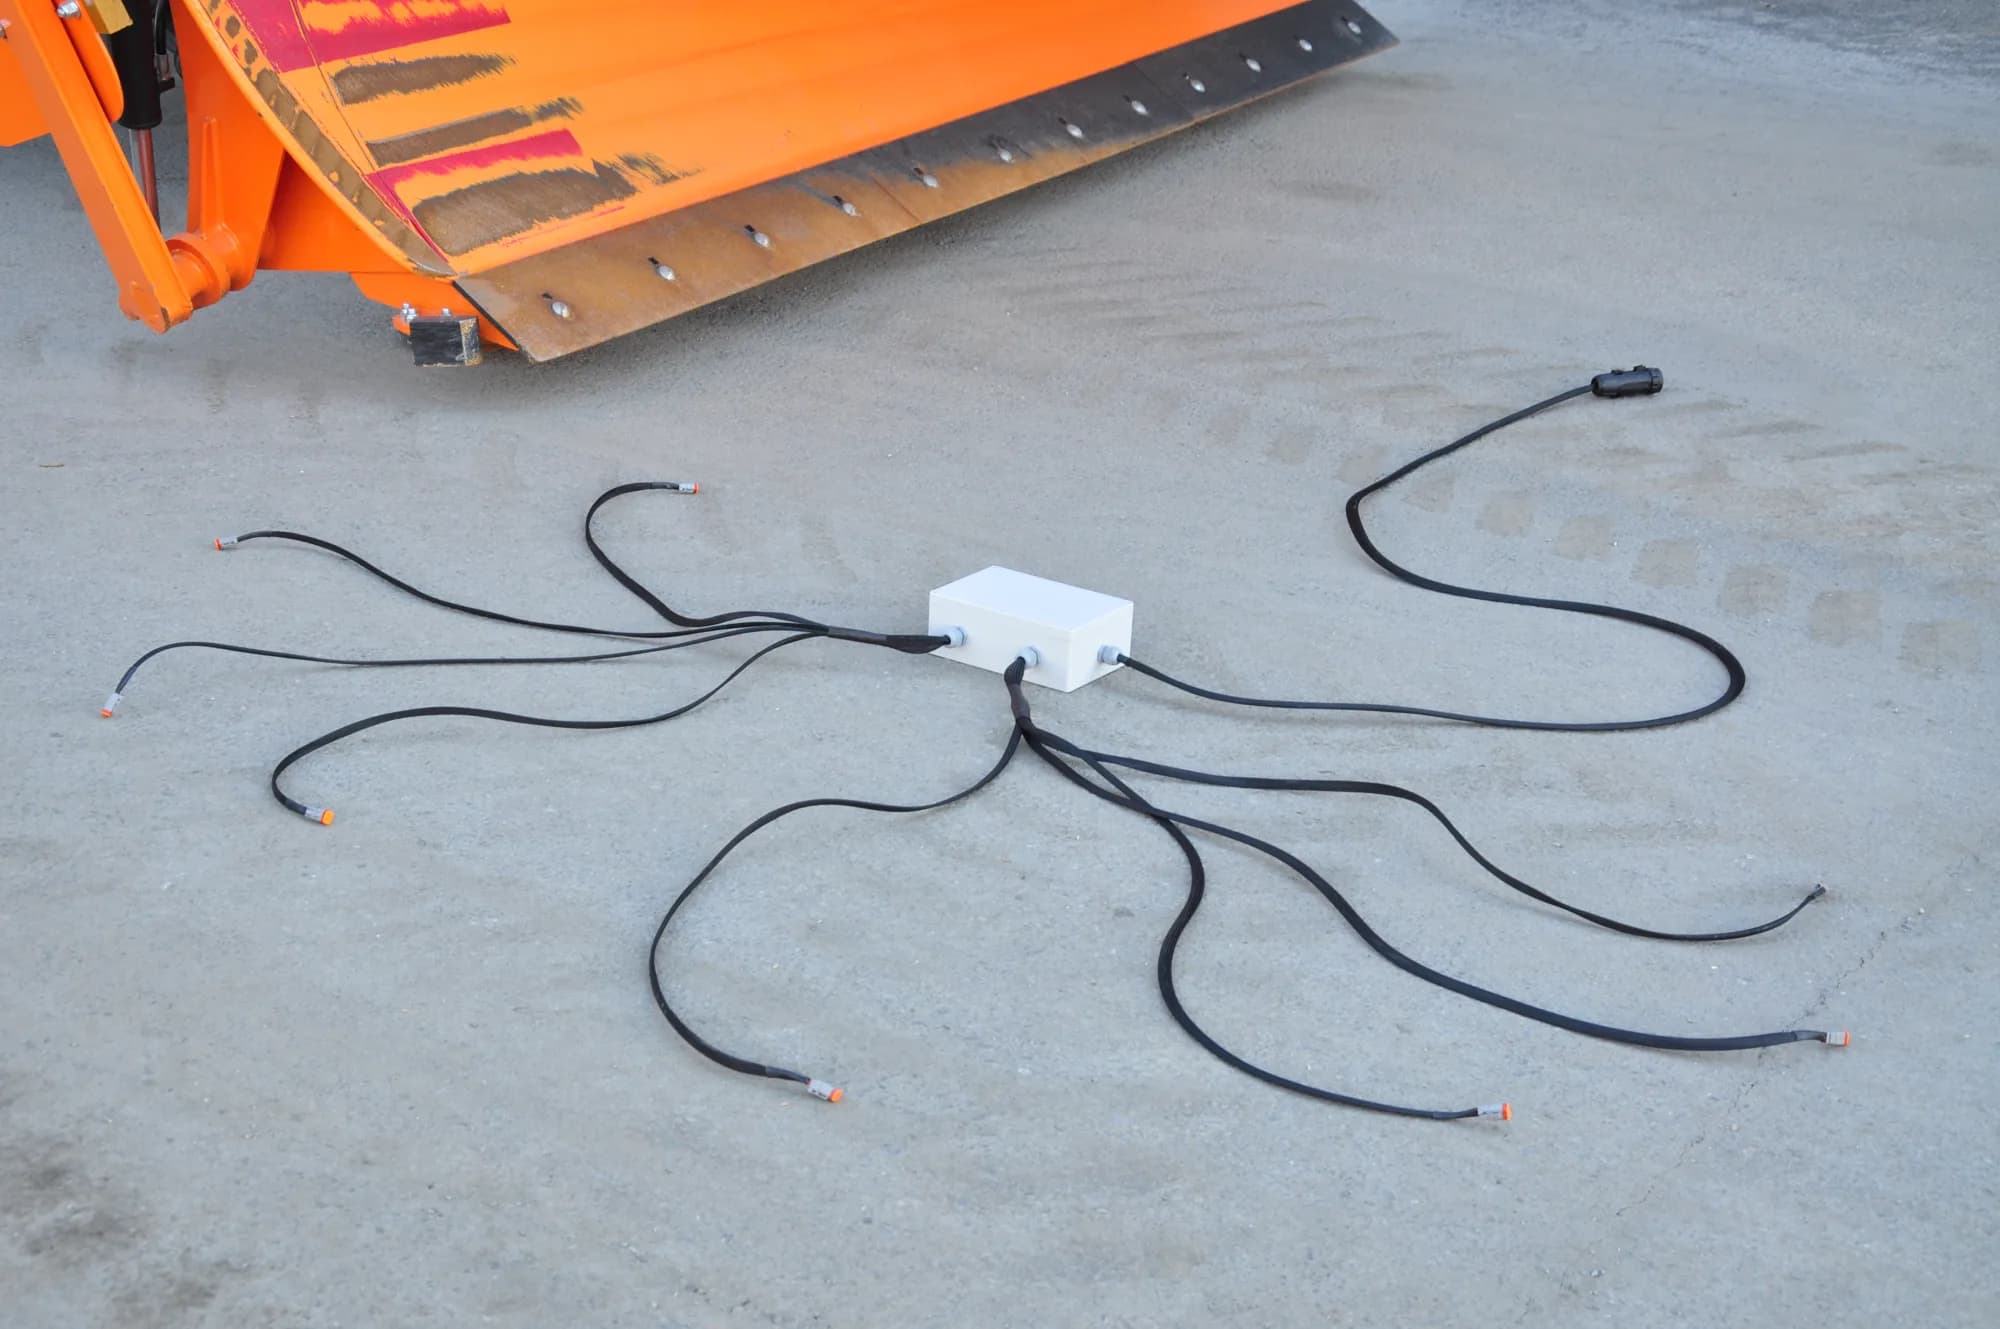
ISOBUS Block + Plug-and-Play Implement Kit
Module pre-mounted in a weatherproof box. One ISOBUS cable to the tractor, eight 2-pin Deutsch connectors out. Bolt it on, plug it in.