
Adding work lights to agricultural equipment usually means drilling holes, mounting toggle switches, and running wires through the cab. It works, but it leaves every tractor with a different switch panel wired to a different relay box.
With ISOBUS and AUX-N, you switch work lights from the joystick buttons and armrest switches already in the cab — the same ones you use for hydraulics. No cab modifications, no aftermarket switch panel. The button assignments live in the tractor; the relay module switches the load.
The Traditional Approach
A typical work light installation involves:
- Toggle switches mounted somewhere in the cab (often drilled into the dashboard or console)
- Relay boxes hidden behind panels
- Wiring routed through the cab to power sources
- Fuses added to the electrical system
This approach works, but each tractor ends up with its own set of switches, its own relay box, and its own wiring behind the dashboard.
The ISOBUS Approach
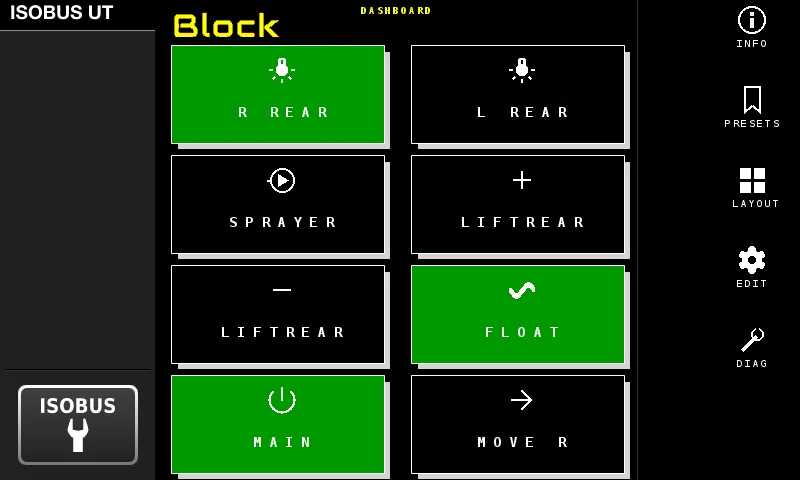
Instead of adding switches to the cab, ISOBUS Block uses the tractor's ISOBUS system to switch relay outputs. It's part of a broader family of ISOBUS terminal solutions that can control anything from hydraulic valves to work lights through the tractor's existing screen:
- No cab modifications—the module mounts on the implement or in an equipment box
- Control from the Virtual Terminal—the tractor's built-in screen shows relay status and provides soft key control
- AUX-N—assign work light functions to existing joystick buttons or armrest switches
- Assignments stored in the tractor—your button layout persists even when equipment is disconnected
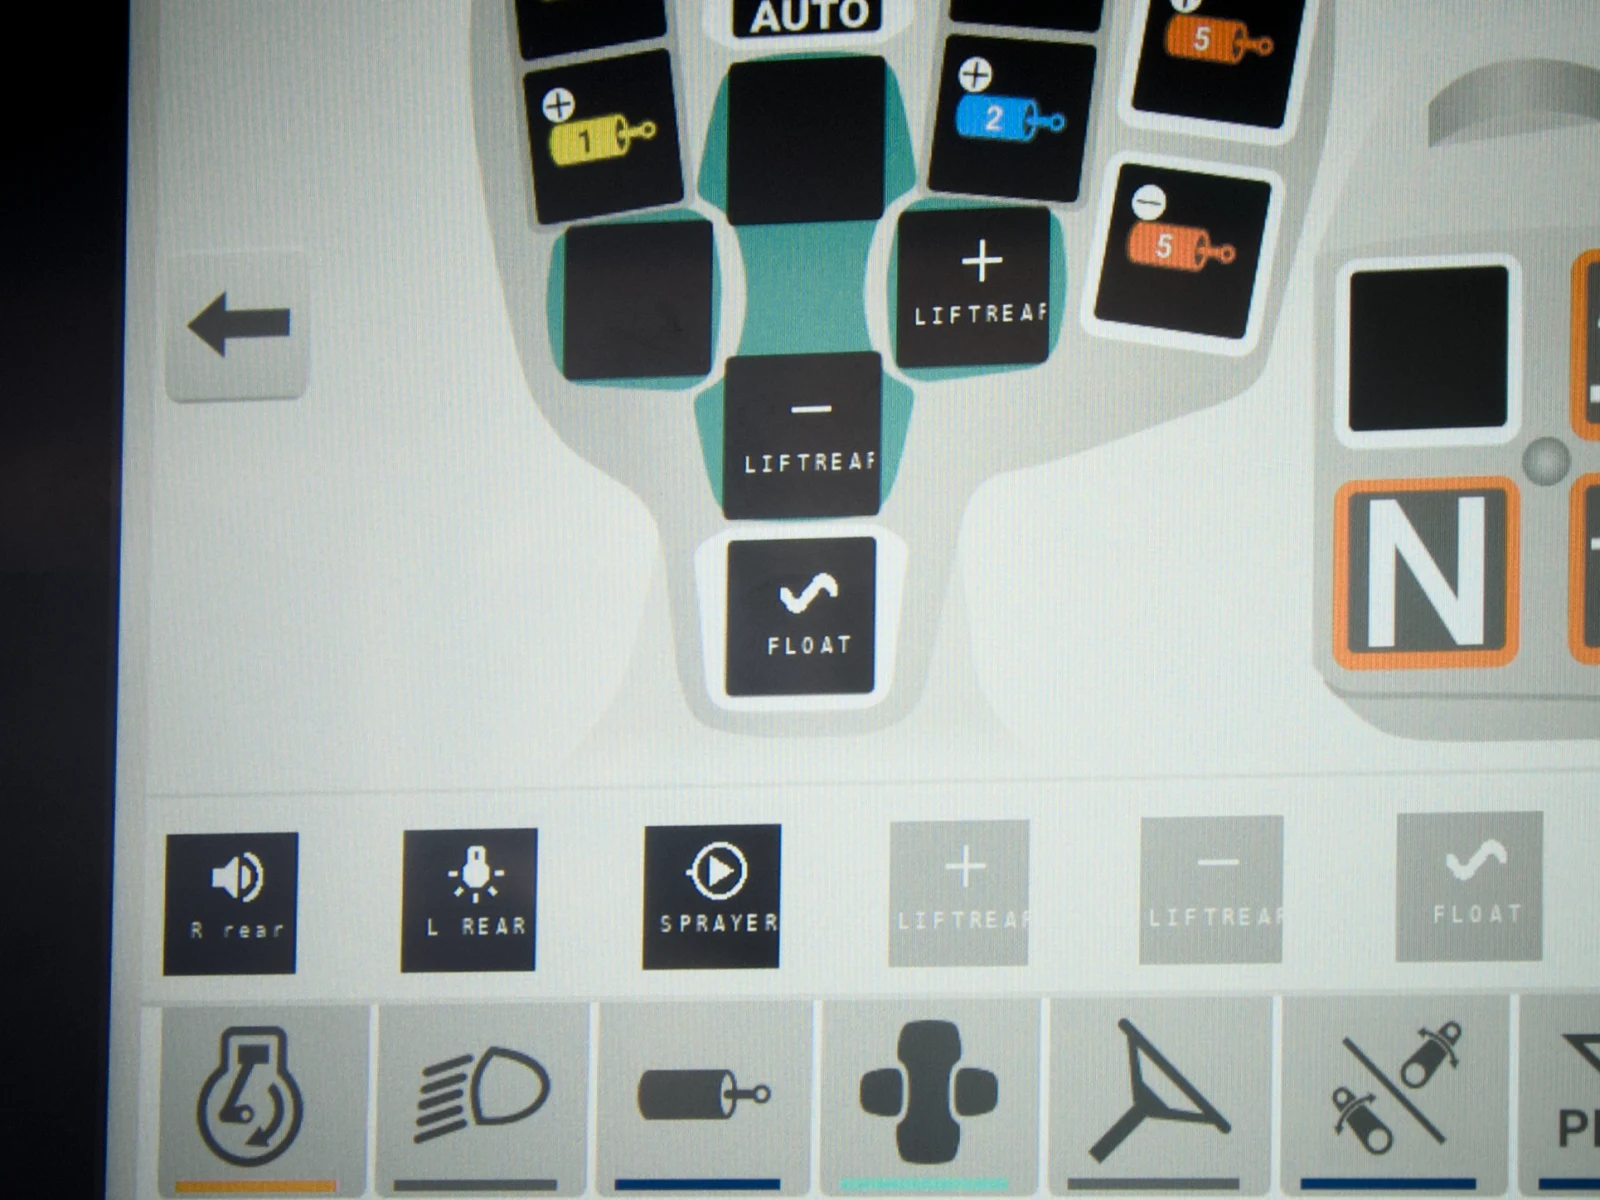
Press an armrest button, a CH1–CH8 relay switches, the work lights come on.
Simple Wiring
The electrical side is straightforward. Each relay channel has COM, NO (normally open), and NC (normally closed) terminals. For work lights, you wire the power supply through the relay so that activating the relay completes the circuit to the lights.
Each relay channel handles up to 10A at 30V DC, which covers most LED and halogen work lights. For higher-draw lights, the relay can switch a secondary relay or contactor rated for your load.
The ISOBUS connection is equally simple—one standard cable to the tractor's implement connector, which provides both CAN communication and power for the module.
Configuring Work Lights
Configuration happens entirely on the tractor's Virtual Terminal display. No separate software or apps required.
For work lights, toggle mode is the right choice. Press once to turn lights on, press again to turn off. The lights stay on until you toggle them off — unlike momentary mode, which only activates while you hold the button.
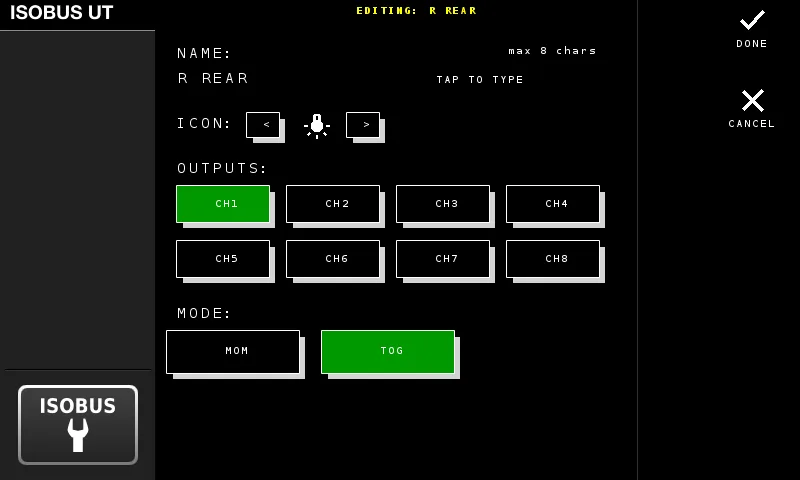
The Virtual Terminal shows which channels are assigned to each input and whether they're set to momentary or toggle mode.
AUX-N: Using Tractor Controls
Instead of adding switches, you assign work light functions to the tractor's existing controls.
Most modern tractors with ISOBUS have an AUX-N assignment menu. The ISOBUS Block publishes 8 functions (one per relay channel) that appear in this menu. You simply assign the work light function to your preferred button—a joystick button, armrest switch, or any available AUX-N input. For the full walkthrough of the AUX-N assignment process, including per-brand menu navigation and troubleshooting, see the ISOBUS AUX-N Complete Guide.
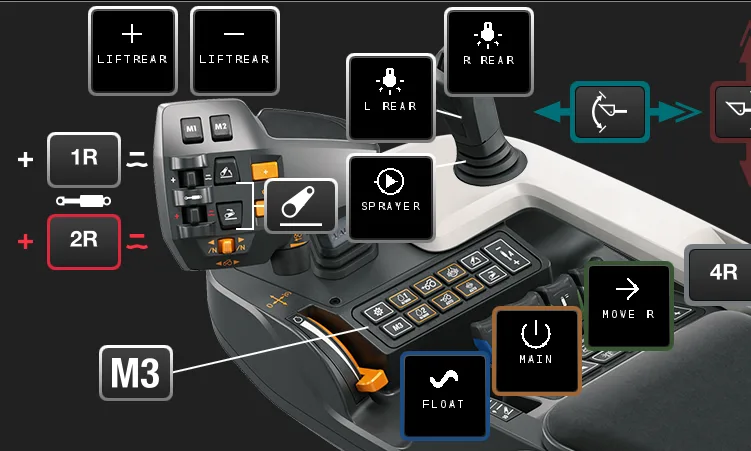
The tractor stores these assignments, not the implement. This means your preferred button layout persists across power cycles and even when the equipment is disconnected.
Grouped Outputs: One Button, Multiple Functions
You can group multiple outputs on a single input.
Example: You have a front loader with a third-function hydraulic attachment and a work light that illuminates the work area. Instead of separate controls, group them:
- Input 1 activates Channel 1 (diverter valve) + Channel 2 (work light)
One button press switches to the third function AND turns on the work light. Press again, both turn off.
Toggle switch installations can't do this without additional relay logic. With grouped outputs, it's a single setting on the VT.
Why This Approach Works
- Controls already in your hand — you assign work lights to the armrest and joystick buttons you already use.
- No switch panel in the cab — nothing to drill, nothing to run through the firewall.
- Button assignments live in the tractor — the AUX-N mapping persists across power cycles and disconnects.
- Change the setup from the screen — reassign a button or regroup channels without touching a wire.
Frequently Asked Questions
What is AUX-N?
AUX-N (Auxiliary Input Type N) is an ISOBUS standard that lets you assign implement functions to your tractor's built-in controls—joystick buttons, armrest switches, and other inputs. Instead of adding aftermarket switches, you use the controls already in your cab.
Do I need to drill holes in my cab?
No. The ISOBUS Block mounts on the implement or in an equipment box outside the cab. You control everything through the tractor's existing ISOBUS display and buttons. No holes, no extra switches, no cab modifications.
Does this work with LED work lights?
Yes. LED work lights typically draw 1-4A, well within the 10A capacity of each relay channel. You can run multiple LED lights on a single channel if the combined draw stays under 10A.
Do all tractors support AUX-N?
Most modern tractors with an ISOBUS Virtual Terminal support AUX-N. This includes John Deere, Fendt, Case IH, New Holland, Massey Ferguson, Claas, and others. Check your tractor's ISOBUS specifications or look for an AUX-N assignment menu in the Virtual Terminal settings.
What if my work lights draw more than 10A?
Use the ISOBUS Block relay to switch a larger relay or contactor rated for your load. The module's relay handles the control signal; the external relay handles the high current.
Can I control multiple light zones independently?
Yes. Each of the 8 relay channels operates independently. You could have front work lights on one channel, rear lights on another, and beacon lights on a third—each with separate controls.
Do I need to configure anything on the tractor?
Only the AUX-N button assignments, which is done through the tractor's standard menu. The ISOBUS Block handles the relay control logic—the tractor just needs to know which button activates which function.
Will the settings survive a tractor restart?
Yes. Your configuration and button assignments stay saved. The only thing that resets is the lights themselves—they start off when you power up, just like the tractor's own lights.
Resources
- AUX-N Configuration Guide—detailed documentation on setting up AUX-N functions
- Input Modes Explained—when to use momentary vs. toggle mode
- I/O Mapping—how to configure grouped outputs
- Front Loader Third Function—complete use case with diverter valve and work light integration
Looking for a clean, professional way to add work lights to your equipment? Learn more about ISOBUS Block or browse the FAQ for quick answers on which kit to choose and what installation involves. Contact us with questions about your specific application.