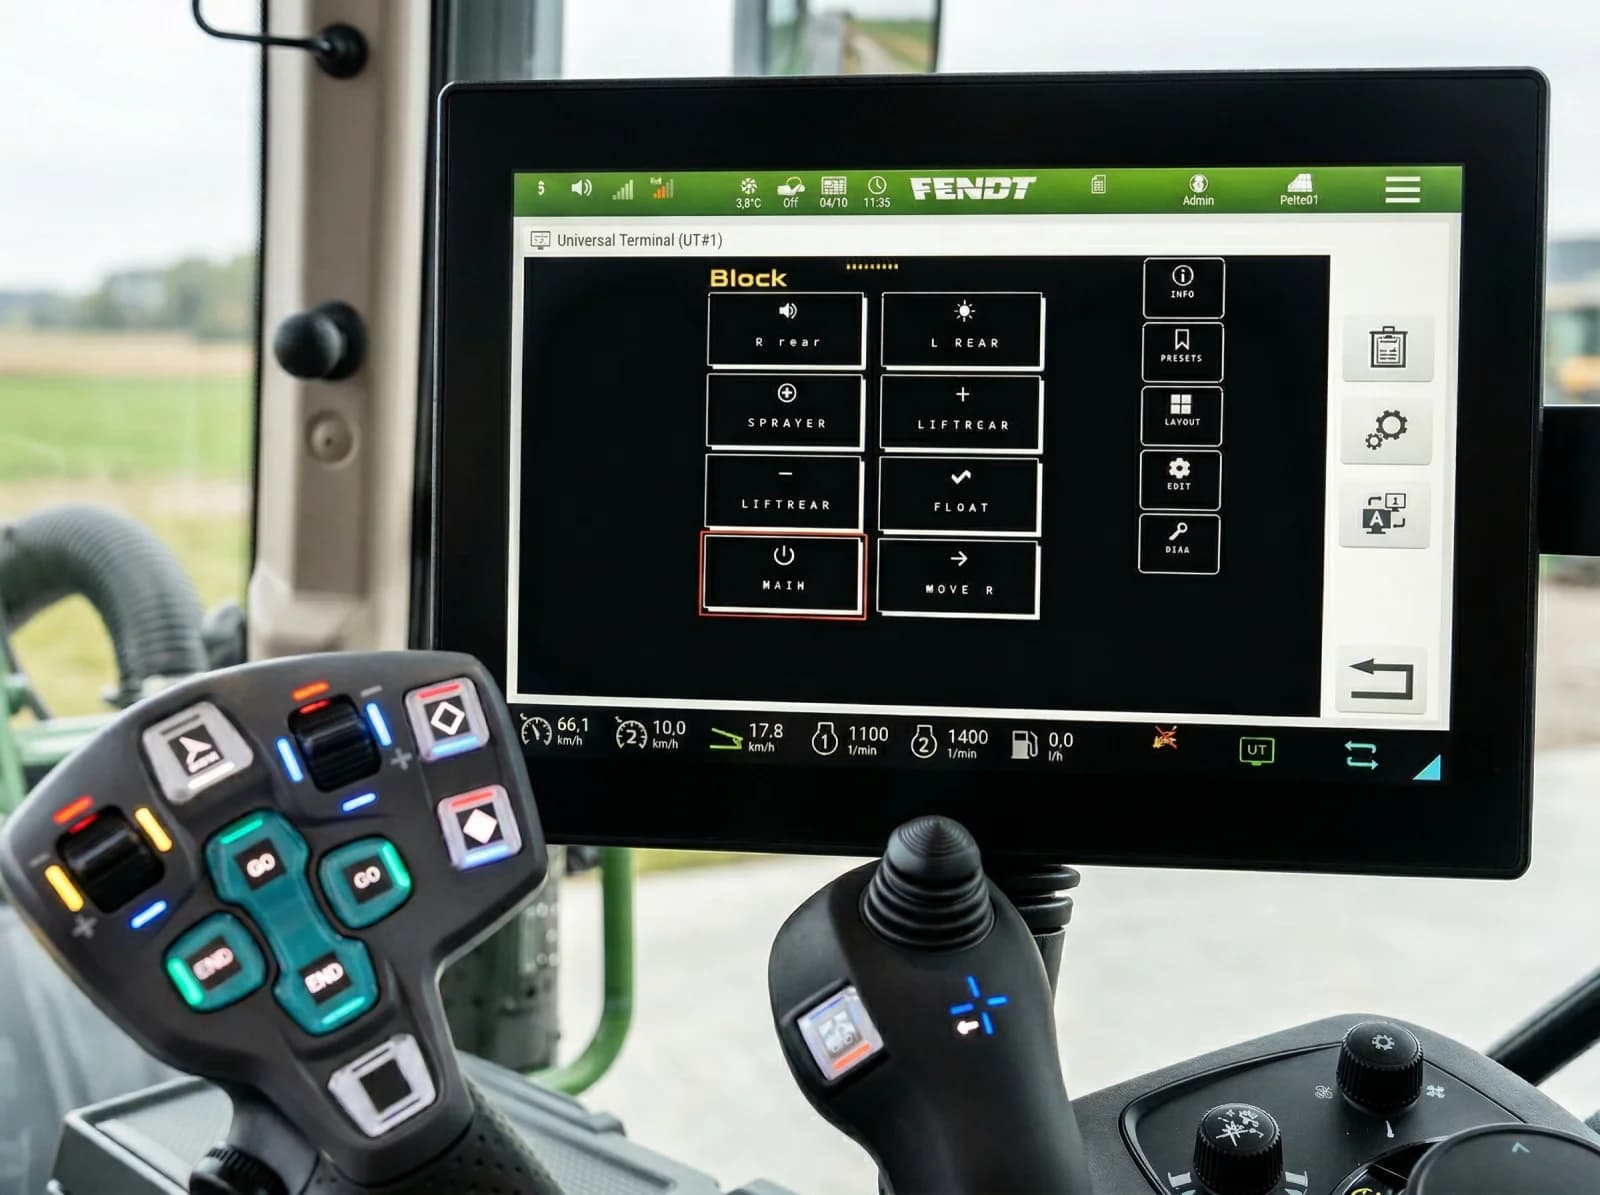
In short: ISOBUS Block puts a bale wrapper's load, wrap and unload functions on the tractor's joystick and ISOBUS screen, by switching the same solenoid valves the wrapper's control box switches. One relay channel per solenoid, named on the terminal, assigned to joystick buttons through AUX-N. It moves the manual functions only. Automatic wrap cycles, wrap counting and film-break detection stay with the wrapper's own controller, or go away with it.
Bale wrapper ISOBUS control is a common request from contractors. The tractor has a joystick, an armrest full of programmable buttons and a terminal. The wrapper brings its own small monitor with rubber buttons, clipped somewhere in the cab, with its own cable back to the wrapper. Run three wrappers and you have three boxes and three button layouts to remember. This guide moves the manual functions (load, wrap, unload) onto the tractor's joystick and ISOBUS screen. The parts for this job: Replace the bale wrapper control box.
First, find out what the wrapper's box does
Check the wrapper's wiring diagram before you buy anything. The answer decides whether this works.
| What the box does | What ISOBUS Block can do |
|---|---|
| Buttons switch solenoid valves on the wrapper directly | Replace the box. Each relay channel switches one solenoid. |
| A controller runs an automatic cycle, counts wraps, watches the film | Not replace it. Block has no wrap cycle, counter or film sensing. |
| Manual levers on a hydraulic valve, no solenoids | Nothing to switch yet. The valve side has to change first, and that is a hydraulic job. |
Some wrappers sit in the middle: a monitor that runs an automatic cycle and also has manual buttons for each function. Block only switches outputs on and off. If you keep the wrapper's controller for the auto cycle and want the manual functions on the joystick too, the same solenoid ends up with two sources. Ask the wrapper's dealer how the controller drives its valves before you tap into those circuits.
If your wrapper is in the first row, you are swapping a switch box for the tractor's own controls, the same job as in Replace the Cab-Mounted Switch Box with ISOBUS AUX-N.
On an ISOBUS tractor, ISOBUS Block puts a bale wrapper's manual functions on buttons the tractor already has, with no wrapper control box in the cab. Each solenoid valve on the wrapper, such as arm up, wrap or tip, goes on one relay channel. You switch them from AUX-N buttons on the joystick or armrest. If your terminal has no AUX-N, the same buttons work from the tractor screen. The wrapper's hydraulics stay as they are.
ISOBUS Block runs on any ISOBUS tractor terminal and has been manually tested on all major brands, with customers running it daily on Fendt, Valtra, John Deere, Case IH, CLAAS, New Holland and Massey Ferguson tractors and on the AmaTron 4 from Amazone, Jaltest and Arag add-on terminals.
Plan the channels before you wire
Count solenoids, not functions. "Load" on a wrapper is often two movements, arm up and arm down, and each direction has its own solenoid coil. Each coil gets its own relay channel. The 8-channel module gives you CH1 to CH8, each switching up to 10 A.
Here is an example plan for a wrapper with a loading arm, a wrapping drive and a tipping table. Your valve block decides the real count.
| Channel | Button name | Solenoid | Mode |
|---|---|---|---|
CH1 | ARM UP | Loading arm, raise | MOM |
CH2 | ARM DOWN | Loading arm, lower | MOM |
CH3 | WRAP | Wrapping drive | MOM |
CH4 | TIP | Table tip, unload | MOM |
CH5 | TIP BACK | Table return | MOM |
CH6 to CH8 | Spare | Work light, beacon, or the next function | Your choice |
MOM keeps the relay on only while you hold the button. That suits anything that moves: you watch the arm or the table and let go to stop it. TOG is press on, press off. It suits a work light or a beacon. Wrapping with TOG means the drive runs until you press again, and you count the wraps yourself.
If a function needs two solenoids energized together, for example a main valve plus the function valve, one button can switch both channels. You set that on the terminal, no extra wiring. Button names are limited to 8 characters, so plan short names like the ones above.
Wiring: one module per wrapper, or one module on the tractor
There are two sensible layouts. Both use the same module and the same relay wiring: supply to COM, NO to the solenoid, solenoid return to ground. The solenoid valve wiring guide covers that circuit in detail.
One module on each wrapper
The module sits on the wrapper in a weatherproof enclosure you supply. The bare module is not weatherproof, so it needs that box outdoors. An ISOBUS cable runs from the module to the tractor's rear external ISOBUS connector, using the External Connector Kit at the tractor end. Power for the module and the solenoids comes through that connector.
The setup travels with the wrapper. Button names, icons and modes live in the module and come back on any ISOBUS tractor it plugs into. Three wrappers means three modules. Each module saves its joystick assignments for each tractor terminal it has met and offers them back when you hook up again, so swapping wrappers does not mean assigning the buttons from scratch.
One module on the tractor, a plug for each wrapper
The module stays on the tractor: in the cab on the in-cab ISOBUS connector, or in a weatherproof box on the chassis fed from the rear connector. The relay outputs run to a multi-pin socket at the back of the tractor. Each wrapper gets a matching plug wired to its own solenoids.
Wire all three plugs to the same pin map and the same buttons work for every wrapper: CH1 is always arm up, CH3 is always wrap. If the wrappers differ, give each one a preset on the module and load it when you hook up. The joystick assignments stay put when you change preset: the same joystick button now runs what that preset sets for it. A real build of this layout, with a 15-pin socket at the rear of a Fendt, is shown in Add relay outputs to a modern tractor.
The socket, plugs and cable to the rear are your own parts. Size the cable and fuses for the solenoid loads you plan to switch. With the module in the cab, feed COM from a +12 V or +24 V source such as the battery.
Assign the wrapper functions to joystick buttons
Setup happens on the tractor terminal. No laptop, no app.
- Plug the module into the tractor's ISOBUS connector. The Block dashboard appears on the terminal.
- Press the
EDITsoftkey. The buttons turn blue. - Tap a button and set its
NAME:(ARM UP), its icon, which channel it switches underOUTPUTS:, and itsMODE:(MOMorTOG). - Repeat for each function, then exit edit mode to save.
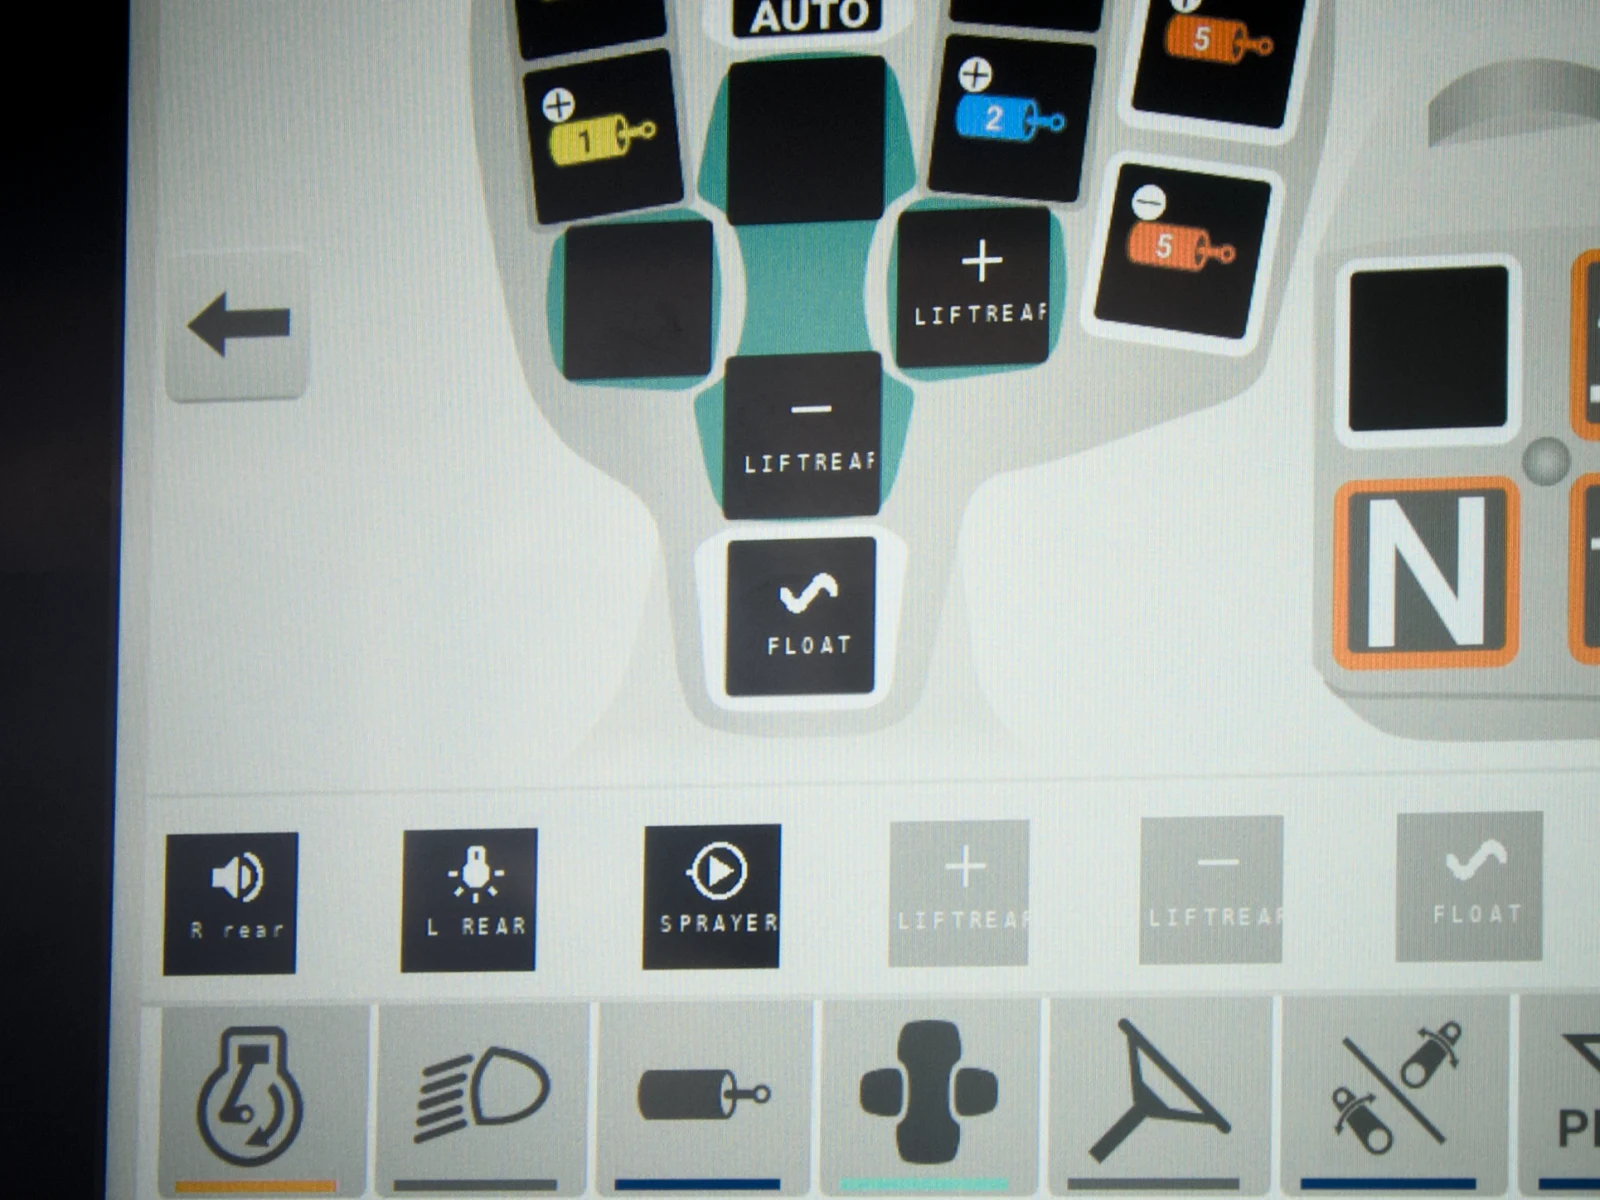
- Open the tractor's AUX-N assignment menu. Your wrapper functions are listed by the names you typed. Drop each one onto a joystick or armrest button.
The tractor stores the AUX-N mapping across power cycles. The buttons stay on the terminal screen too. The ISOBUS AUX-N complete guide explains how the assignment menu works on different terminals.
What stays the same on the wrapper
Only the control side moves. On the wrapper itself:
- The hydraulic hoses, the valve block and the solenoid coils stay as they are.
- The cylinders and the wrapping drive move on the same oil as before.
- The film dispenser is untouched.
- If you keep the wrapper's controller for its automatic cycle, it keeps doing that job.
What changes is where you press. The rubber-button monitor comes out of the cab, or stays only for the functions Block does not cover.
What you need
- An ISOBUS tractor with a Virtual Terminal. For joystick control it also needs AUX-N. The ISOBUS compatibility guide has the checklist.
- The ISOBUS Block 8-channel module.
- The In-Cab or External Connector Kit for the tractor end, depending on the layout. Contacts ship loose and you crimp them.
- An ISOBUS cable to the module, your own or one of the cut lengths offered with the module.
- A weatherproof enclosure for any module mounted outside the cab.
- Wire, fuses and, for the shared-module layout, the socket and one plug per wrapper.
Setup, support and delivery
- Setup: 5 to 10 minutes on the tractor terminal, naming the buttons and picking their icons. Nothing to install on a computer.
- First use: the same day the module arrives.
- Support: on WhatsApp and by email, answered by the people who design and build the module. On WhatsApp a reply typically comes within minutes during the working day. Every message gets an answer within one business day.
- Warranty: 5 years.
- Shipping: free express shipping. Orders ship the next business day.
Frequently asked questions
What is the easiest way to control a bale wrapper from the tractor joystick?
On an ISOBUS tractor, wire the wrapper's solenoid valves to the relay channels of ISOBUS Block. Name each function on the tractor screen and assign it to a joystick button in the AUX-N menu. This covers the manual functions only: an automatic wrap cycle stays with the wrapper's own controller.
Can I control a bale wrapper from an ISOBUS joystick?
Yes, with ISOBUS Block, if the wrapper's functions are switched by solenoid valves. Each solenoid goes on a relay channel, and AUX-N puts each function on a joystick or armrest button.
Does ISOBUS Block replace the bale wrapper's controller?
No, ISOBUS Block replaces the wrapper's manual buttons, not its controller. It switches outputs on and off. Automatic wrap cycles, wrap counting and film-break detection belong to the wrapper's own controller.
Can one module run three bale wrappers?
Yes. Keep the module on the tractor and fit each wrapper with a plug wired to the same pin map. The joystick buttons then work the same way on every wrapper. If the wrappers need different layouts, give each one a preset.
How many relay channels does a bale wrapper need?
One per solenoid coil. A wrapper with a two-way loading arm, a wrapping drive and a tipping table in two directions uses five, which leaves three spare on the 8-channel module.
Do I configure the wrapper buttons over WiFi?
No. Names, icons, channels and modes are set on the tractor terminal only. The module's WiFi is for diagnostics, output testing and software updates.
What if I get stuck during the install?
Message ISOBUS Block support on WhatsApp or by email. The people who design and build the module answer, and on WhatsApp a reply typically comes within minutes during the working day. A photo of the wiring or the screen with your question is enough to start. If your terminal ever does not show the module, we sort it out with you.
Want the wrapper's load, wrap and unload on your joystick? ISOBUS Block gives you 8 relay outputs you wire to the solenoids and control from the tractor's screen and AUX-N buttons.