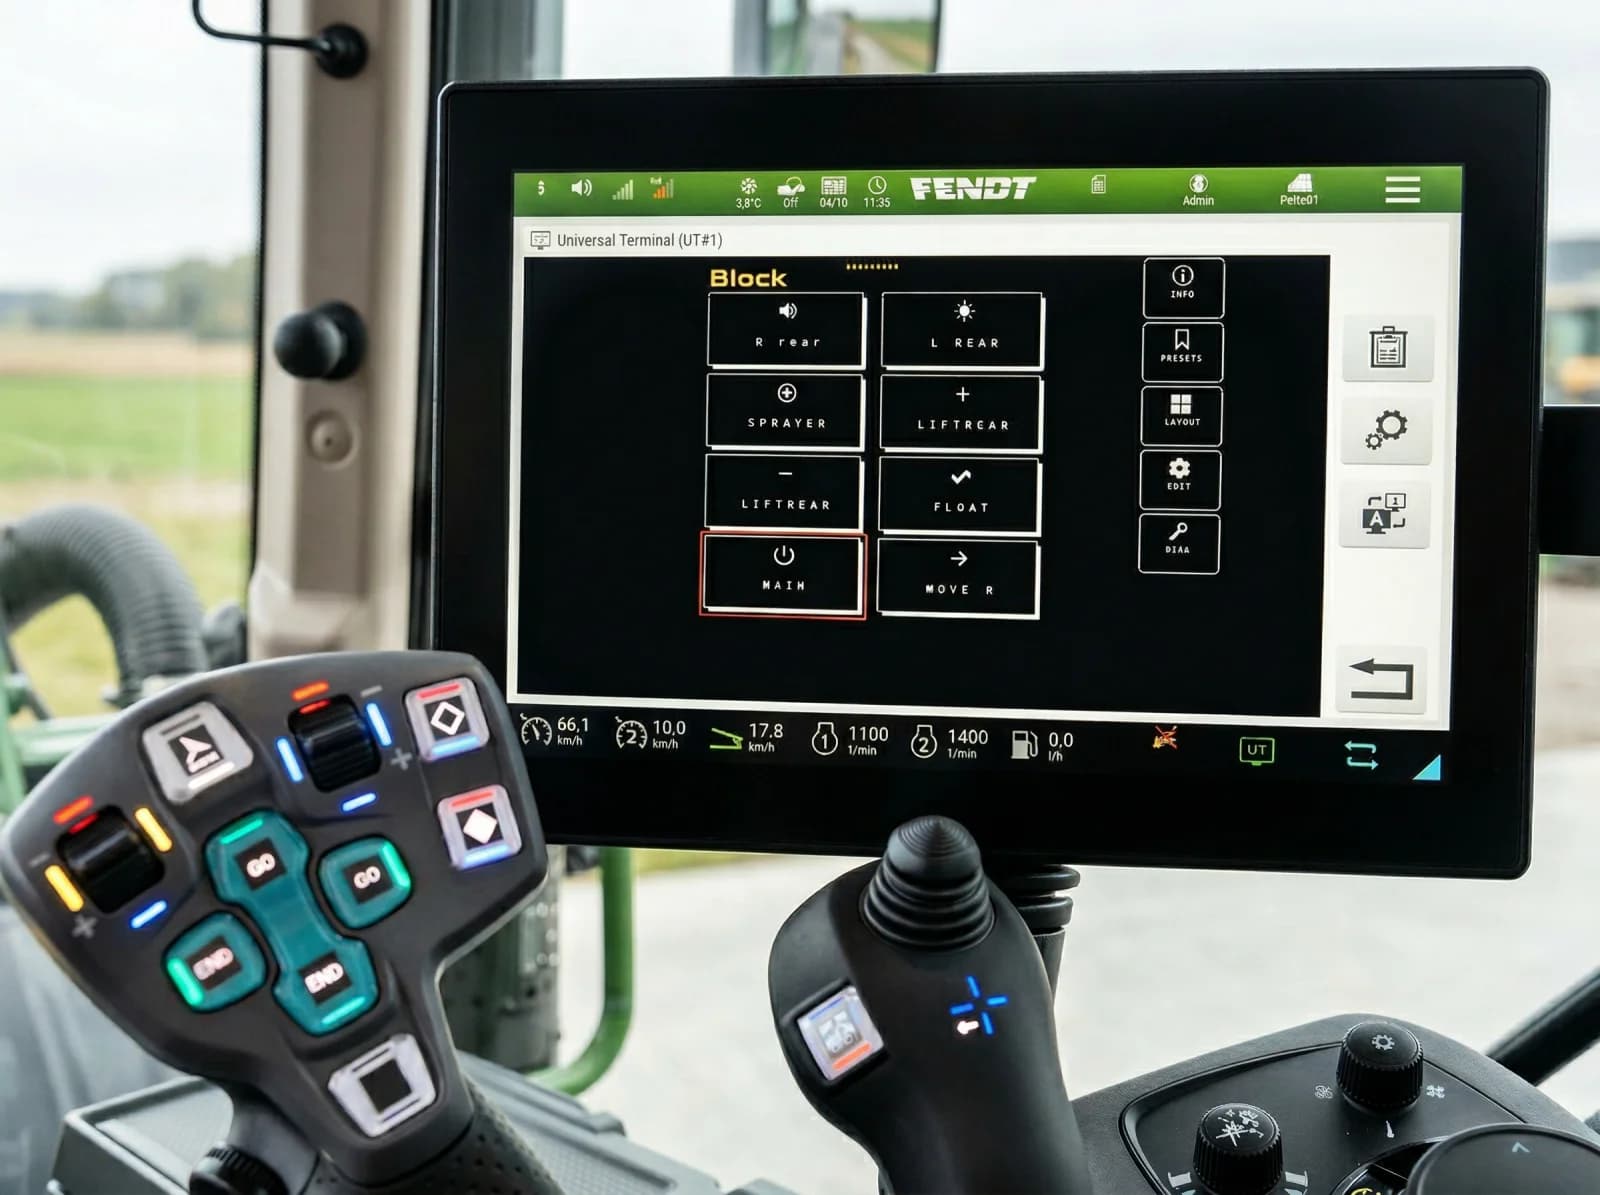
In short: Wire each cylinder direction solenoid and the pump to its own relay channel on ISOBUS Block, then assign each channel to an armrest button through AUX-N. Set the cylinder valves to MOM, so a cylinder moves only while you hold the button, and the pump to TOG. The implement's own joystick comes out of the cab. Only the control side changes.
A lot of implements ship with their own external joystick. It bolts somewhere in the cab, runs a loom back to the implement, and switches that machine's solenoid valves and pump. It works, but it leaves you with a second control in the cab, a second loom to route, and a layout that has nothing to do with the buttons your hands already know.
You can pull that joystick out entirely. Wire the implement's solenoid valves and pump to an ISOBUS relay module, map each function onto your tractor's own armrest buttons over AUX-N, and the whole machine runs from the controls you already use. This post walks through how to replace an implement joystick with ISOBUS AUX-N: what gets wired where, what AUX-N actually does, and what stays untouched.
The Setup You Start With
Take a typical case: a vineyard implement with several hydraulic cylinders, each driven by an electric solenoid valve, plus a hydraulic pump. The implement came with its own joystick. Each lever or button on that joystick energises a solenoid, out and in for each cylinder, and a switch runs the pump.
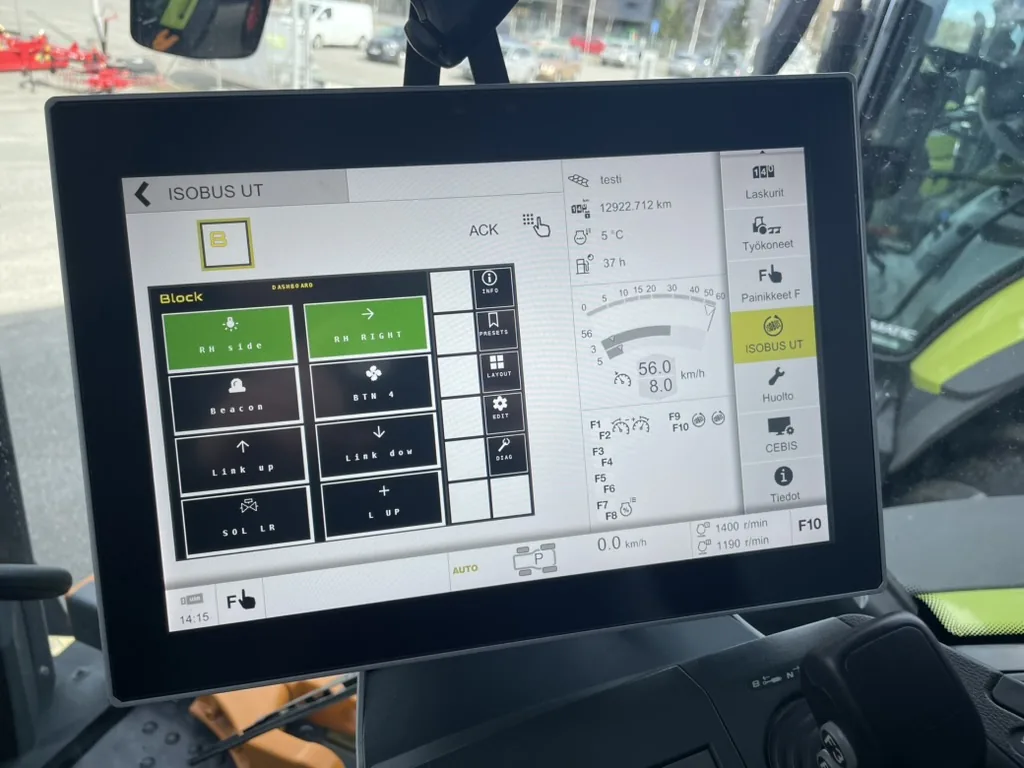
That joystick is doing one job: switching 12V or 24V to a set of solenoid coils. Nothing about that job is special. It is on/off control of electrical loads. An ISOBUS relay module does the same switching, and it does it from the tractor's existing screen and buttons instead of a dedicated lever in the cab. A front loader third function with a button on the loader lever is the same job on a smaller scale.
The key point: you are replacing the control side only. The solenoids, the valve block, the pump, the hoses, the cylinders: all of that stays exactly as the implement maker built it. The module switches the same coils the old joystick switched. For the wider picture of how this layer fits together, see the ISOBUS implement control guide.
Wiring the Solenoids and Pump to the Module
Each function on the old joystick maps to one relay channel. The module gives you eight: CH1 through CH8.
Count your functions first. A double-acting cylinder needs two channels: one solenoid for out, one for in. The pump needs one. So a machine with three cylinders and a pump uses seven channels: six for the cylinder directions, one for the pump. That leaves a channel spare. A fork stacker on a three-section valve counts up the same way: lift, tilt and fork spread are three double-acting sections, so six outputs and two channels left over.
| Implement function | Channel | Mode |
|---|---|---|
| Cylinder 1, out | CH1 | MOM |
| Cylinder 1, in | CH2 | MOM |
| Cylinder 2, out | CH3 | MOM |
| Cylinder 2, in | CH4 | MOM |
| Cylinder 3, out | CH5 | MOM |
| Cylinder 3, in | CH6 | MOM |
| Hydraulic pump | CH7 | TOG |
| Spare | CH8 | n/a |
Each relay channel has NO, COM, and NC terminals. You run the solenoid's electrical lead through the relay so that energising the channel completes the circuit to the coil, the same circuit the joystick used to close. Load power comes from a 12V or 24V source you supply; the relay just switches it. Each channel handles up to 10A, which covers ordinary hydraulic solenoid coils with room to spare.
Toggle or Momentary
The module runs each channel in one of two modes, set from the tractor screen:
- MOM (momentary): the relay is active only while you hold the button. This is what you want for cylinder direction valves. Hold to move the cylinder, release to stop. The old joystick worked the same way: lever held, oil flowing.
- TOG (toggle): press once on, press again off. This suits the pump. Press to start it, press again to stop, and leave it running while you work.
You choose the mode per function. The implement maker's logic doesn't change. You're just reproducing it on the tractor's controls.
Mapping Functions onto the Tractor's Armrest
This is where AUX-N comes in. AUX-N (Auxiliary Input Type N, part of ISO 11783) lets you bind an implement function to a physical button on the tractor: a joystick trigger, an armrest switch, a thumbwheel. You assign it once, and the tractor remembers it.
The module publishes a function per relay channel to the tractor's AUX-N menu. Open that menu, pick the cylinder-1-out function, and assign it to whichever armrest button you want. Do the same for each function. From then on, that button switches that solenoid. No menus, no screen-tapping mid-row.
Name the channels first, on the tractor screen, and the assignment menu gets a lot friendlier. Rename CH7 to PUMP, give CH1 and CH2 sensible labels, set an icon for each. Those names and icons show up in the AUX-N assignment list, so you're binding PUMP to a button, not a bare CH7. The ISOBUS AUX-N complete guide covers the assignment process and per-brand menu locations in detail.
This works on any ISOBUS tractor. A Fendt armrest is one example (you'd assign the functions to its joystick and armrest buttons), but the same module and the same AUX-N menu logic apply to John Deere, Valtra, Case IH, CLAAS, and the rest. The implement is no longer tied to one cab's joystick. Plug it into a different ISOBUS tractor and set the assignments up there once. See the ISOBUS compatibility guide for what your tractor needs to support this.
Two Ways to Drive It
Once it's wired and assigned, you have two control paths, and you can use both:
- AUX-N buttons: the armrest and joystick buttons you mapped the functions to. This is the day-to-day control, hands where they already are.
- The Virtual Terminal screen: the module also shows up as a tile grid on the tractor's screen. Each function is a button you can press there directly. Handy for setup, for testing, or for a function you use rarely and don't want to spend an armrest button on.
The screen and the buttons drive the same relays. Press PUMP on the screen or hit its armrest button: same result. For more on the screen side, see ISOBUS Virtual Terminal explained.
What Comes Out, What Stays
After the swap:
- Out of the cab: the implement's external joystick and its loom back to the machine. Gone. One less control bolted to the cab, one less harness to route.
- Stays on the implement: every solenoid valve, the valve block, the pump, every hose and cylinder. Untouched.
- New in between: the relay module, wired to the same solenoid coils, plugged into the tractor's ISOBUS connection.
The machine does exactly what it did before. It just runs from the tractor's own armrest now, with the spare channel left for whatever you add to the implement next: a work light, another valve, a beacon. For more on driving arbitrary loads this way, see control any device from your ISOBUS terminal.
Frequently Asked Questions
Can I remove an implement's own joystick and use the tractor's controls instead?
Yes. If the implement's joystick is switching electric solenoid valves and a pump, you can wire those same loads to an ISOBUS relay module and assign each function to a tractor armrest or joystick button over AUX-N. The external joystick comes out of the cab; the implement runs from the tractor's own controls and screen.
Does this change the implement's hydraulics?
No. The module switches the control side only: the same solenoid coils the joystick used to switch. The valve block, pump, hoses, and cylinders stay exactly as they were. Button press, relay switches, solenoid opens, oil moves: the chain is unchanged from where the joystick used to sit, and everything downstream is standard hydraulics.
How many relay channels does a multi-cylinder implement need?
One channel per independently switched solenoid, plus one for the pump. A double-acting cylinder uses two channels (out and in). Three double-acting cylinders plus a pump comes to seven channels, leaving one spare on an 8-channel module. Count the functions on the old joystick: that's your channel count.
Will this work with any tractor brand?
Any tractor with an ISOBUS Virtual Terminal and AUX-N support. The in-cab ISOBUS connector and the AUX-N assignment menu are standardized across brands: Fendt, John Deere, Valtra, Case IH, CLAAS, New Holland, Massey Ferguson and others. Move the implement to a different ISOBUS tractor and set up the button assignments there once; each tractor stores its own layout.
Should the cylinder valves be toggle or momentary?
Momentary (MOM) for cylinder direction valves: the relay is active only while you hold the button, so the cylinder moves while held and stops on release, just like the original joystick. Toggle (TOG) suits the pump: press once to start, press again to stop, and leave it running while you work. You set the mode per channel from the tractor screen.
Need an ISOBUS relay module for controlling solenoids, work lights, or hydraulic valves? ISOBUS Block provides 8 relay outputs controlled directly from your tractor's Virtual Terminal display.