In short: Planter fold takes two relay channels on ISOBUS Block: one for the fold solenoid, one for unfold. Set both to MOM, so the wing moves while you hold the button and stops when you let go. Fold from the Virtual Terminal, or from an armrest button assigned through AUX-N. The cab switch box comes out, and the hoses and cylinders stay where they are.
Most planters fold and unfold through a separate switch box bolted to the cab, a panel of toggles wired back to the fold solenoid valves. It works, but it is one more box in a cab that already has a screen and an armrest full of buttons. When it fails, you are chasing a wire to a switch that only does one job.
This post shows how to move planter fold control onto the tractor's ISOBUS screen. You fold and unfold from the Virtual Terminal (or from an armrest button you assign yourself), and the mechanical switch box comes out. The relay module switches the same fold solenoid valves the switch box used to switch. The hydraulics stay exactly as they are.
What "Planter Fold from the Screen" Actually Means
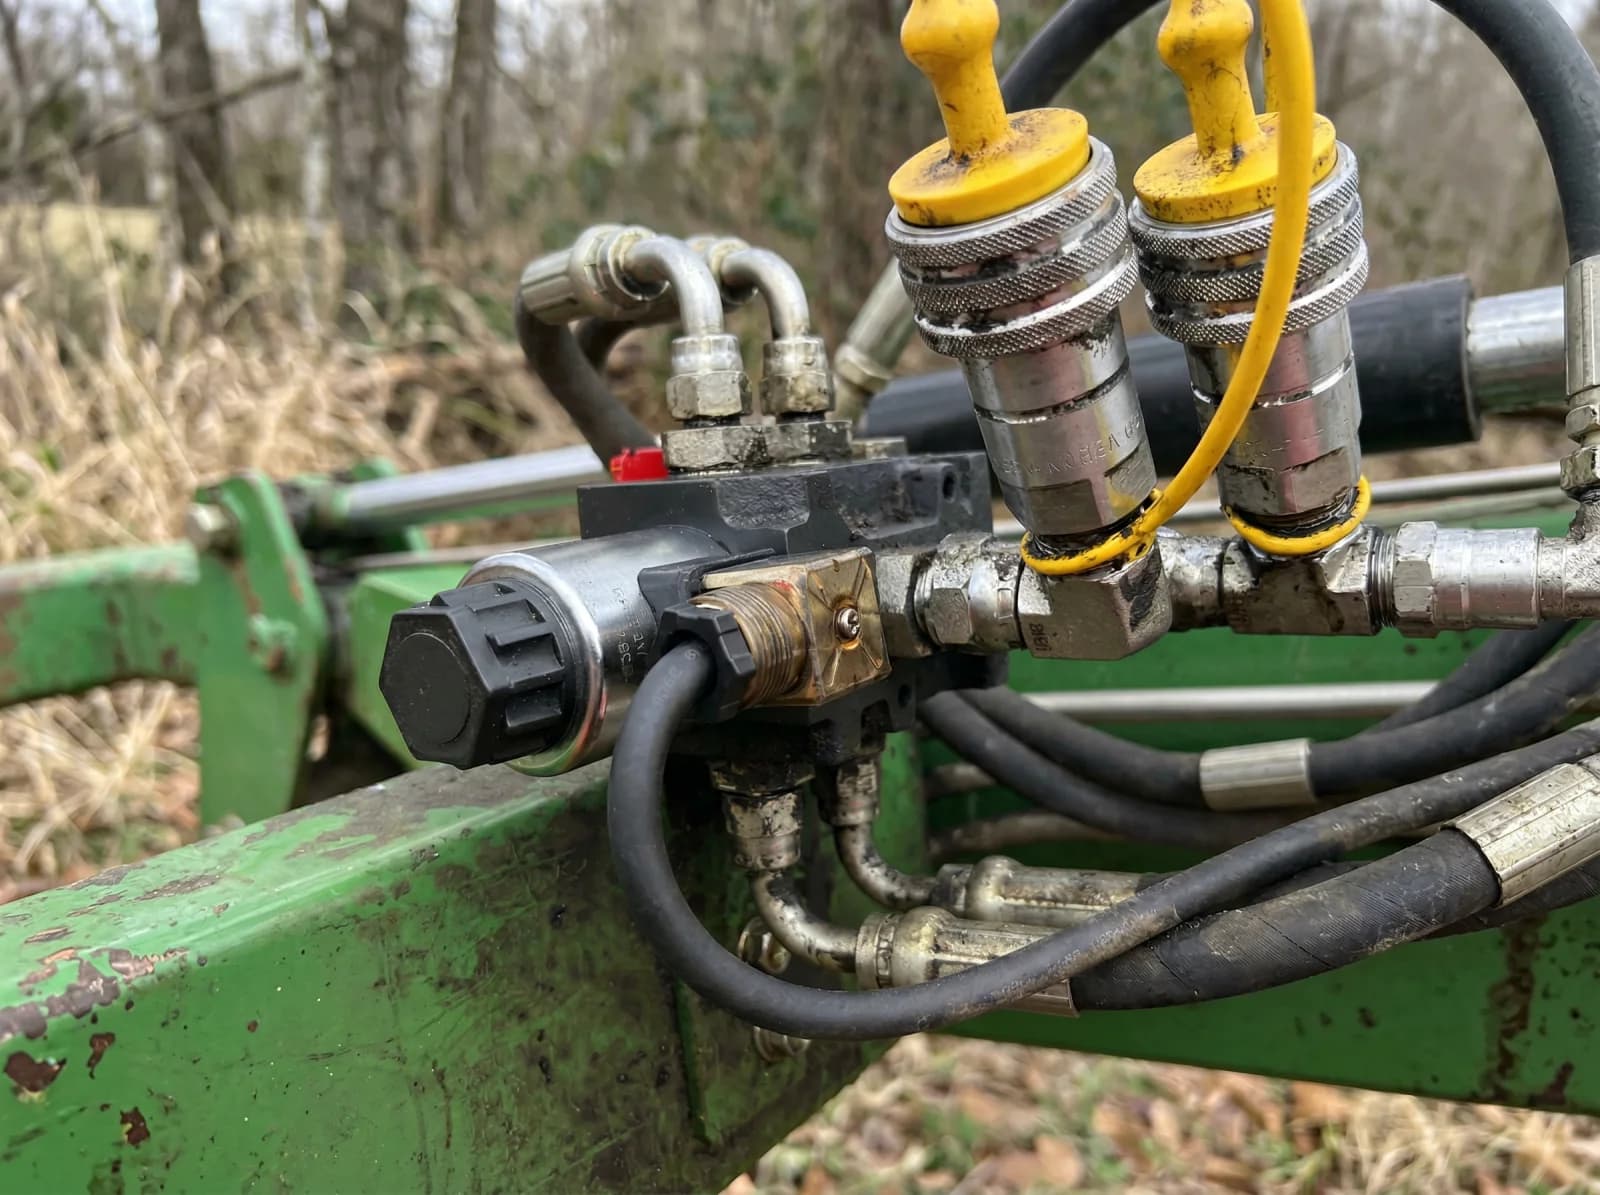
A planter's fold is hydraulic. Cylinders pull the wings up for transport and push them back down for fieldwork. Those cylinders are driven by solenoid valves, and the solenoids are switched electrically. The mechanical switch box is just that: a set of switches that energize the fold and unfold solenoids.
The control side is what moves to the screen. The chain is the same as before:
Button press → relay switches → fold solenoid energizes → hydraulic oil moves → wing folds.
ISOBUS Block sits in the relay position. It speaks ISOBUS, registers on the tractor's bus as an AUX function, and switches its eight relay outputs, CH1 through CH8, on command from the Virtual Terminal and the armrest. The fold and unfold solenoids wire to the relay terminals where the switch box leads used to go.
What does not change: the hydraulic hoses, the fold cylinders, the solenoid valves, the flow rates. The module replaces the control wiring, not the plumbing. If the planter folded on hydraulics before, it still does. You have swapped a panel of toggles for the screen and buttons already in the cab.
Fold and Unfold: Two Directions, Two Channels
Folding is directional. Up is one solenoid; down is another. So a basic fold setup uses two relay channels, one per direction.
On the Virtual Terminal, each button you set up runs in one of two modes:
| Mode | Behavior | Fits |
|---|---|---|
MOM (momentary) | Relay is active only while you hold the button | Fold motion you want to watch and stop at will |
TOG (toggle) | Press on, press off | Functions you set and leave, like a transport lock |
For a folding wing, MOM is the natural choice. You hold the button, the wing moves, you release and it stops. Let go and the solenoid de-energizes. The wing holds where it is. That hold-to-run behavior keeps the operator in control of a large moving structure, which is exactly what you want when 40 feet of toolbar is swinging over your head. Watch the fold; release the button if anything looks wrong.
You set the mode per button on the VT, so fold-up on CH1 and fold-down on CH2 can both run as momentary, while a separate transport-lock solenoid on CH3 runs as toggle. Each channel is independent. The same arithmetic runs a butterfly mower combination on four channels: each unit raises and lowers on its own pair of solenoids, so you can lift one out of the way and keep mowing with the other. For the full picture of how VT soft keys and channel modes fit together, see the ISOBUS implement control guide.
Naming the Buttons So They Read Like a Fold Panel
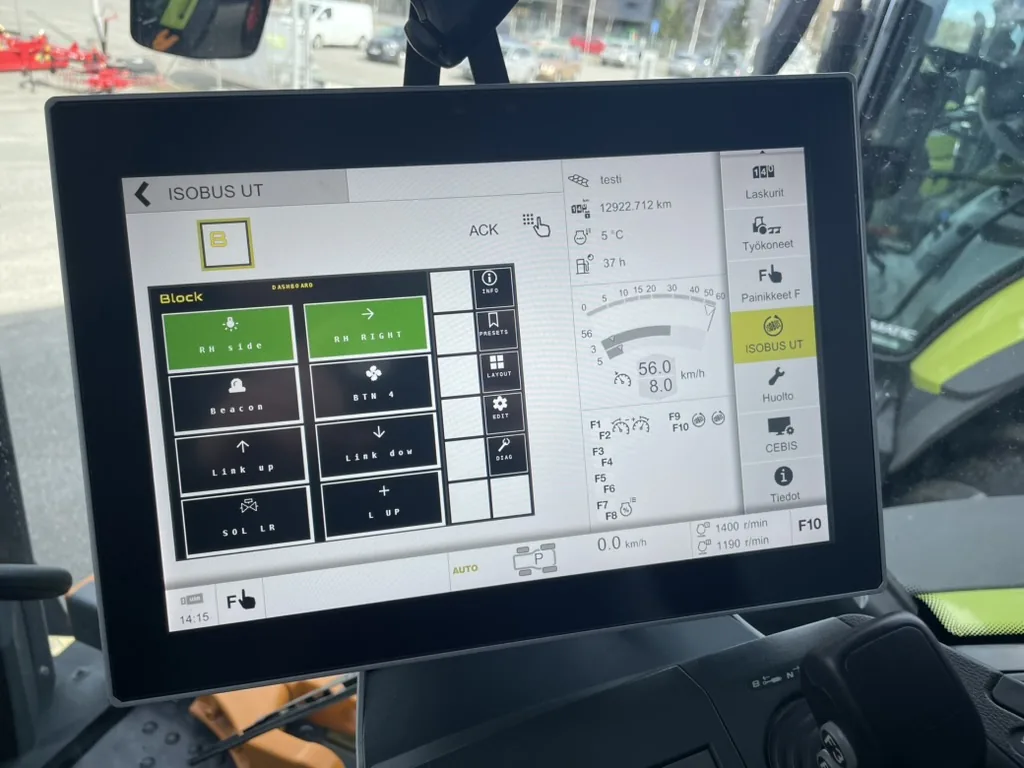
A grid of CH1–CH8 tiles tells you nothing at a glance. On the VT you rename each button and pick an icon (FOLD UP, FOLD DOWN, LOCK), and that name and icon show up in two places: the main screen tile grid, and the tractor's AUX-N assignment menu. When you later bind fold-up to a joystick trigger, the menu shows FOLD UP, not a generic channel number. The screen ends up reading like the panel you removed, only cleaner.
Building the Harness Around the Module
The module is the control core. The installer builds the wiring around it: the same wiring that used to run to the switch box, redirected to the relay terminals.
In broad strokes:
- The fold solenoids that the switch box drove get wired to the relay channels instead (NO/COM/NC per channel).
- Load power for the solenoids comes from the source you supply. The module switches the circuit, it does not power the loads.
- The module connects to the tractor over ISOBUS, which carries CAN and powers the module itself.
How the leads are routed, fused, and protected is the installer's call, sized to the planter and the solenoid loads. Each relay channel switches up to 10 A. We do not prescribe a specific run. Every planter is laid out differently, and the person building the harness knows the machine. The module gives you eight switched outputs and an ISOBUS interface; what you wire to them is yours.
If the module rides on the planter rather than in the cab, it goes in a sealed IP65 enclosure bolted to the frame, with a cable running to the tractor's rear external ISOBUS connector. You supply that box. The module's own housing is IP20, made for a dry cab or panel. For a cab-mounted module switching loads through cab wiring, the in-cab connection applies instead. Either way the control logic is identical: the relays switch, the solenoids follow. For what adding ISOBUS control to a planter costs and what the tractor needs, see the ISOBUS retrofit guide.
Control from the Screen and the Armrest
Once the harness is built and the module is on the bus, you have two ways to fold.
From the Virtual Terminal. The module's buttons appear on the tractor screen. Press FOLD UP, the relay closes, the solenoid energizes, the wing comes up. This is the direct replacement for the switch box: same function, now on the screen you already look at.
From the armrest with AUX-N. AUX-N lets you assign each fold function to a physical button (a joystick trigger, an armrest switch) so you fold without taking a hand off the controls or hunting through a screen menu. Open the tractor's AUX-N menu, pick the FOLD UP function, bind it to the button you want. The assignment lives in the tractor and persists across power cycles.
Most operators use both: the VT for setup, the armrest buttons for the daily fold and unfold on the headland. You decide which function goes on which button. The module publishes the functions; the tractor terminal handles the binding.
Why Move Fold to ISOBUS
A few practical reasons the screen beats the box:
- One less panel in the cab. No drilled-in switch box, no dedicated wiring loom to it.
- Same controls as everything else. Fold lives on the same armrest as your hydraulics, not on a separate panel.
- Relabel without rewiring. Change a button name, icon, or which channel it switches from the screen: no wire touched.
- Spare channels for more functions. Fold might use two or three channels. The other channels are free for markers, a work light, or a row-clutch solenoid.
The switch box did one job. The module does eight, and you assign them.
Frequently Asked Questions
Can I fold a planter from the ISOBUS screen?
Yes. A relay module on the tractor's ISOBUS bus switches the planter's fold and unfold solenoid valves, and you trigger them from the Virtual Terminal screen or an assigned armrest button. The module replaces the mechanical switch box on the control side. The hydraulic cylinders, hoses, and solenoid valves stay as they are. Only the switching moves to the screen.
Does an ISOBUS relay module replace the planter's hydraulics?
No. It replaces the control wiring, not the plumbing. The module switches the electrical solenoid coils that the old switch box switched. The solenoids still open the same valves, the same oil still drives the same cylinders. If the planter folded on hydraulics before, it folds on the same hydraulics after.
Should planter fold use momentary or toggle mode?
Momentary (MOM) is the usual choice for fold motion. The relay stays active only while you hold the button, so the wing moves while you hold and stops when you release. You watch the fold and stop it at any point. Toggle (TOG) suits set-and-leave functions like a transport lock, where you press once on and once off.
How many relay channels does planter fold need?
Two for a basic fold and unfold, one channel per direction. Add a channel if you have a separate transport-lock solenoid, and more for markers or row clutches. An 8-channel module covers fold plus several extra functions on one unit, with channels to spare.
Can I fold from a joystick button instead of the screen?
Yes, using AUX-N. You assign each fold function to a physical control (a joystick trigger or armrest switch) through the tractor's AUX-N menu. The button then folds the planter directly, no screen navigation. The assignment is stored in the tractor and stays put across power cycles.
Need an ISOBUS relay module for controlling solenoids, work lights, or hydraulic valves? ISOBUS Block provides 8 relay outputs controlled directly from your tractor's Virtual Terminal display.