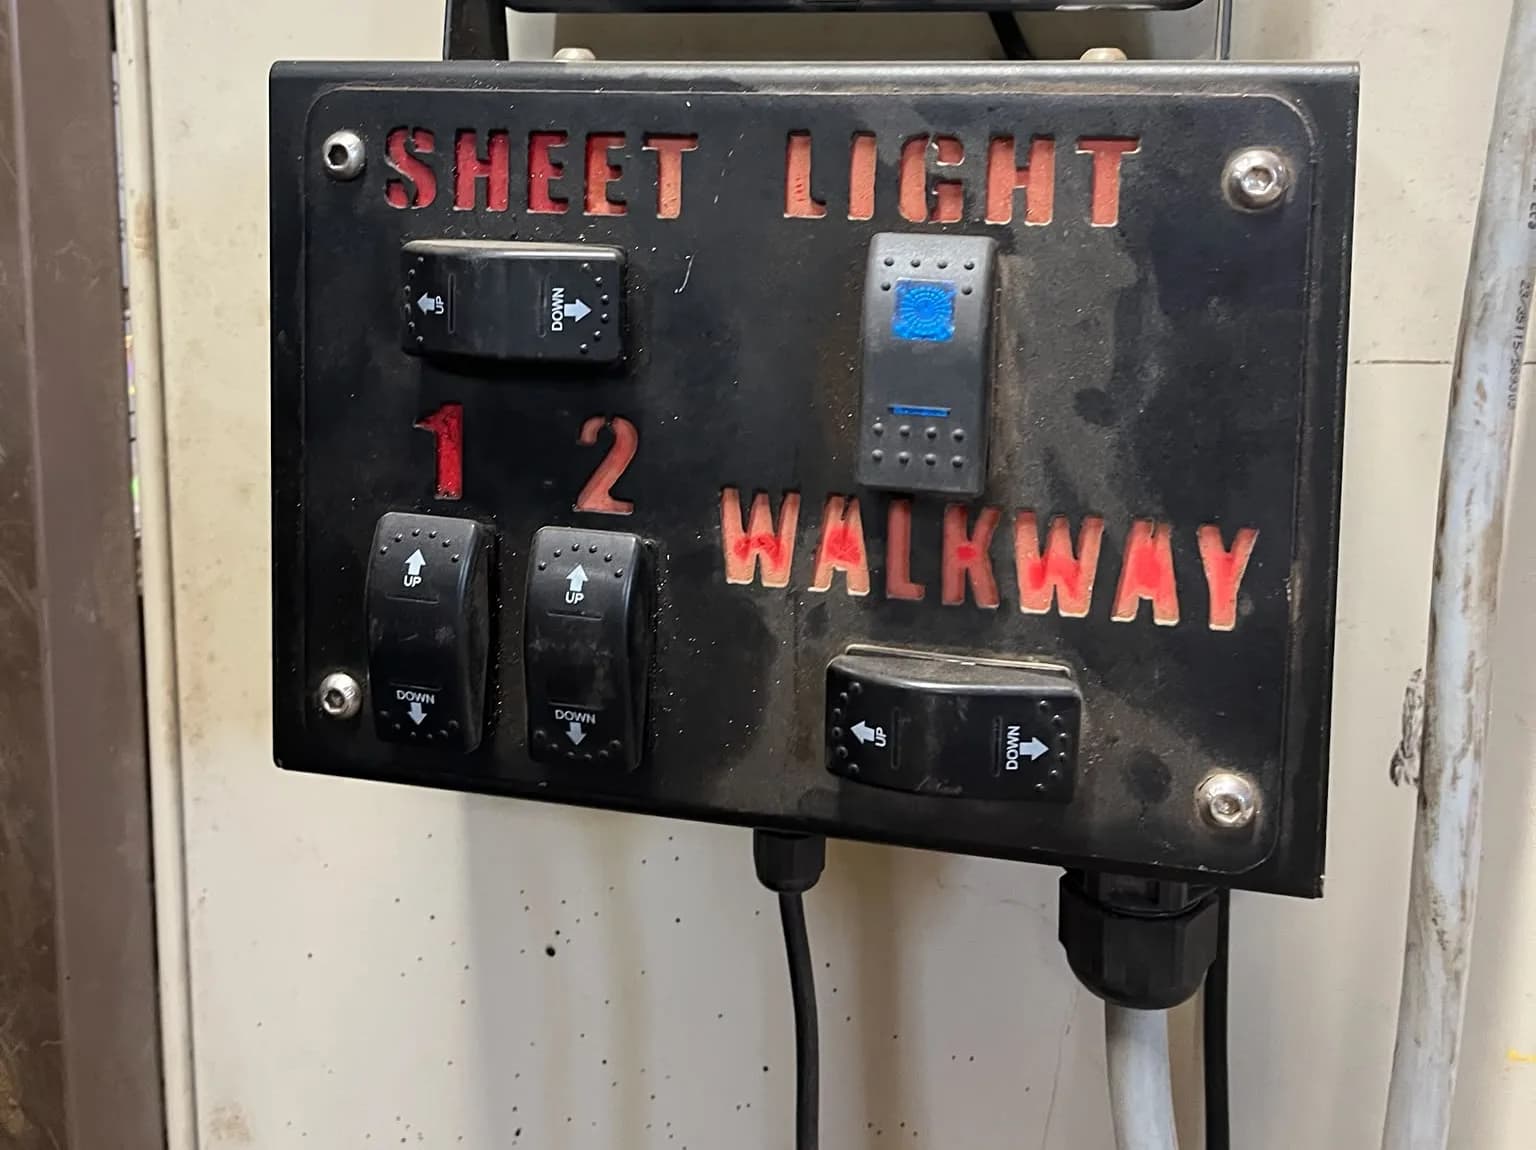
A non-ISOBUS implement brings its own controls: a switch panel in the cab, a multi-core cable through the back window, its own power feed. An ISOBUS implement brings one lead with a 9-pin plug on the end, and its controls come up on the screen the tractor already has. Everything else in the ISOBUS vs non-ISOBUS comparison follows from that.
Here is what changes in the cab and out on the machine, what "ISOBUS-ready" is worth on a spec sheet, and what your options are if your implement is the first kind.
The non-ISOBUS implement: its own box, its own cable
A non-ISOBUS implement has no way to talk to the tractor, so it brings everything with it.
- A control box, or a switch panel. Rocker switches or toggles on a plate, mounted somewhere the operator can reach: the A-pillar, the dash, the right-hand console.
- A cable to the implement. Multi-conductor, one core per function, usually out through a grommet in the back window.
- Its own power. A feed off the battery, an accessory terminal or the 3-pin power socket, with a fuse someone fitted at some point.
- A label per switch, if you are lucky. Engraved plate, embossed tape, or the operator's memory.
Press the switch, current flows down that core, the solenoid or lamp at the far end reacts. Nothing on the panel tells you whether the load actually switched. An illuminated switch means the switch is closed, not that the solenoid moved, because there is no path back.
It works, and it has worked for decades. It also ties the implement to whichever tractor got the panel and the loom. Swapping the control side across to AUX-N is a post of its own.
The ISOBUS implement: one plug, and it appears on your screen
An ISOBUS implement carries an ECU that speaks ISO 11783. On the tractor side, one connection does everything.
- One connector. The standard 9-pin ISO 11783-2 plug goes into the tractor's rear external ISOBUS connector. Same connector on Fendt, John Deere, Valtra, Case IH, CLAAS, Massey Ferguson and New Holland. Pin functions for both sockets are in the ISOBUS connector pinout guide.
- The screen you already have. The implement uploads its interface to the tractor's Virtual Terminal (VT). Buttons, status and settings render on the terminal in the cab. No second display bolted to the pillar.
- Physical buttons, assigned by you. With AUX-N you bind implement functions to the tractor's own joystick triggers and armrest switches, from the tractor's assignment menu. The AUX-N complete guide covers the procedure.
- Power through the same connection. The rear external ISOBUS connector carries ECU power on pin 4 for the implement's electronics and a separate battery supply on pin 3 for the loads, fused by the tractor at 60 A. No feed run back to the battery, no inline fuse holder cable-tied under the cab step.
Unplug it, hitch it to a different ISOBUS tractor, plug in again. The interface comes up on that tractor's screen. AUX-N assignments live in each tractor, so you bind the buttons once per tractor and that tractor remembers them. How the screen and the armrest layers fit together is in the ISOBUS implement control guide.
ISOBUS vs non-ISOBUS: the differences that matter
Side by side, on the things an operator notices.
| What changes | Non-ISOBUS implement | ISOBUS implement |
|---|---|---|
| Cab display | Its own control box or switch panel | The tractor's Virtual Terminal |
| Connector to the tractor | Proprietary plug, or loose wires into a terminal strip | Standard 9-pin ISO 11783-2 connector, same on every brand |
| Joystick control | None, or proprietary and fixed to that machine | AUX-N: any function to any compatible free button, assigned on the tractor |
| Power | Own wiring to the battery or an accessory terminal, own fuse | ECU power and a fused load supply through the ISOBUS connector |
| Documentation and mapping | Not available. Nothing reaches the tractor | Possible where the implement supports Task Controller (TC-BAS, TC-GEO, TC-SC) and the tractor runs one |
| Moving between tractors | Move the box and the loom, or build a second set | Unplug, plug in, assign buttons once on the new tractor |
| Feedback in the cab | Whatever the switch panel has, usually a lamp at best | The implement reports state back to the terminal |
| Cost | Cheap per function, expensive per extra tractor | Higher up front on the implement, and that part is not paid again for each tractor |
The last row is the one people argue about, and on a small mixed farm it decides whether ISOBUS is worth it at all. A switch panel is cheap once, for one tractor. Every machine after that is another panel and another loom, so the switching keeps costing money each time the fleet changes. The same maths decides a self-built box, which is what the build-or-buy comparison of ISOBUS Block and a DIY relay box works through.
What "ISOBUS-ready" is worth on a spec sheet
Spec sheets use ISOBUS-ready and ISOBUS-capable loosely, and the trap is the same either way: ISOBUS takes two sides.
- The tractor needs an ISOBUS terminal (a VT) and an ISOBUS connector. A socket on the back with nothing driving it is not ISOBUS control.
- The implement needs an ECU that speaks ISOBUS and uploads an interface to that terminal. A connector on the implement with no ECU behind it is not either.
One side alone does nothing. A tractor with a full ISOBUS armrest and a non-ISOBUS implement gives you exactly what the implement always gave you: its own box. An ISOBUS implement behind a tractor with no terminal gives you nothing at all. Neither term is defined in ISO 11783, the ISOBUS standard. They are marketing shorthand, and what they cover changes from one manufacturer's spec sheet to the next.
"Supports ISOBUS" is also not one capability but several. Check the terminal maker's compatibility list and the implement maker's spec sheet for which functionalities each model supports: UT for the terminal, AUX-N for button assignment, TC-BAS, TC-GEO and TC-SC for the Task Controller levels. Check the tractor and the implement against the same list. The ISOBUS compatibility guide covers how to read it and what to look for on your own machine.
Your options if the implement is not ISOBUS
Three paths. Which one is right depends on how many tractors the implement has to work behind.
1. Keep the control box
If the implement never leaves one tractor, and the switch panel is where the operator's hand already goes, there is nothing to fix. Replacing it buys you nothing you did not already have.
2. An OEM ISOBUS upgrade, where the manufacturer offers one
Some implement manufacturers sell an ISOBUS conversion for their own machines: an ECU, a loom, and an object pool built for that implement, the same parts any manufacturer needs to make an implement ISOBUS-ready. This is the option that gets the implement's real intelligence onto the terminal, Task Controller functions included if the ECU supports them.
Two catches. It exists only for models the manufacturer chose to support, which usually rules out anything old, niche, or home-built. And you buy the manufacturer's parts at the manufacturer's price. Ask the dealer whether a kit exists for your exact model and year before assuming it does.
3. Put the implement's loads on the tractor's screen
The middle path. The implement keeps its hydraulics and its wiring. What changes is what does the switching and where the switch lives.
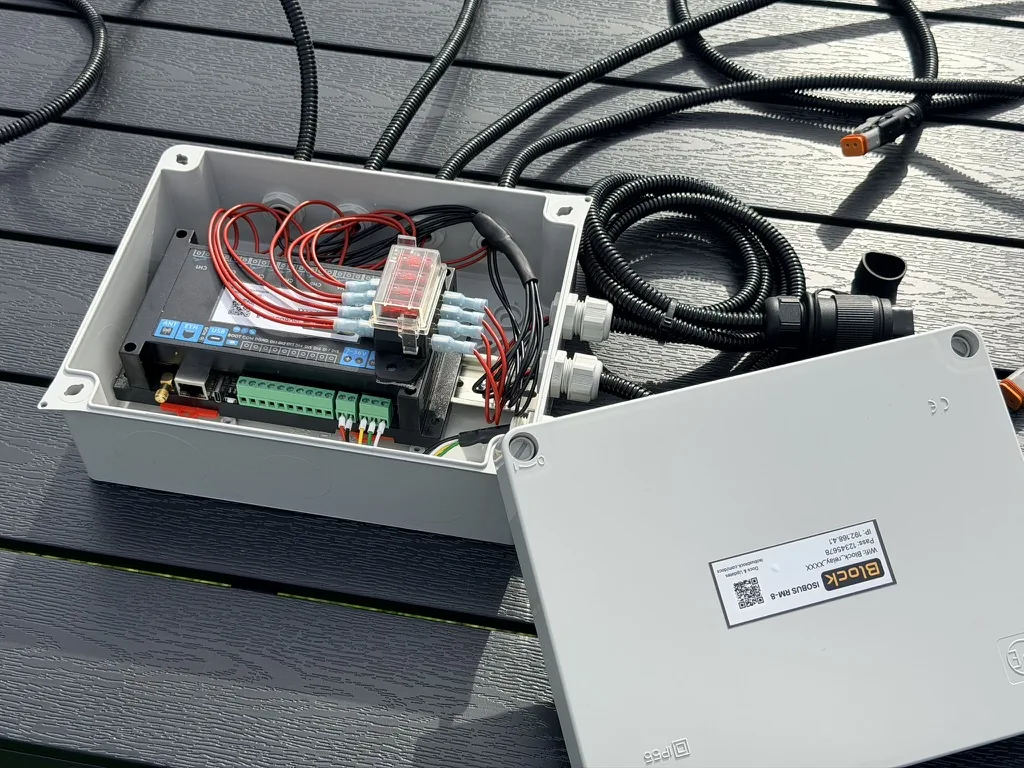
A relay module such as ISOBUS Block mounts on the implement. The loads that used to hang off toggle contacts land on relay channels instead: solenoid valves, work lights, beacons, electric motors, locking solenoids. One cable runs from the module to the tractor's rear external ISOBUS connector. The module registers on the bus and its outputs appear on the Virtual Terminal as buttons, with names you type in yourself and icons you pick from the module's set. Assign them to joystick or armrest buttons over AUX-N and the operator switches the implement without taking a hand off the joystick. An ISOBUS I/O gateway takes the same place on the implement when it also needs sensor readings or proportional outputs, at the price of programming its screens.
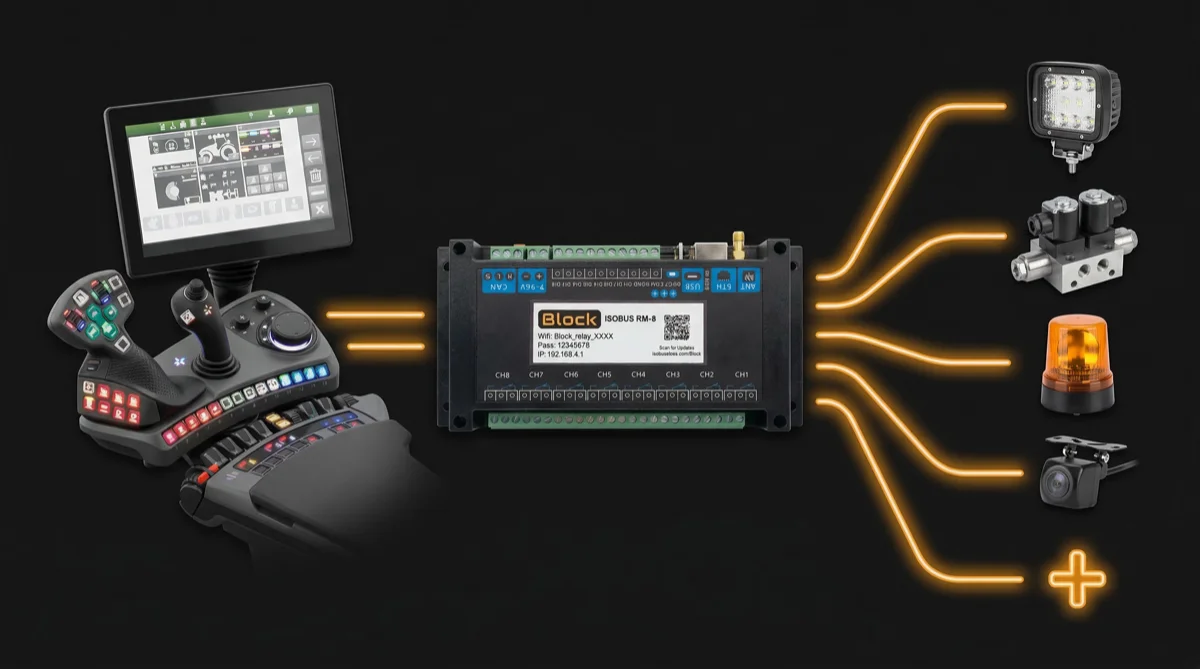
The 8-channel module gives you 8 relay channels, 10 A each, NO / COM / NC per channel. A 32-channel module covers machines with more functions. The ISOBUS connection powers the module at 7 to 36 V. Load power is separate: on the rear external connector it comes from the tractor's own 60 A fused feed on pin 3. The bare module is IP20, so an implement mount needs a weatherproof box you supply. What else the job needs, including the connector kit and the crimping you do yourself, is in the ISOBUS retrofit guide.
What a relay module does not convert
A relay module converts the switching, not the intelligence. After the swap, a non-ISOBUS implement is still a non-ISOBUS implement with an ISOBUS way of switching its loads.
- No Task Controller. No TC-BAS documentation, no TC-GEO variable rate, no TC-SC section control. Those need an implement ECU that runs the geometry and the prescription.
- No sensor data on the bus. The module does not broadcast the implement's sensors as ISOBUS messages. The 8-channel module's digital inputs drive its own outputs locally; nothing else on the bus sees them.
- No implement diagnostics. Proprietary fault codes from the implement's own electronics stay where they are. Block reports its own state, not the machine's.
- No hydraulics. The relay switches the solenoid coil, the coil opens the valve, the valve moves the oil. Hoses, valve blocks and cylinders are untouched.
- Not a safety device. The latched
STOPfunction holds every output off until you release it, but it is an operator interlock, not a safety-rated stop. Machine safety stays in mechanical end stops and rated safety hardware.
What you do get: the box off the pillar, the loom out of the back window, one standard plug to the tractor, named functions on the terminal, and physical buttons you assigned yourself. For a lot of machines that is the whole complaint solved.
Frequently Asked Questions
What are the differences between ISOBUS and non-ISOBUS systems?
An ISOBUS implement talks to the tractor over a standard CAN network (ISO 11783) through one 9-pin connector, and shows its controls on the tractor's own Virtual Terminal. A non-ISOBUS implement has no connection to the tractor, so it brings its own control box, its own multi-core cable, and its own power feed. The functions are the same; where the operator controls them from is not.
Can I use a non-ISOBUS implement on an ISOBUS tractor?
Yes. Nothing about an ISOBUS tractor prevents a non-ISOBUS implement from working. It just works the old way, off its own panel. The tractor's ISOBUS side simply has nothing to talk to.
How do I know if my implement is ISOBUS?
Look for a 9-pin ISOBUS connector on a lead from the implement and an ECU box somewhere on the frame. Then plug it into the tractor's rear external ISOBUS connector and check whether its interface comes up on the terminal. If the implement's controls only exist on a panel that came with it, it is not ISOBUS.
What does ISOBUS-ready mean when buying an implement?
It has no fixed definition: ISO 11783 does not define it, so it can mean a fitted ECU or nothing more than a loom left ready for one. Ask whether the implement ships with an ISOBUS ECU that uploads an interface to the terminal, or whether ISOBUS is an option you still have to buy. Ask which functionalities are supported: UT alone is very different from UT plus TC-SC.
Can I convert a non-ISOBUS implement to ISOBUS?
You can convert the control side. A relay module, mounted on the implement in a weatherproof box, puts its solenoids, lights and motors on the tractor's screen and AUX-N buttons through one standard connector, the same 9-pin ISO 11783-2 plug on every tractor brand. You cannot bolt on the implement's intelligence: Task Controller, section control and sensor data on the bus need an implement ECU built for that machine, which means an OEM kit if one exists for your model.
Need an ISOBUS relay module for controlling solenoids, work lights, or hydraulic valves? ISOBUS Block provides 8 relay outputs controlled directly from your tractor's Virtual Terminal display and AUX-N buttons.